…or “16 surprising synth DIY tools that will make your builds shine “*
* most clickable header due to blogging specialists
Some time ago I was looking for tools which can boost my synth DIY into the next level. I watched countless YouTube videos like “Top 10 best tools for DIY” and 99% of them was just showing most basic like hammer and combination pliers. Other, more synth related channels/blogs were like “get soldering iron and cutting pliers”. As I feel my modest workshop is more SDIY oriented than others, here are my top, most useful and not obvious tools for synth DIY. Notice, you may find some of them very specific and not applicable in your builds (to be honest, I am almost sure there is not such thing as “tool not applicable in synth DIY”). I also don’t want you to force buying something – read some tests on the web before purchase. So, let’s go to the list in random order.
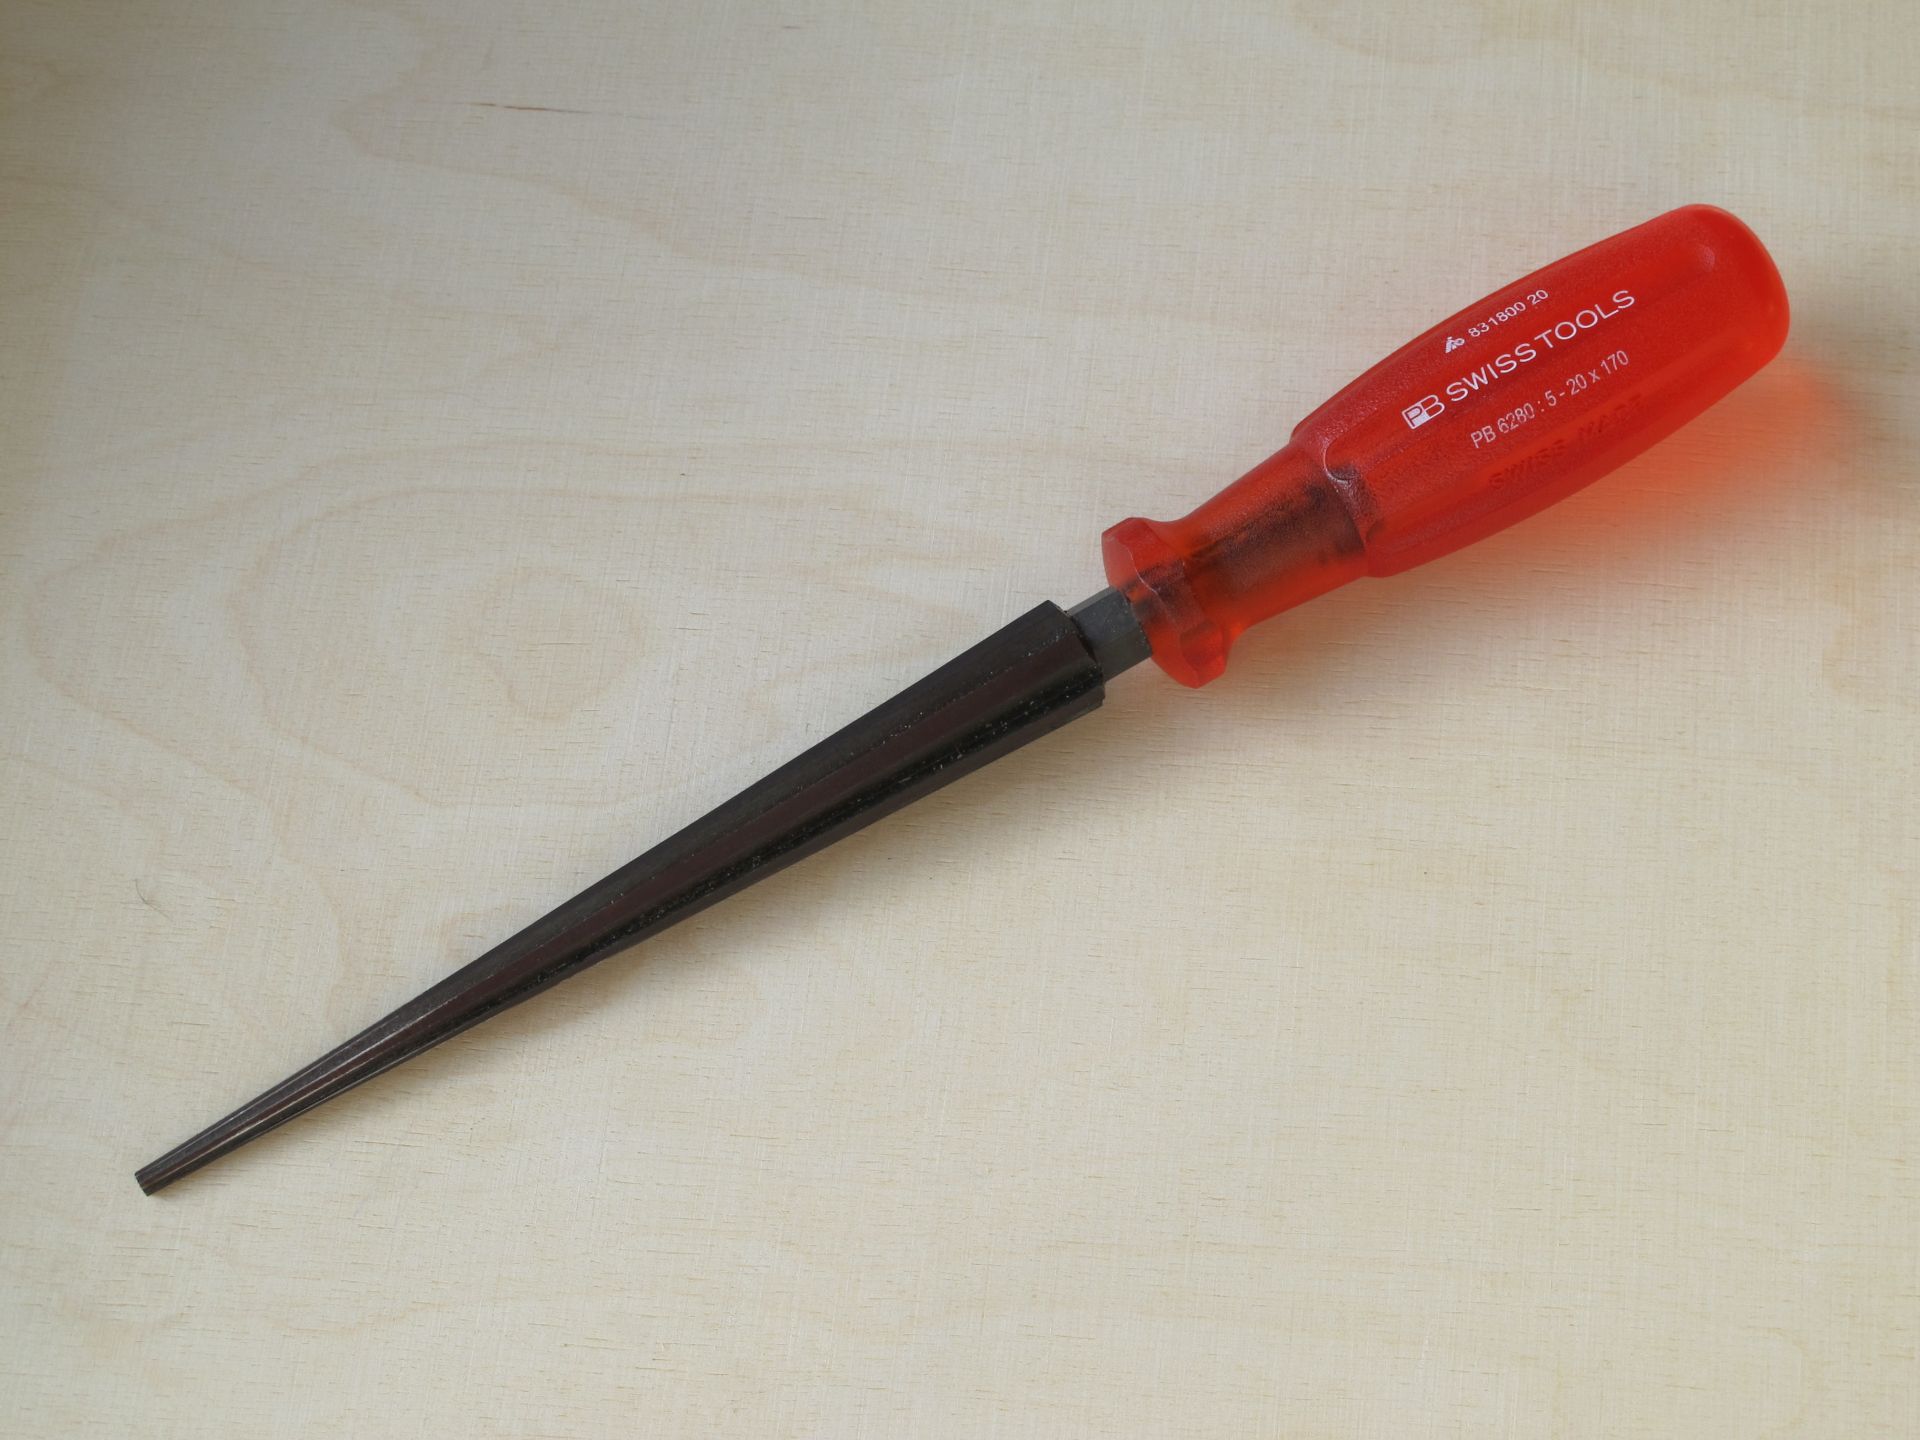
Conical Hand Reamer
One of the few options if you want to mount a MIDI socket into an aluminum enclosure or make any big hole. Lets you drill out a hole from 5 up to 20 mm! The alternative would be step drill (using which is quite painful without bench press machine) or file. This specific tool made by Swiss Tools is around 50 euro.
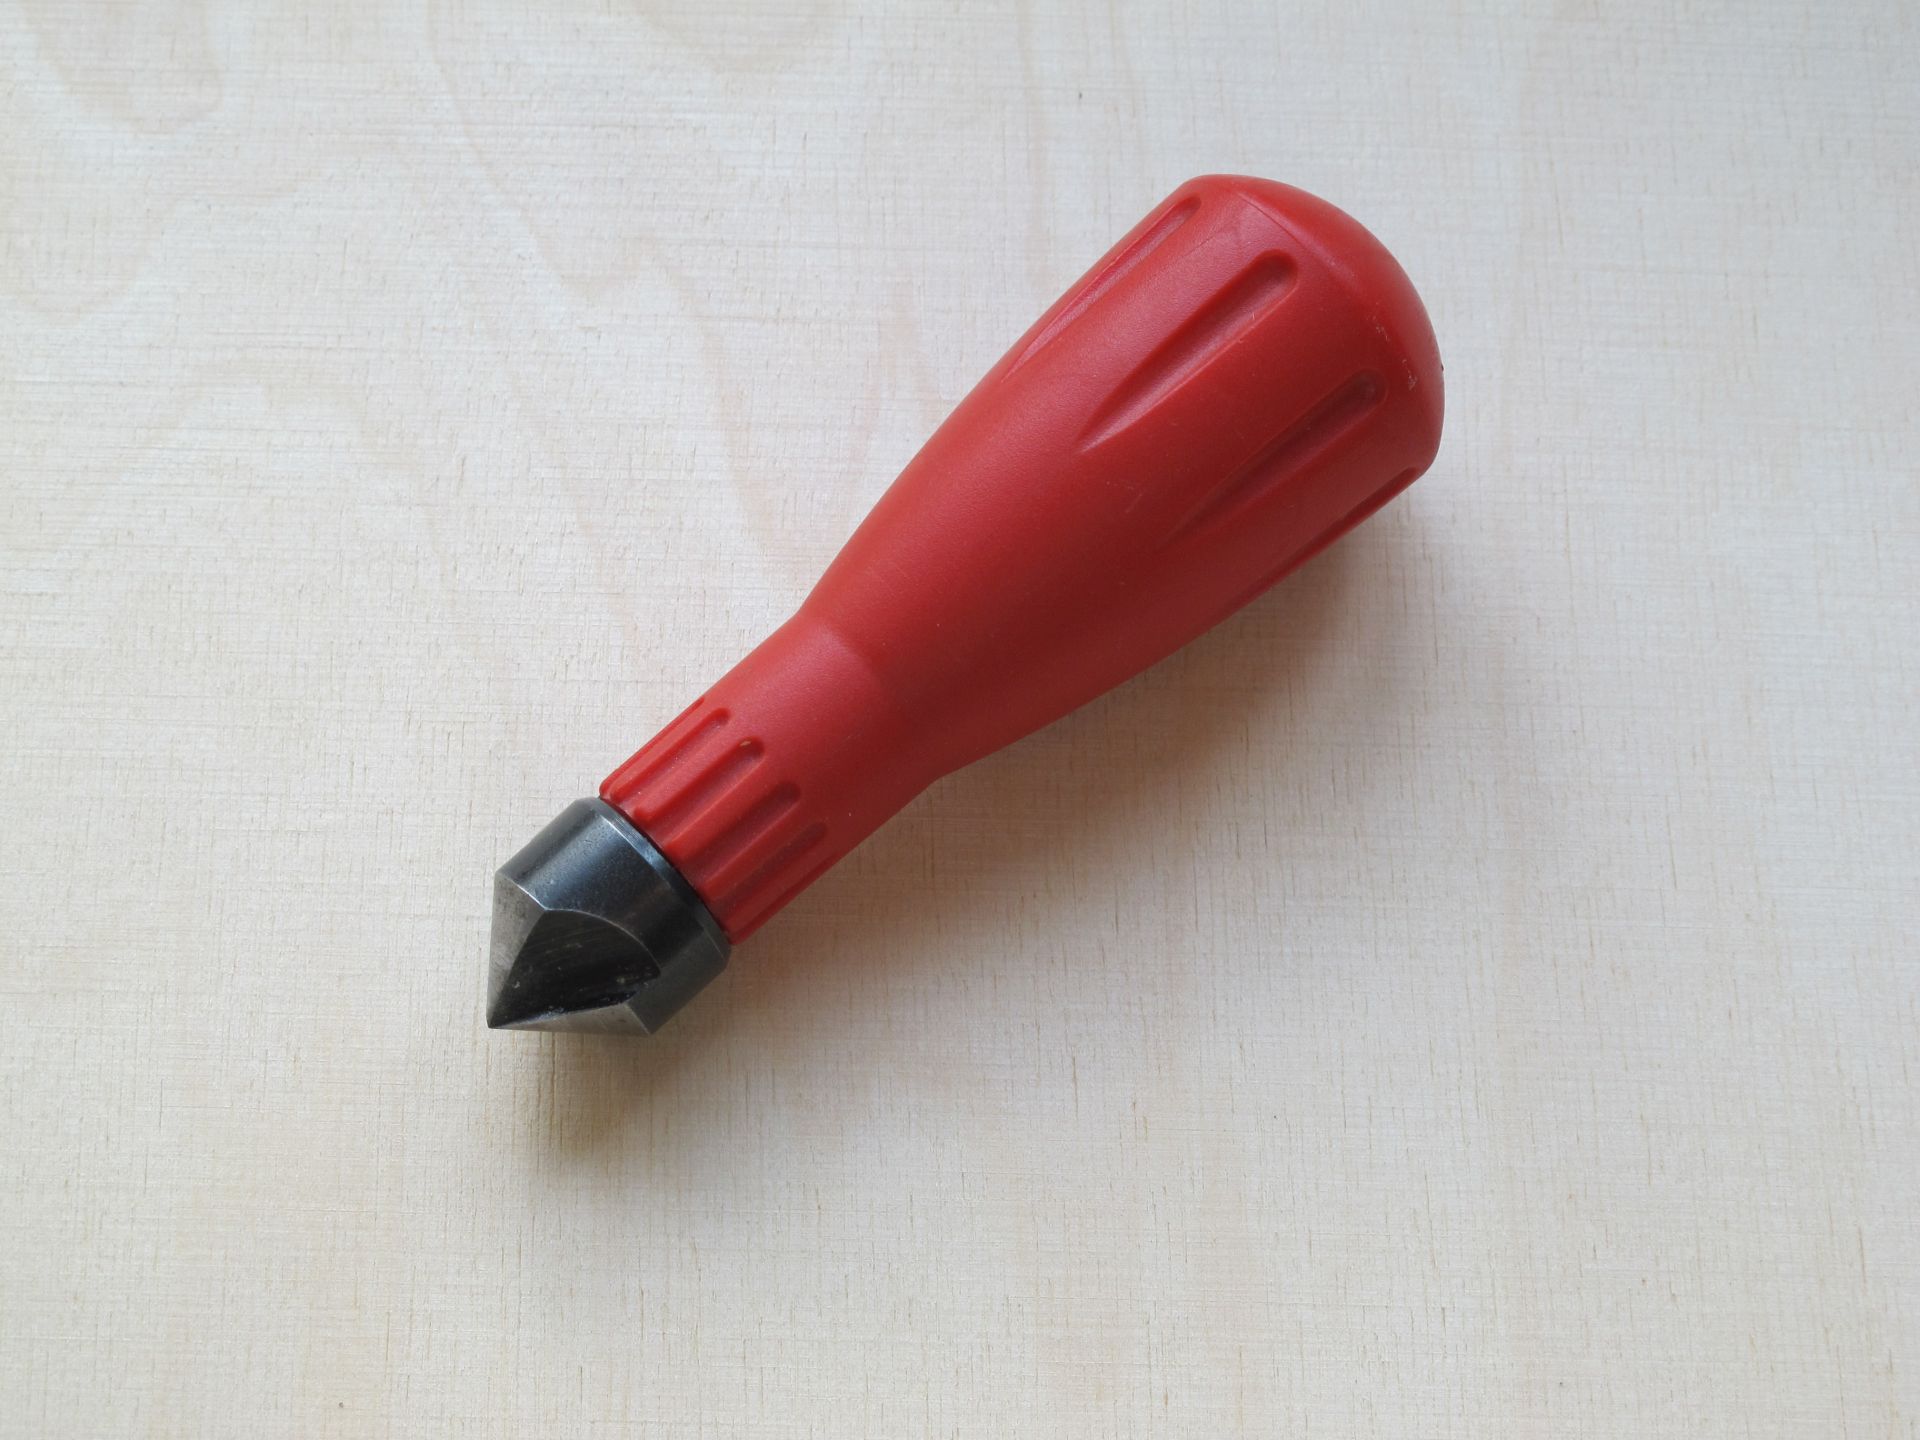
Hand countersink
Great tool for smoothing hole edges. I use it after every drilling to ensure sharp edges will not damage fragile water decals or my fingers. Wolfcraft made them for around 10 euro.
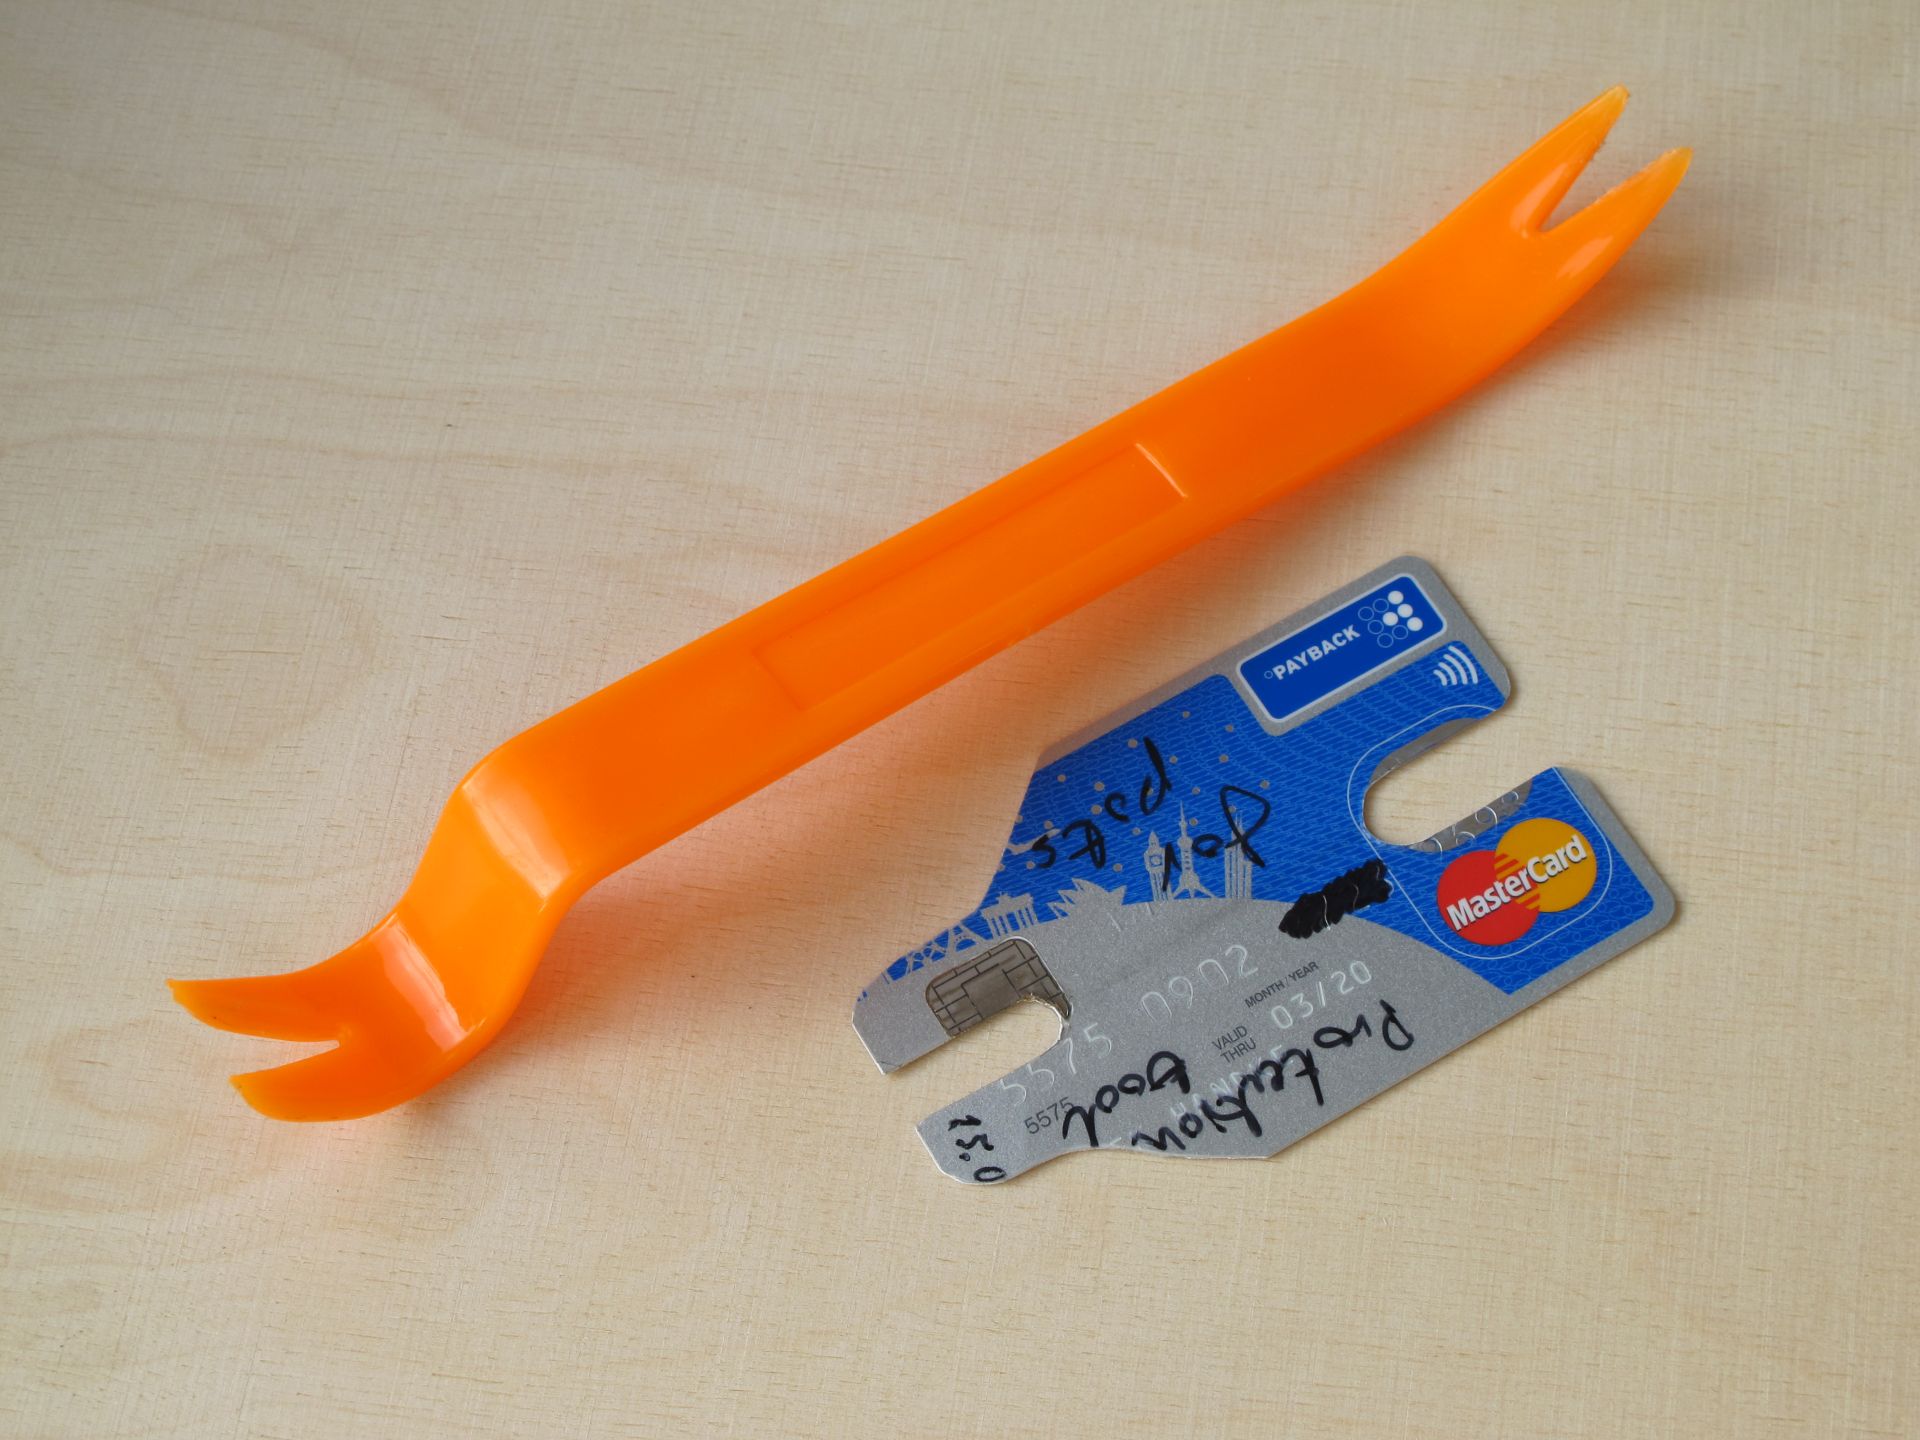
Plastic crowbar & credit card
Most expensive tool in my set, worth over 60 euro (I forgot to cancel the card before I cut it and paid for it for over 2 years). Irreplaceable for snap-in potentiometer knobs removal. Just fit the card under the pot not to scratch the surface and pry the knob from the bottom. Much better than using bare hands or pliers.
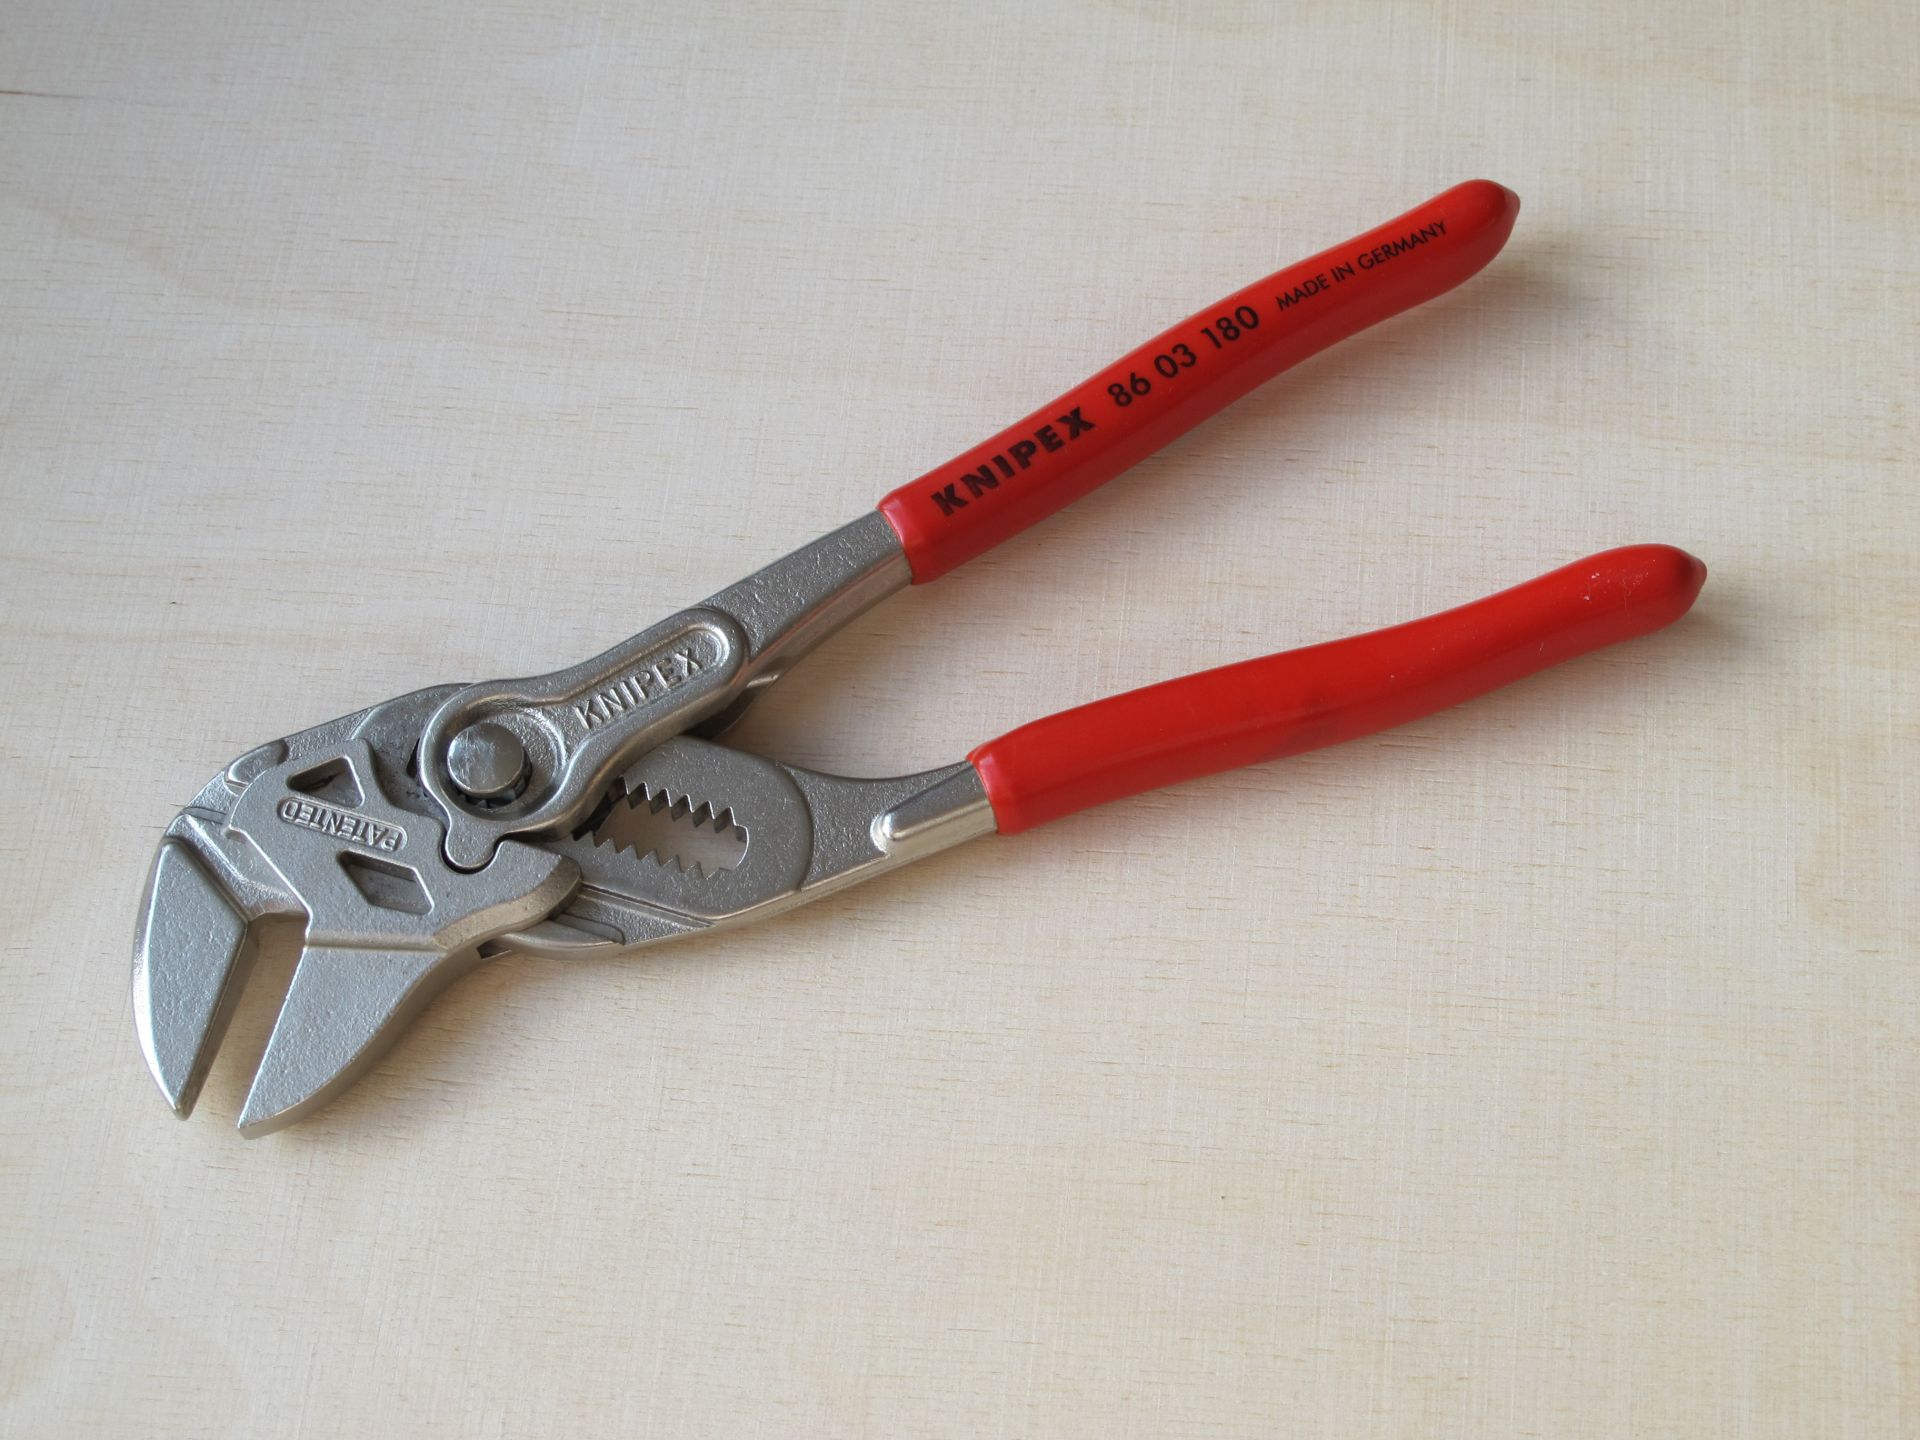
Adjustable pliers
Their greatest advantage is smooth jaws moving in parallel. You can apply a lot of force and don’t scratch a surface. Very useful for bending, crushing, breaking PCBs, tightening the nuts, you name it. Come in various sizes from 125 mm. Quite pricey, the one I own (180 mm length) is around 45 euro.
L type socket wrench size 10
Does one job, but makes it flawlessly. Helps to tighten or unscrew the standard potentiometer nuts. A hole passes through the entire shorter arm of the wrench, so the potentiometer shaft can be any length. A big upgrade over simple pliers for only 4 euro.

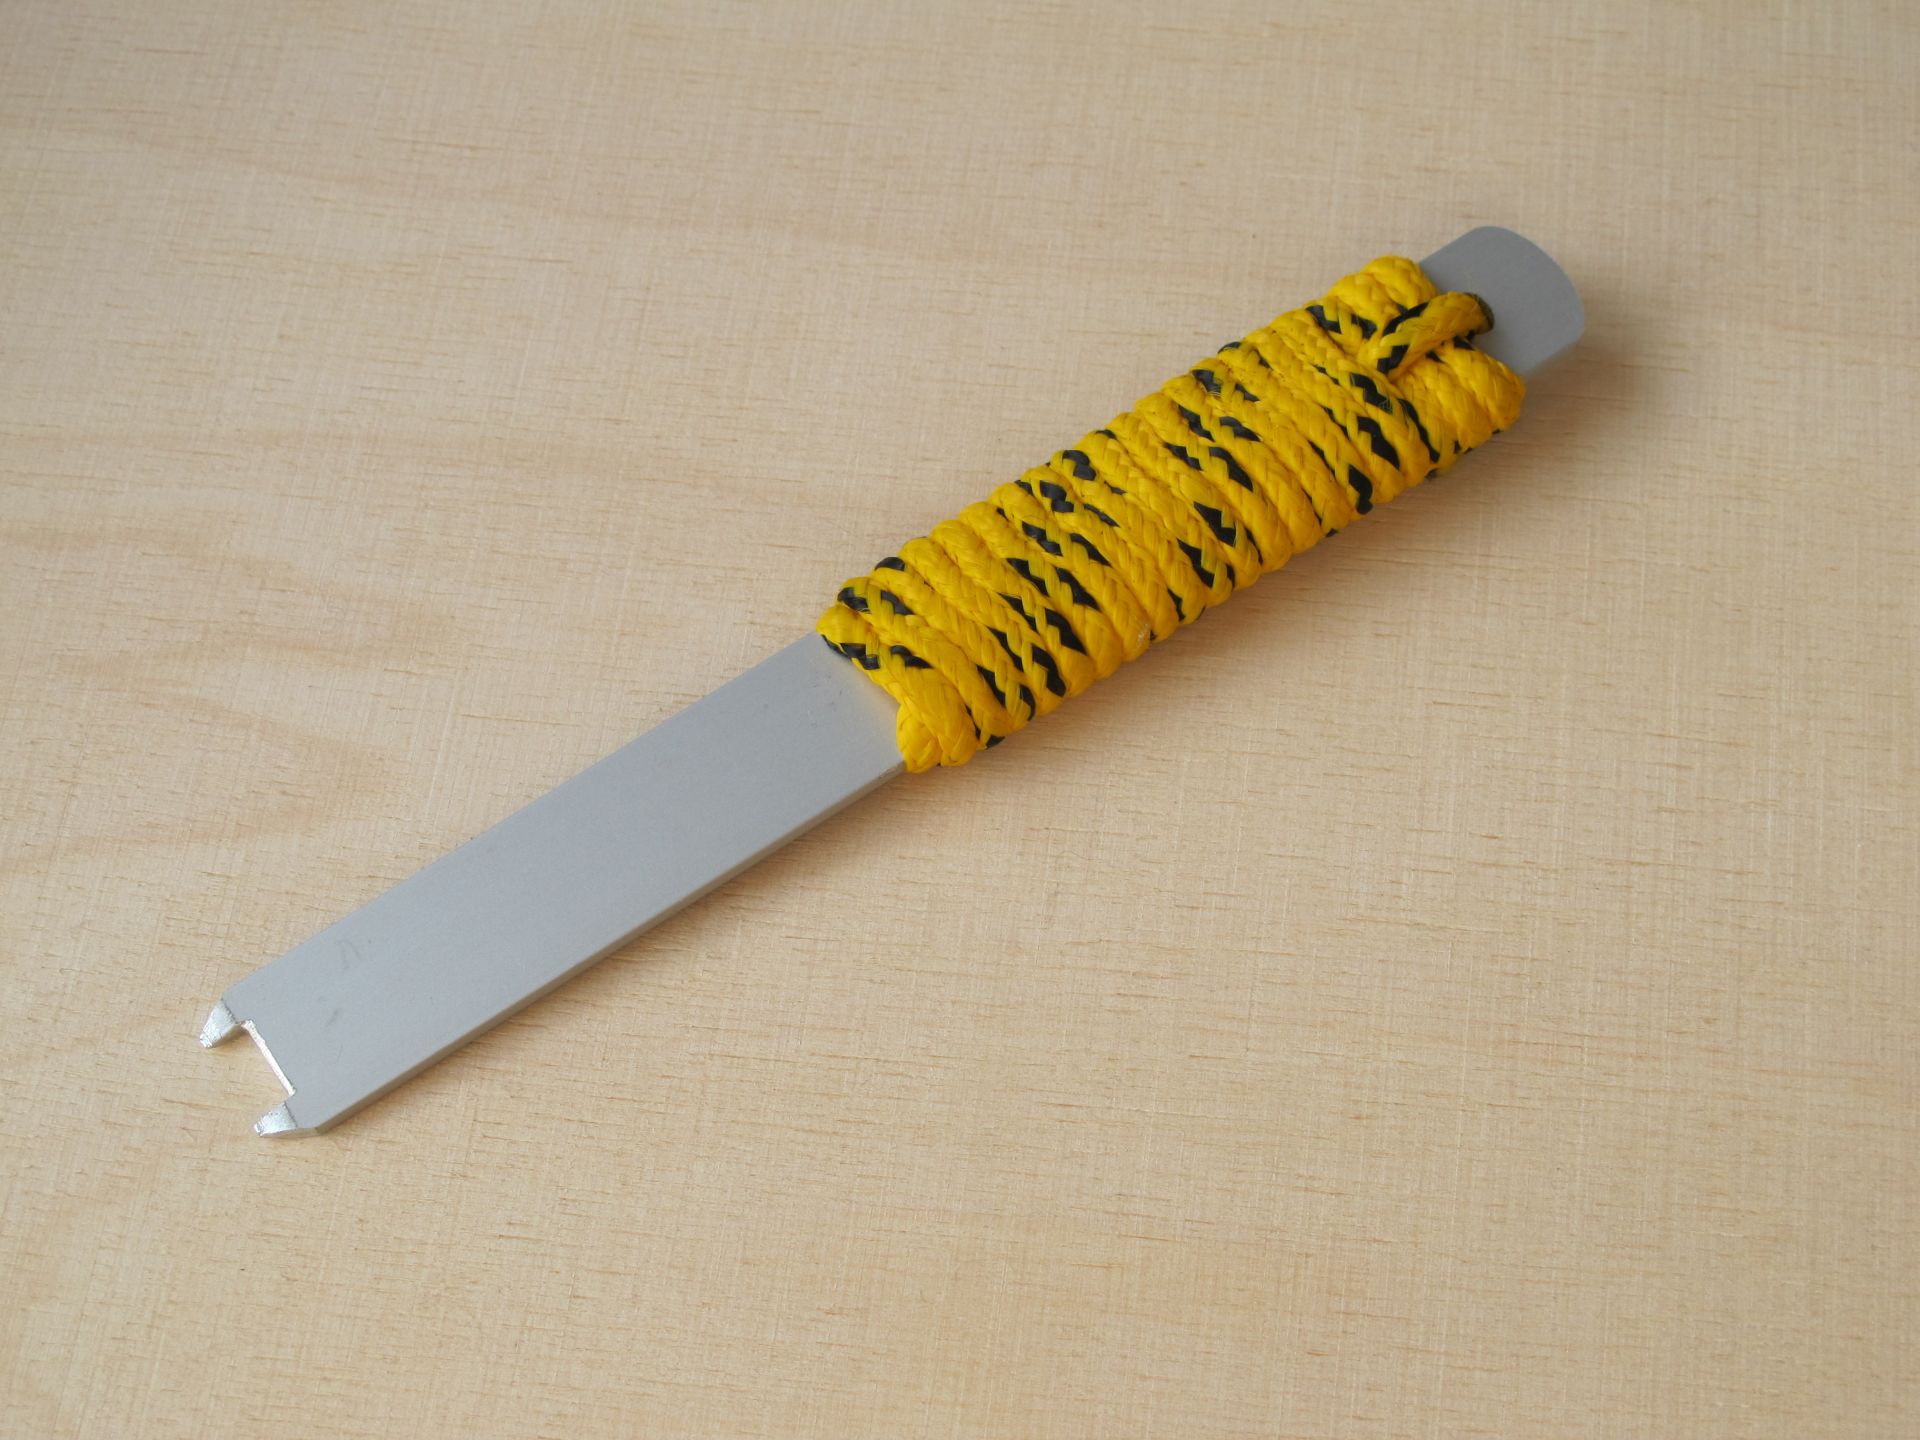
DIY Jack tool
It is funny, because I’m Jack. And the tool is meant to screw jack socket mounting nuts (JG3530 / QingPu PJ3410 / Lih Sheng LJE0352 style). Scissors work well, but this simple wrench is better – made with a piece of aluminum flat bar using only file and some twine to give it a survival EDC look. Costs as much as your time. If you like it, check more info here.
Hand seamer
Great for working with aluminum sheet. Made for sheet bending, but also useful for flattening or breaking FR4 laminate/plexiglass. I used it in my every eurorack module for PCB support. You should be able to get one for around 25 euro.

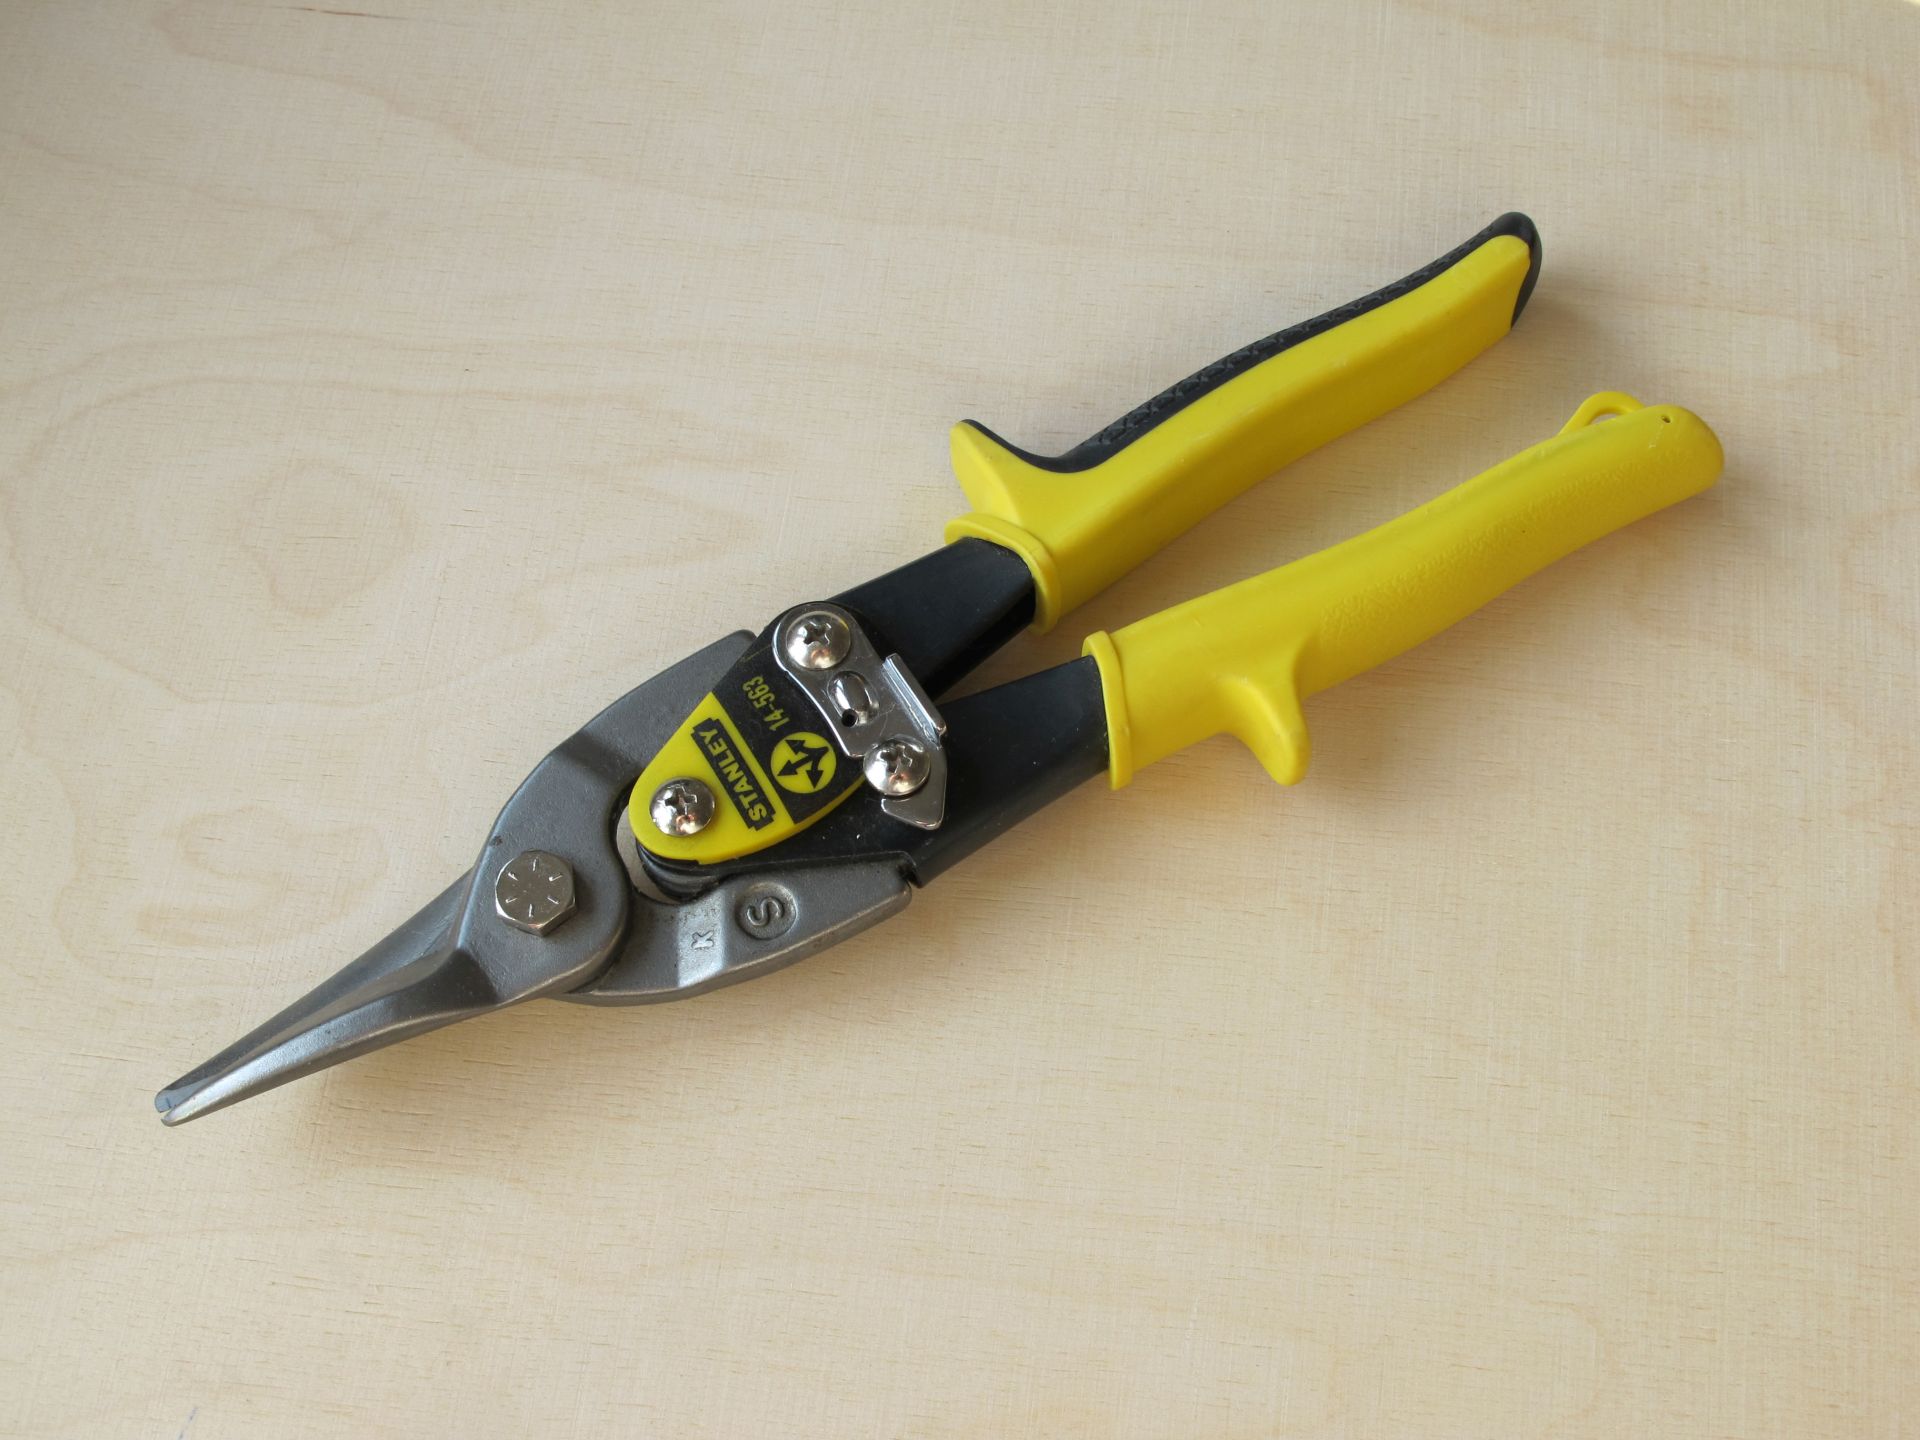
Straight aviation tin snips
Those can handle aluminum sheet, but also PCB laminate or any other flat material (like rubber sheet). Does an amazing job at universal PCB board cutting – just cut straight through holes, then gently smooth the edge with shorter cuts. Can do any job reinforced scissors do, but better. Costs around 10 euro.
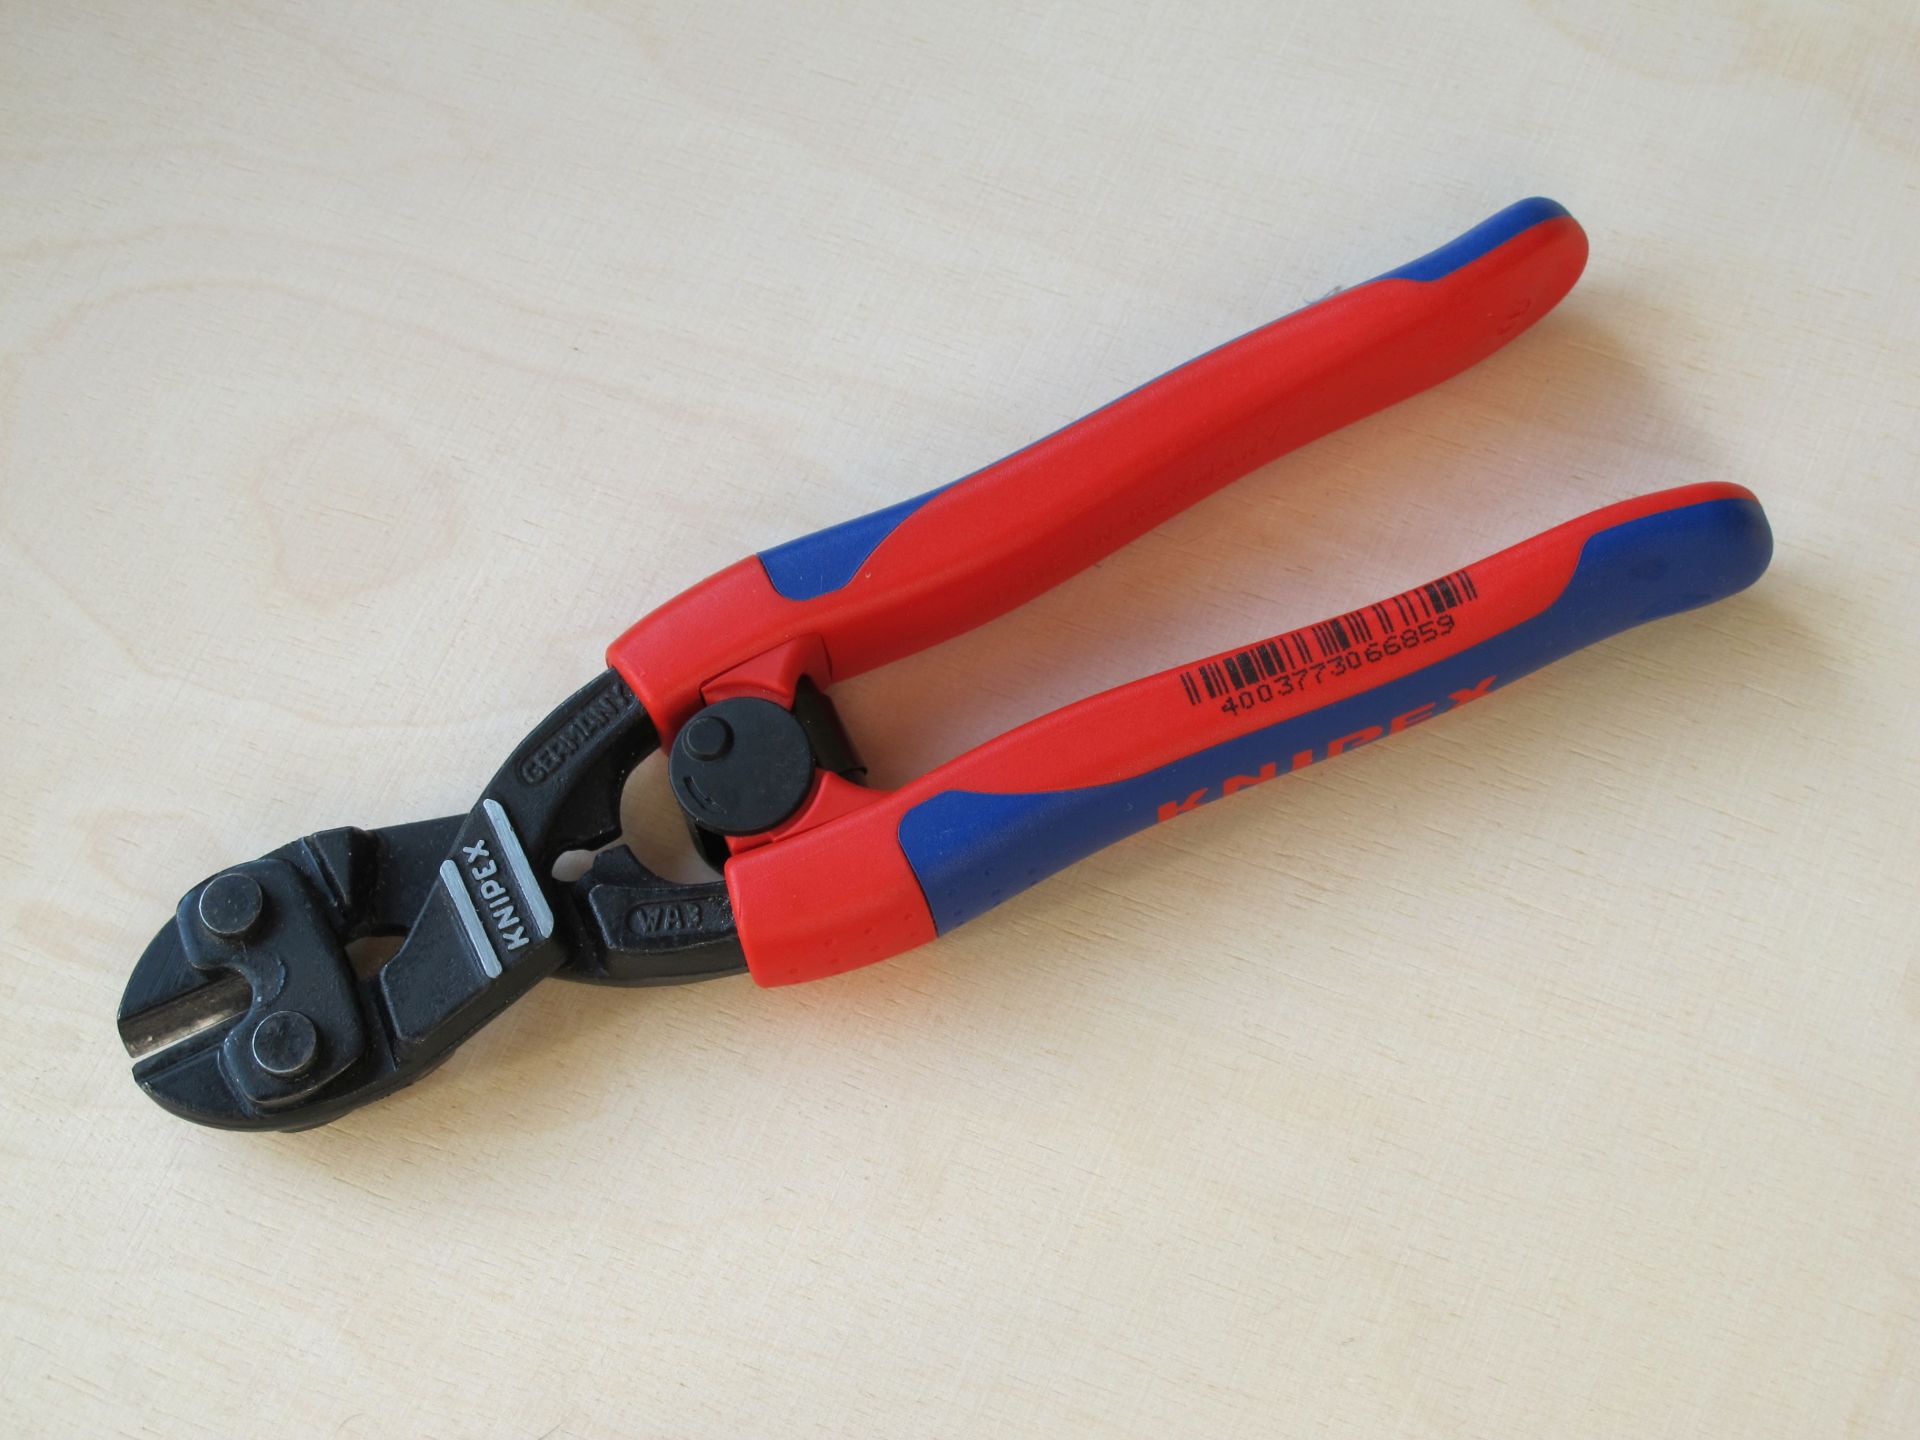
Bolt cutter
I bought them, because my wife often took my electronic cutting pliers to cut just everything, from this strange green wire for plants to piano wire (with a predictable result). So I bought her a bolt cutter, so she can have her own cutter she can’t damage. It turned out it is a nice tool for potentiometer shaft shortening. A bit of file job is needed to soften the edges, but for me still better than a saw. Costs around 40 euro.
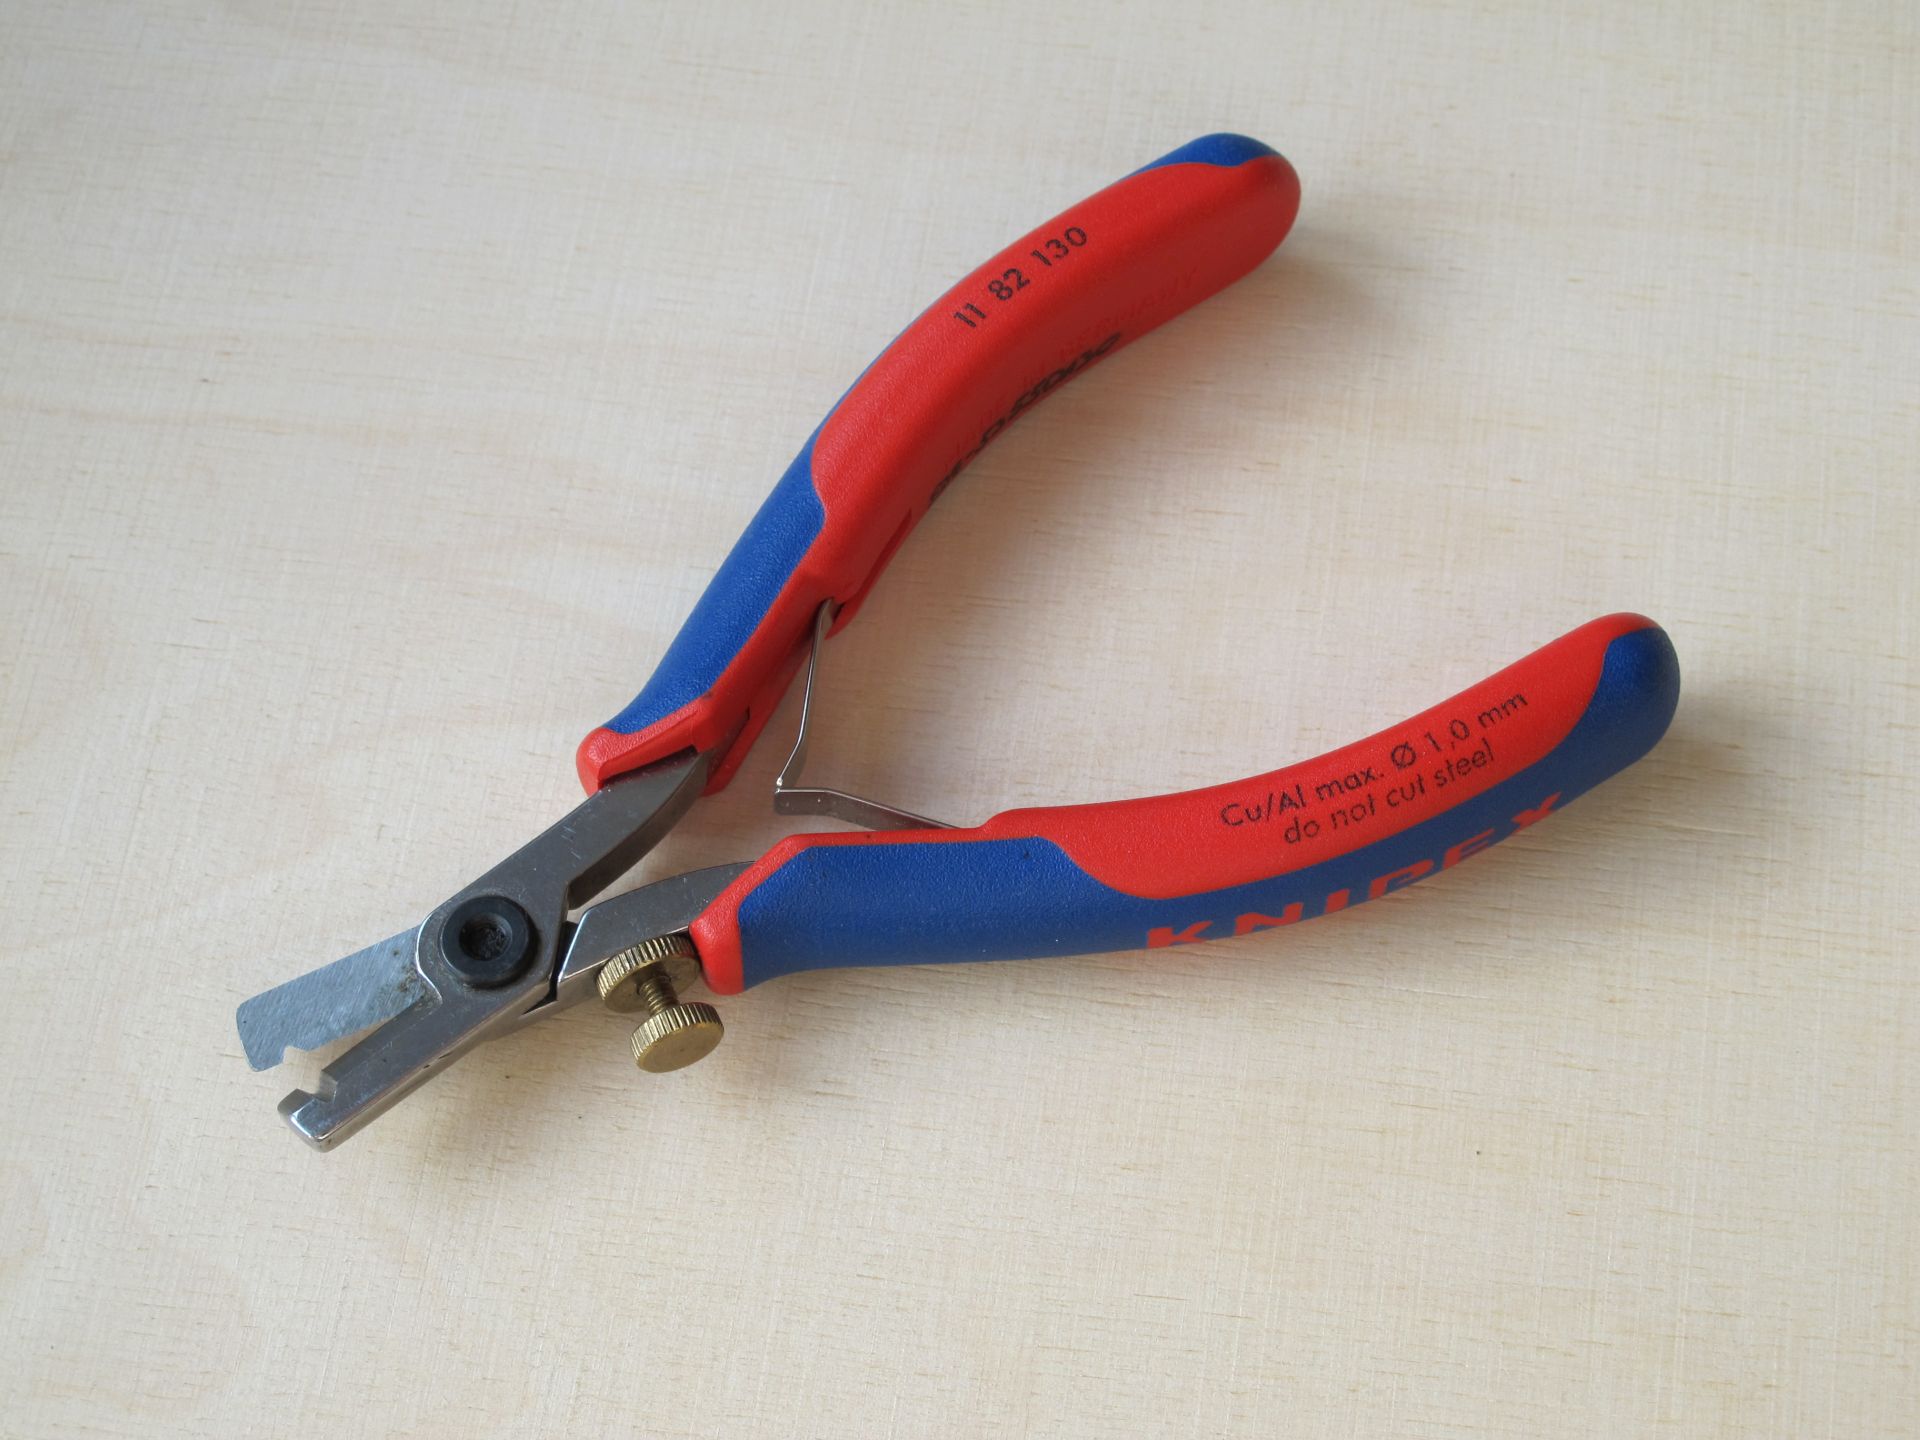
Hand wire stripper
I own 4 wire strippers – 2 automatic and 2 manually operated. This specific one is the most useful – it is small, so it can reach tight places (yeah, eurorack panel wiring!) and strips even 30AWG Kynar wire without any problem. Not the fastest, not the cheapest tool (~30 euro) but I just can live without it.
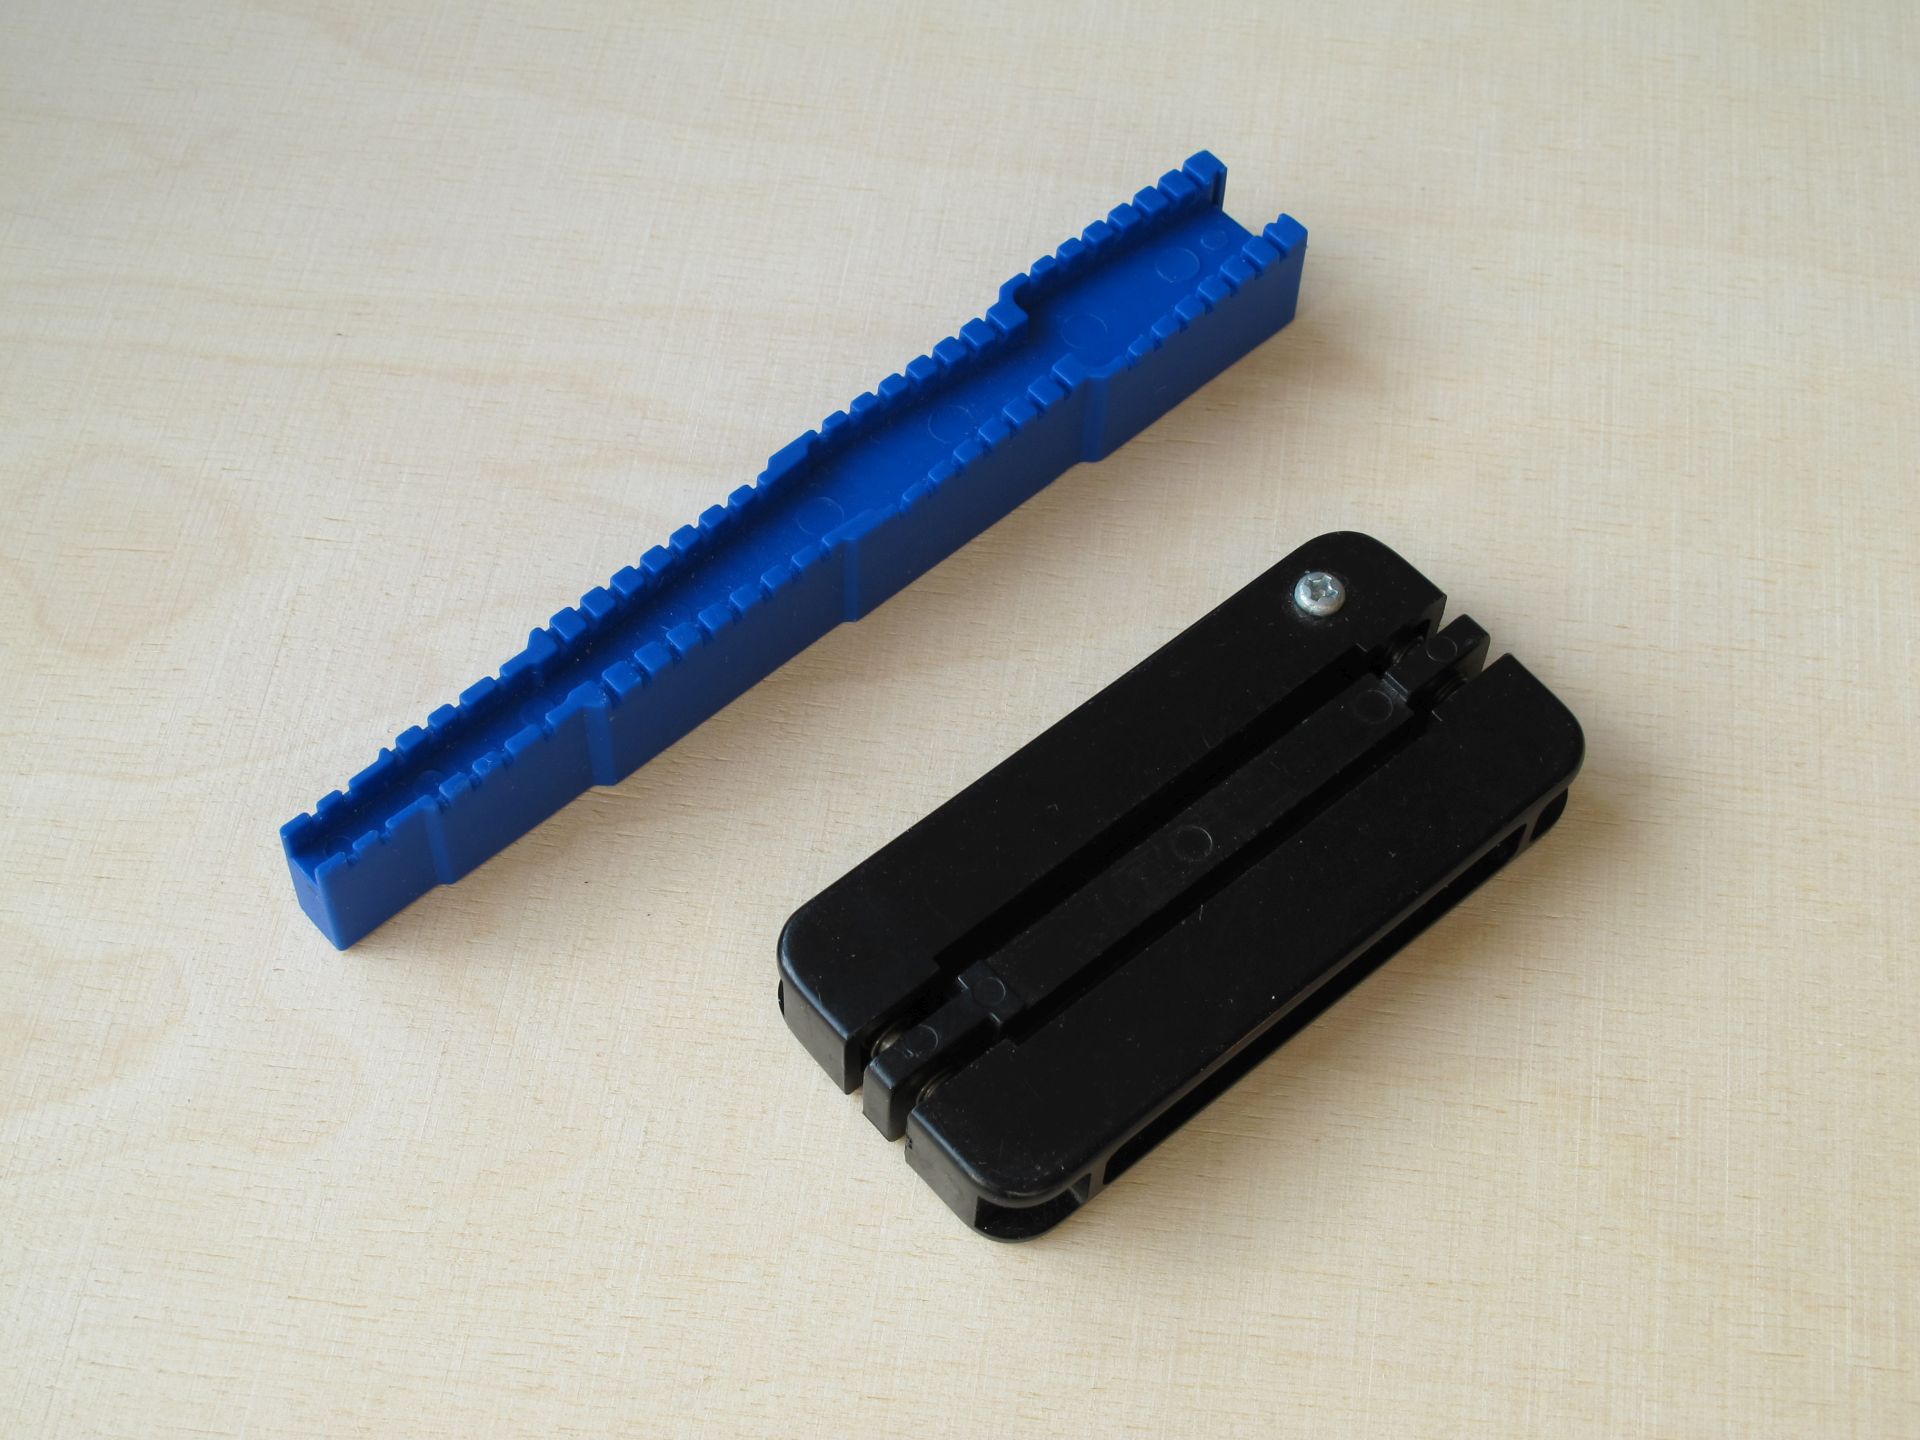
Tools for forming leads of electronic thru-hole components
I believe it is their official name. Just bend the leads of your components just before soldering them to make PCB visually pleasing and ensure IC will fit smoothly in a socket. Blue for radial parts, like resistors or diodes, black for IC in DIP (standard and wide). Probably cheaper than a beer in a pub.
Multifunctional electronic components tester
I use it every time while populating the PCB to ensure the resistor I use has the correct value. It gives me an idea about transistor leads order (and transistor type). Faster to use then multimeter, requires minimum knowledge to use. I got mine from AliExpress for around 15 euro (you may also check updated version in the similar price).

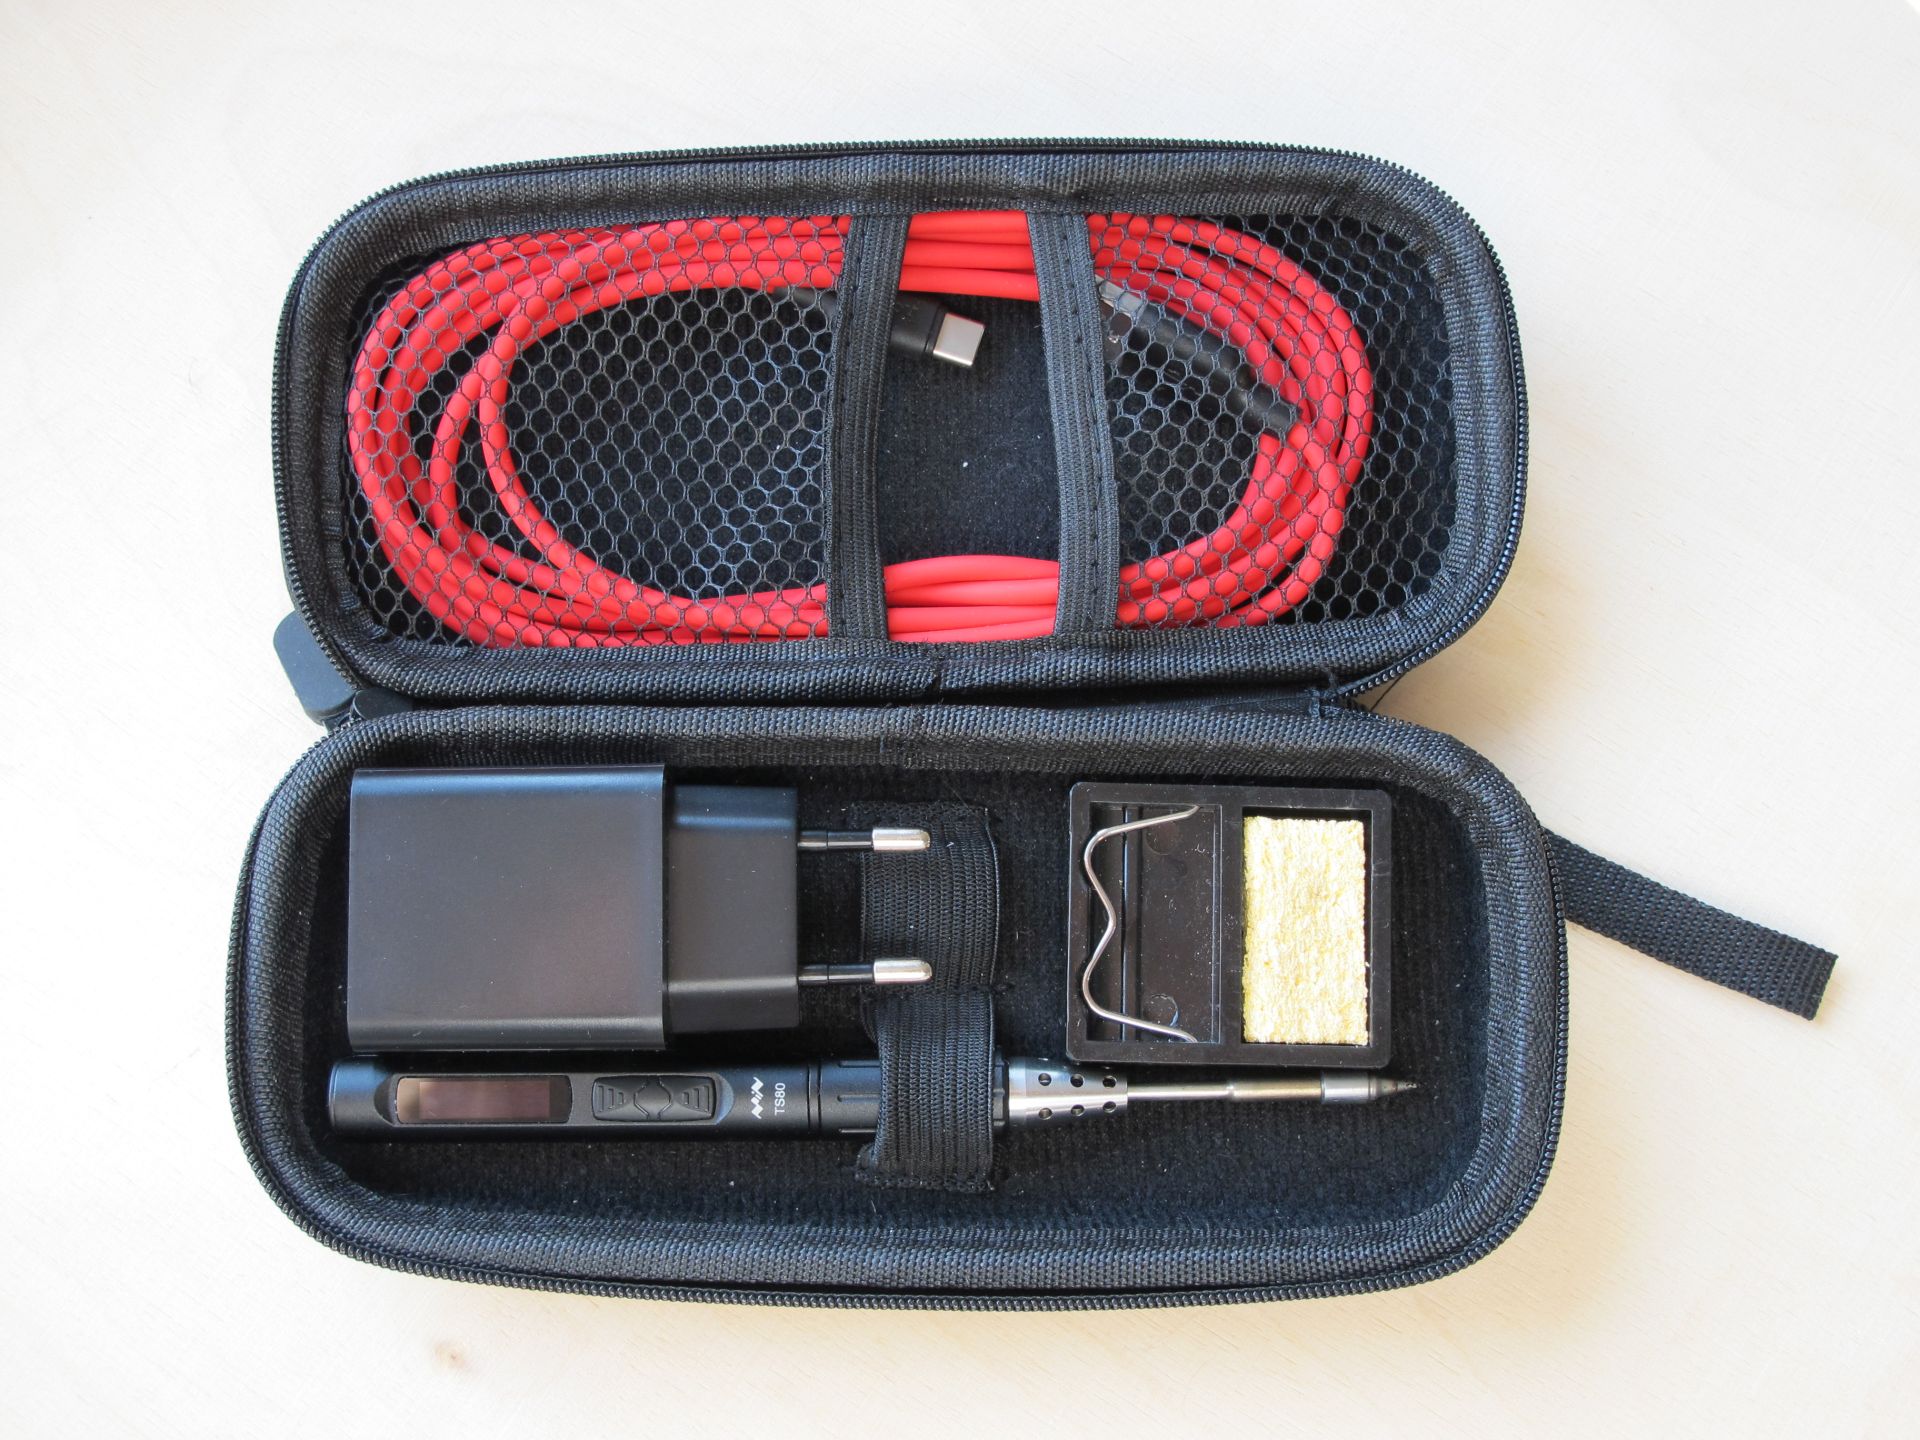
Mini soldering iron
I’ve never felt so free. Now soldering is like using a pen- Mini TS80 soldering iron with silicone USB cable (“HOCO X21 Plus Soft Silicone USB Cable”) weights almost nothing and gives you unimaginable freedom and comfort. Works even with power bank! There is probably an updated version on the market right now, I paid around 70 euro for mine, with carrying case and very flexible USB cable. Fun fact: one of my colleagues calls PCB soldering process “building a town”, as for her, electronic components look like small buildings.
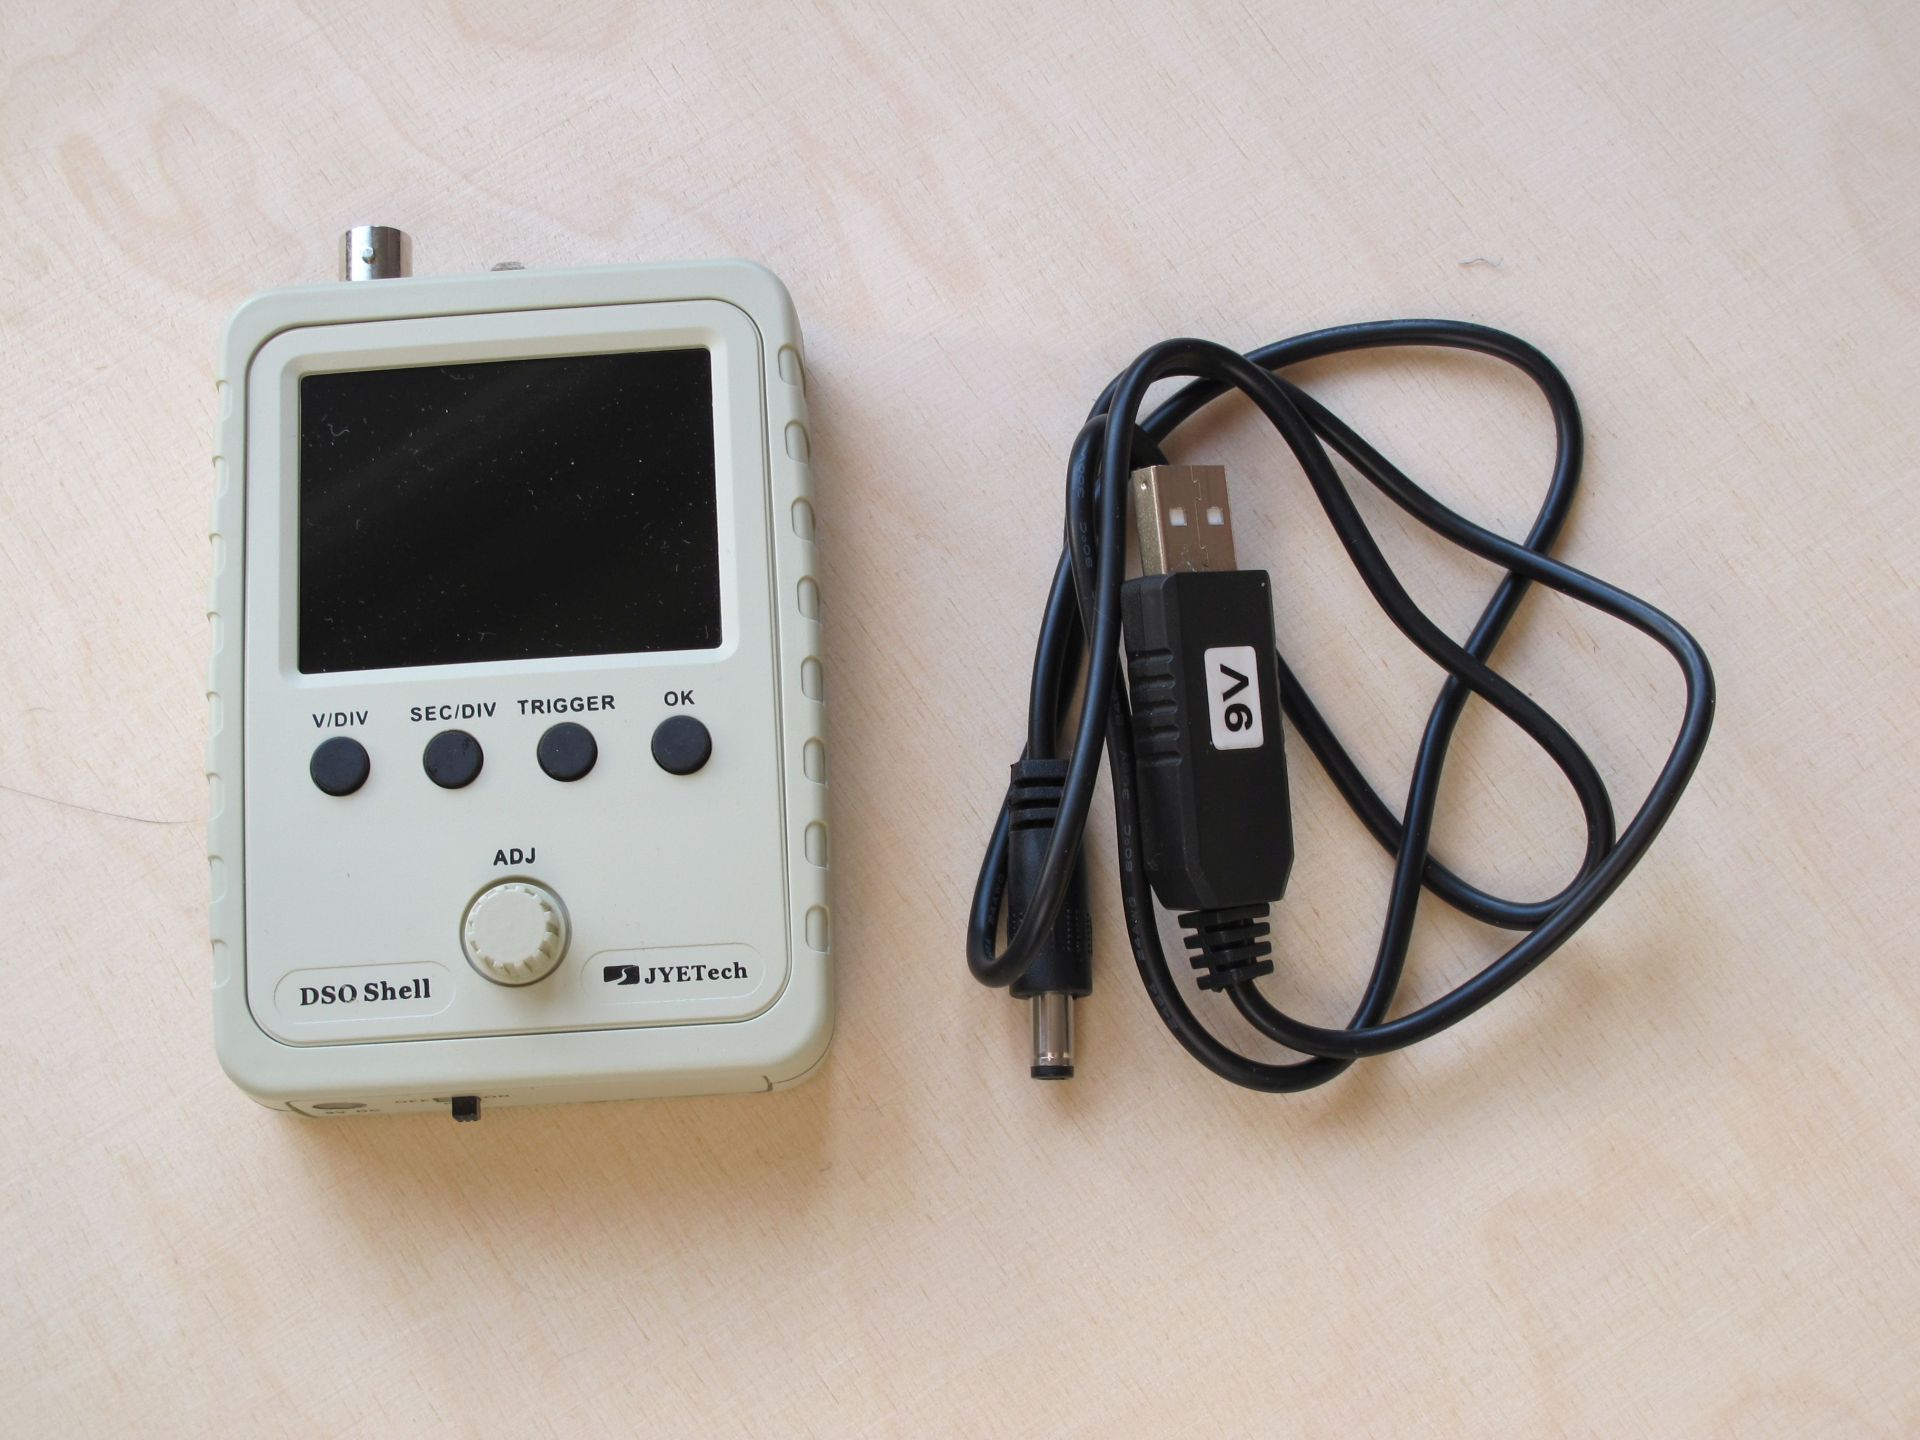
Mini oscilloscope
It’s not a professional oscilloscope replacement. But is always in the drawer and runs from USB. I use it often during waveform generation algorithms implementation in microcontroller to see if I get f.e. 440 Hz sine or 1000 Hz square. It is not meant to make accurate measurements, but works great as a more advanced wave shape indicator. Measures frequency, amplitude and is a great tool for beginning of synth DIY adventure – better this than nothing. Costs around 25 euro at Banggood.
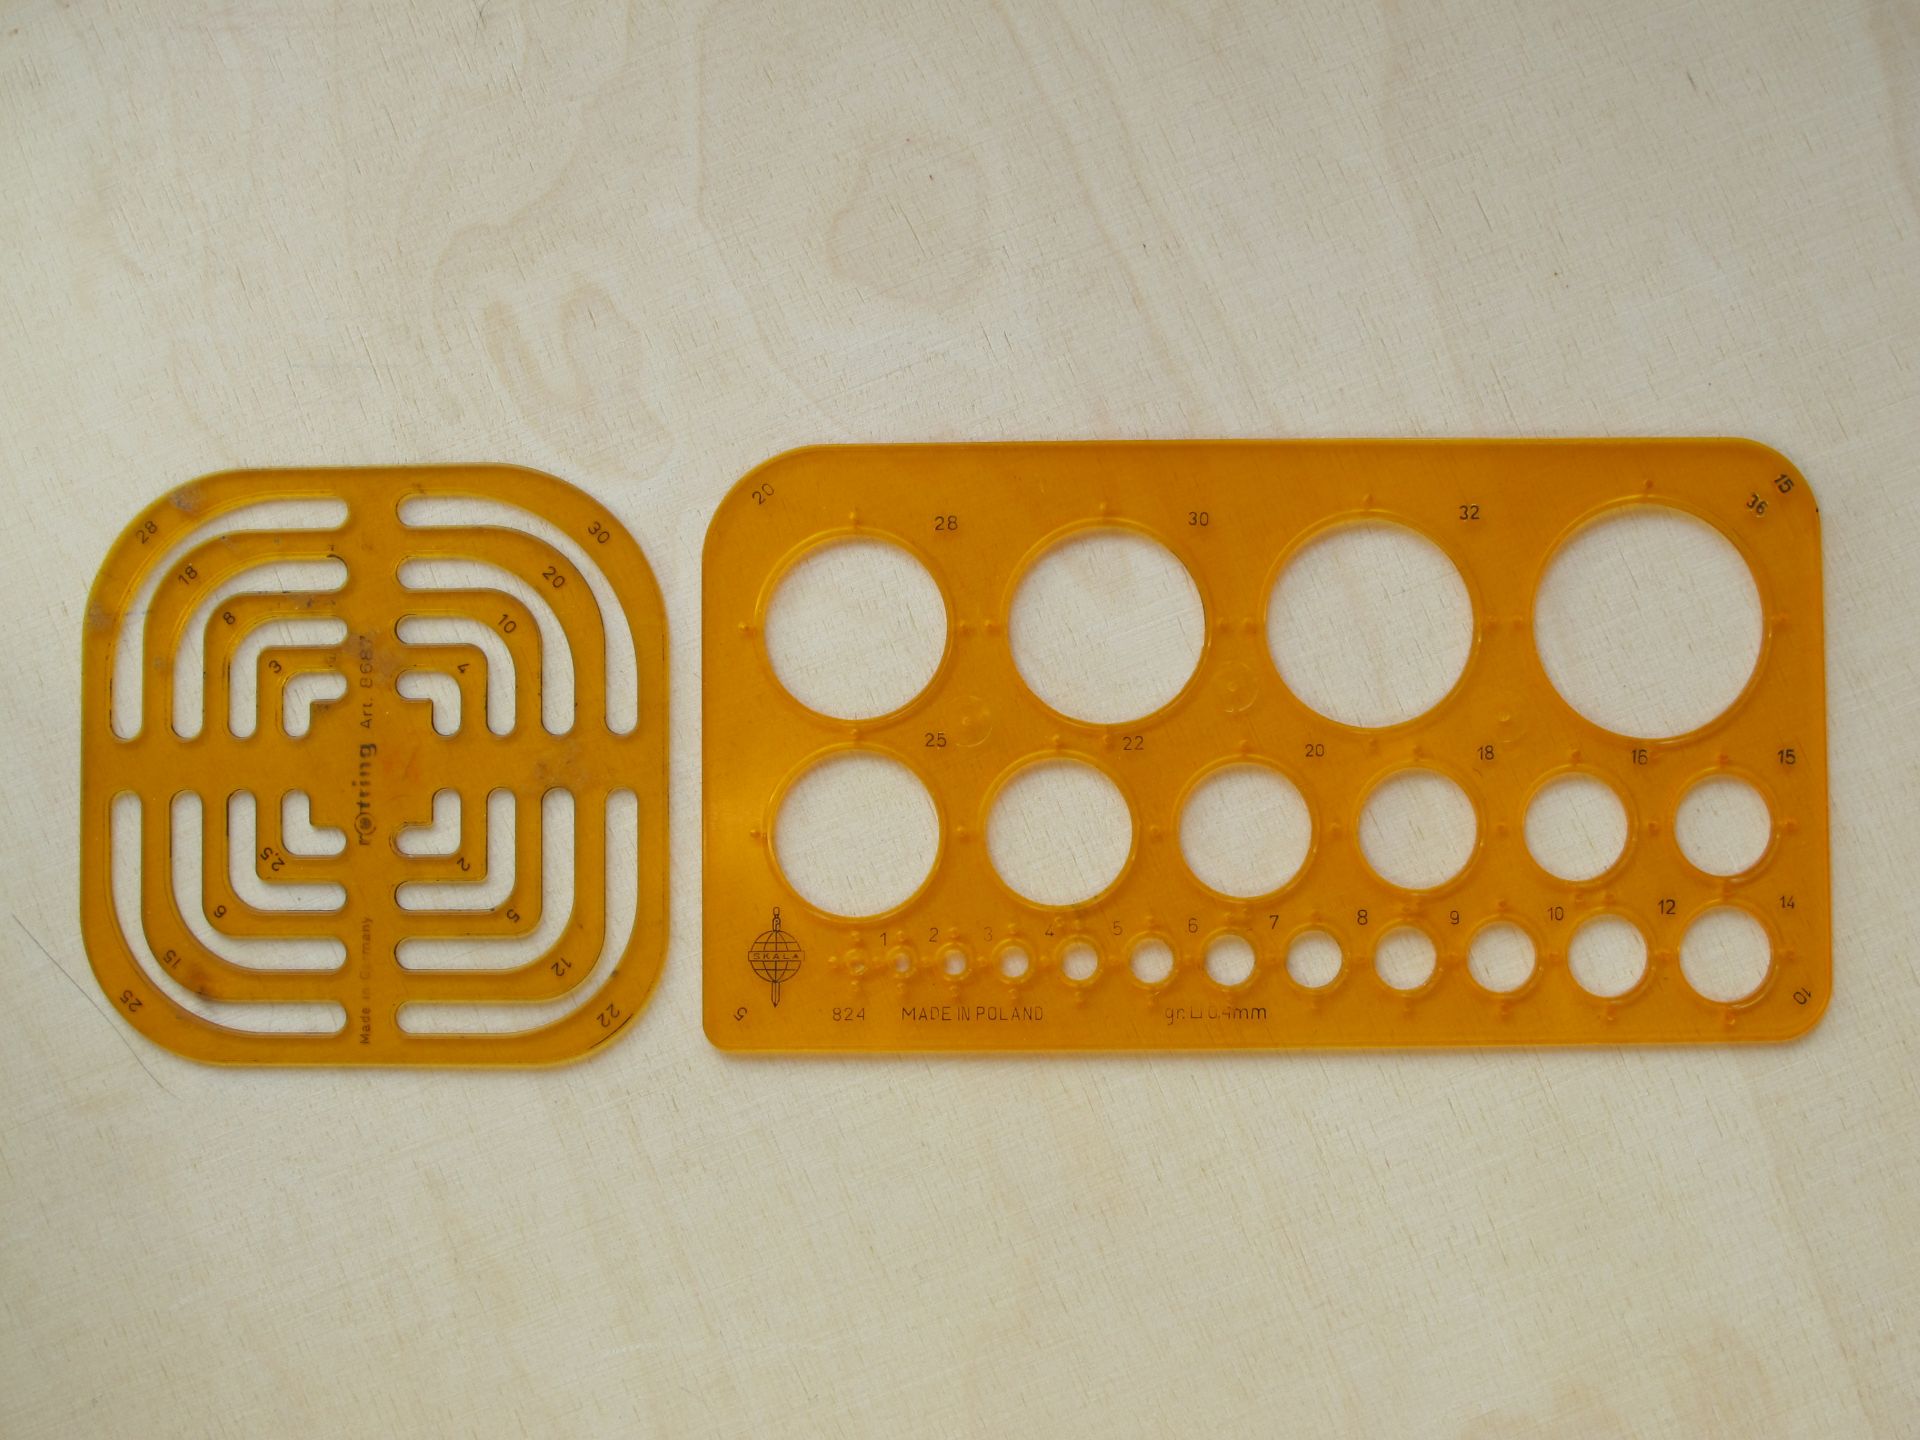
Plastic stencil
I use them to:
- Check how big hole should I drill to fit a certain front panel component (I know such thing as calipers exists, but stencil gives me an idea how much play there will be)
- To get rounding radius of the case to input its dimensions into CAD/vector graphics software
- To draw a hole outline I have to cut (with drill or file) – for me stencil work much better than compass (with stencil you can redraw outline at any moment; with compass only if you have a place for circles center)
I got them for around 0,5 euro at flea market, but quality ones can get quite expensive for a piece of plastic.
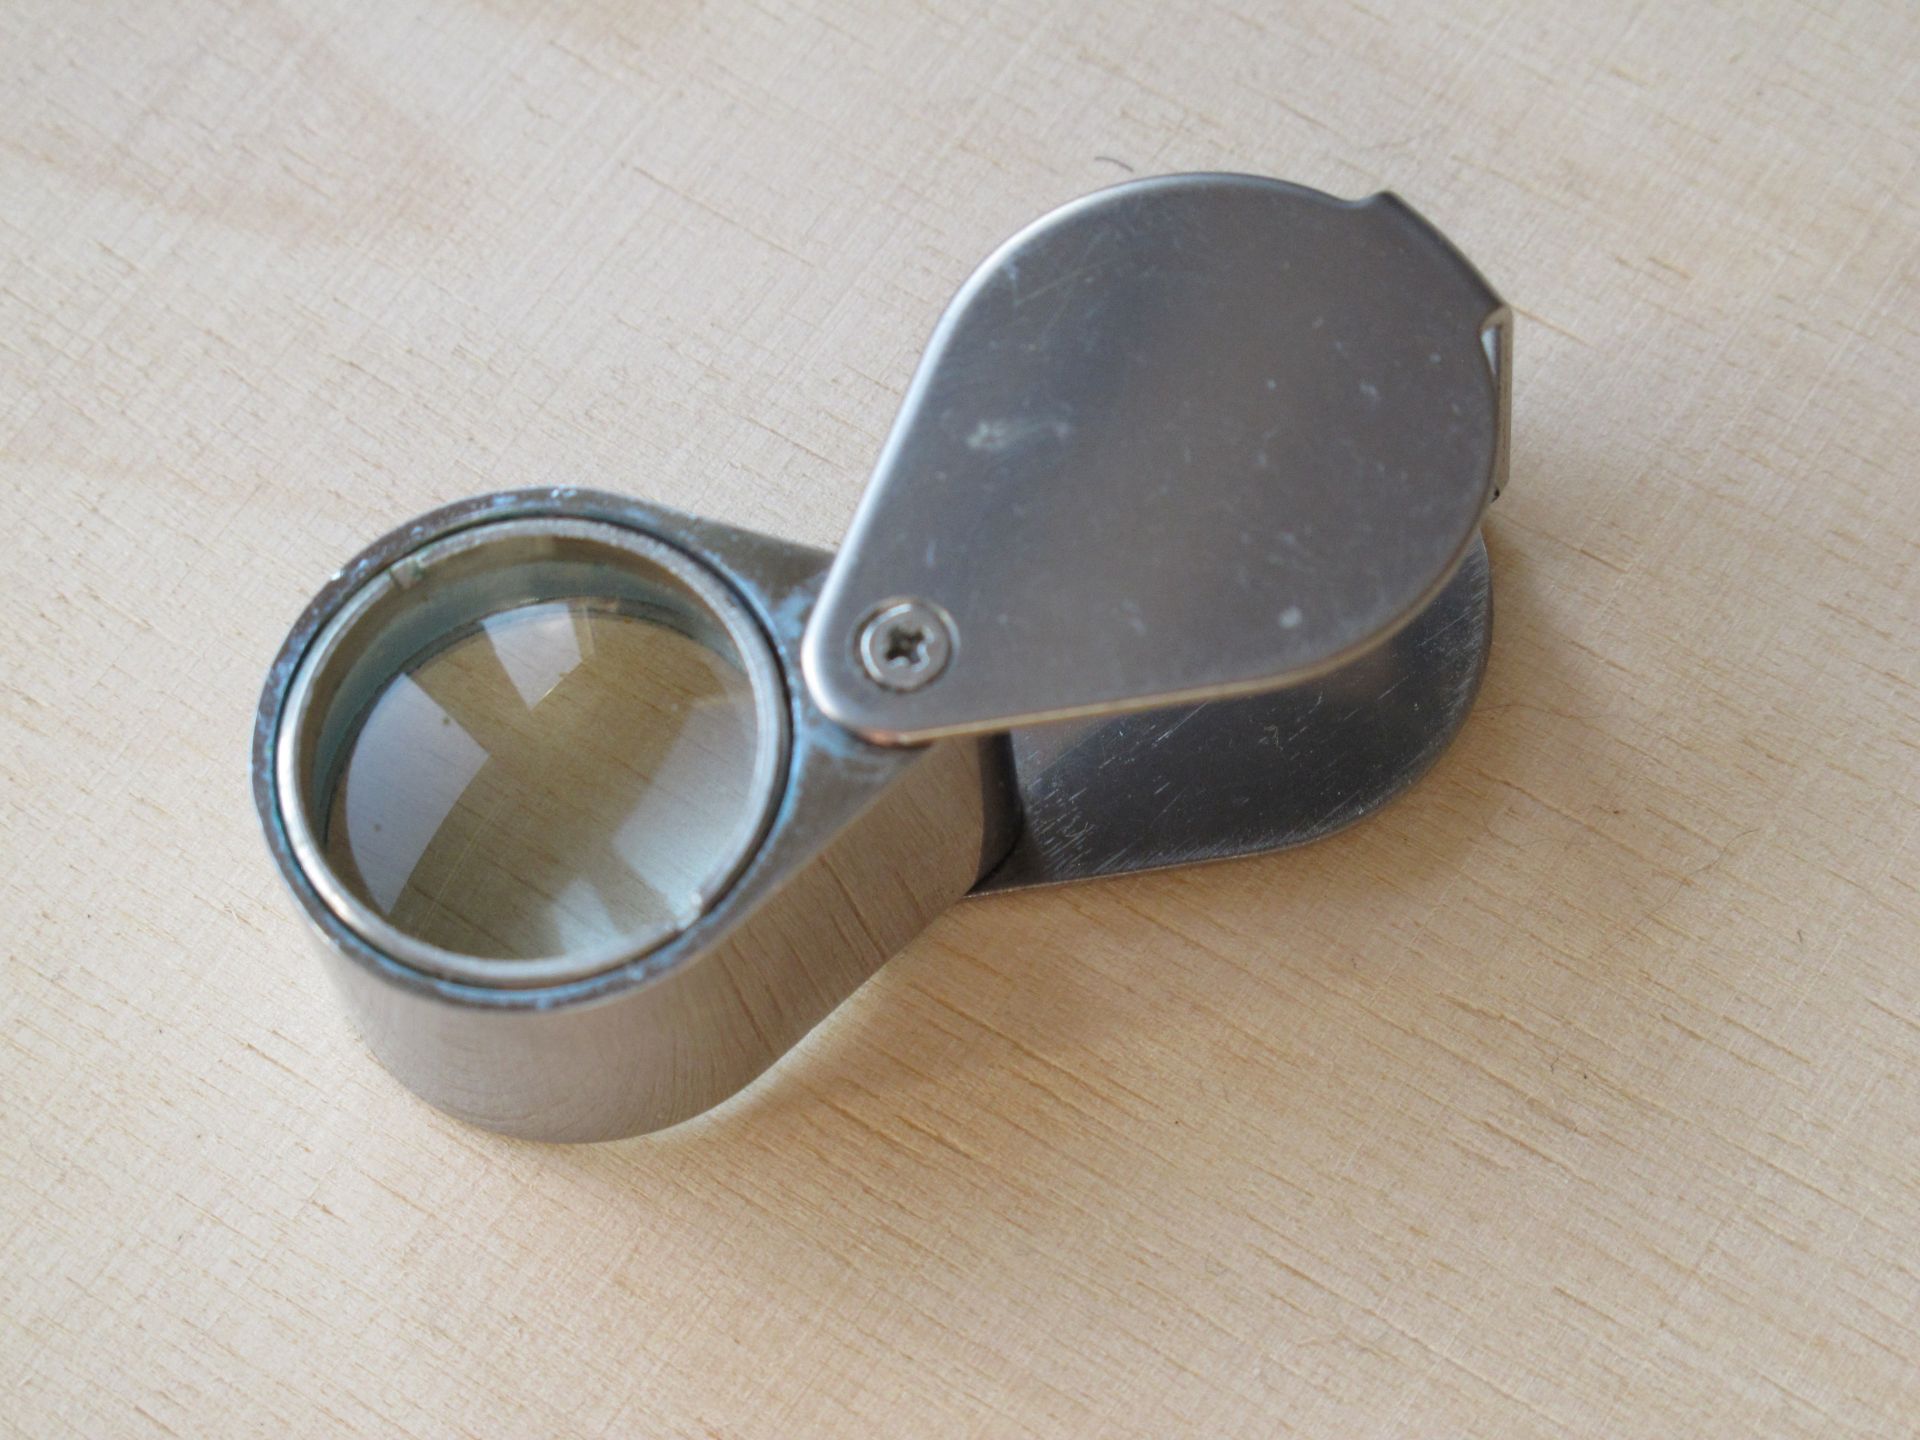
10x Magnifying glass
Most frequently used among all synth DIY tools in my collection. This one is with me for over 20 years and I use it in my every electronic project, mainly for PCB inspection after soldering. Using this and component tester I showed before will drastically reduce the number of potential errors during PCB assembly. Just 2 euro and countless hours of unnecessary debugging less.
“These are not the tools that will let you start, but let you finish.” – Me
Happy DIYing and be safe!
Jack