
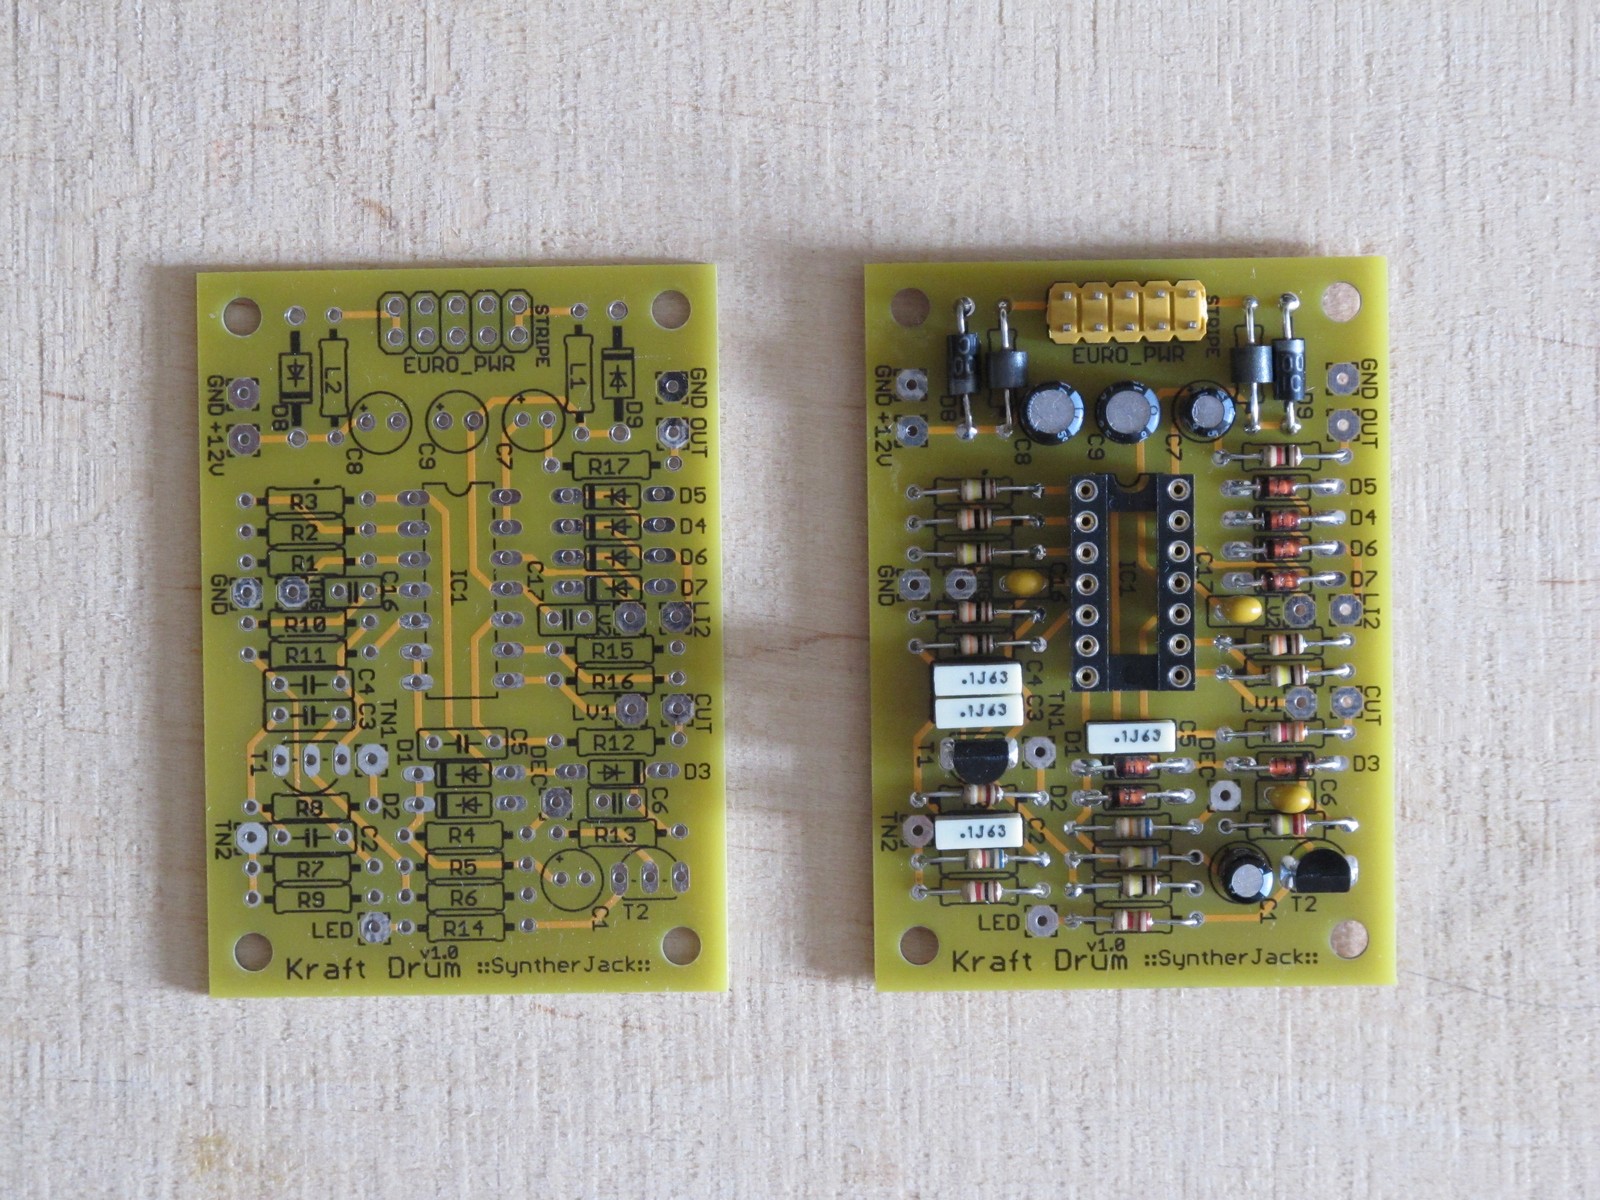
So, you have tested your prototype, got the PCB manufactured and soldered. How to get from here to complete, professional looking eurorack module with mostly hand tools and minimum outsourcing? Here’s a small tutorial. It documents a creation of my Kraft Drum DIY eurorack module.
Why I just won’t order a profesionally made front plate? I just couldn’t find a company in my country that can make 1 – 2 pieces of high quality printed and drilled panel. The few who could make it gave me unacceptable prices. I had tools anyway, so…
This is a very long article, with about 80 photos. I’ve divided it into four sections:
- panel drilling (this page),
- applying graphics,
- making a PCB holder,
- wiring.
One more thing: I own a lot of hand tools, but the only electric one is small Proxxon and big Hitachi drill. I don’t own a workshop, I don’t even have a designated space for DIY in my small flat. Thats why some techniques can be considered strange and overengineered, but I still hope it will be helpful. Here is the first part, mostly about drilling and other mechanical work.
And one more thing. I can talk for a long time about the ways I’ve hurt myself with tools (and girls!). Don’t choose my way.
Always wear personal protective equipment such as protective gloves and glasses. Eyes don’t grow back.
The material
First of all, which material to use? The most popular used for eurorack front panels are:
- aluminum (or steel) sheet -popular, but expensive compared to other methods when outsouced, tons of manufacturing options, sky is the limit,
- PCB (FR4 glass epoxy) – easy to manufacture in every PCB shop, popular and cheap, but the color palette is very limited and still looks like PCB :/,
- (ply)wood – used f.e. in Bastl modules, 3 mm thick to be strong enough, stands out in a row of modules (especially when other are 2 mm :/),
- acrylic glass (PMMA) – cheap and easy to outsource, 2 mm thick bends easily, laser engraved graphic could be hard to read,
- engraving laminate – not shure if someone uses it, but still an option to consider,
- cardboard – ghetto style DIY modules, 0% durability, very easy to drill :).
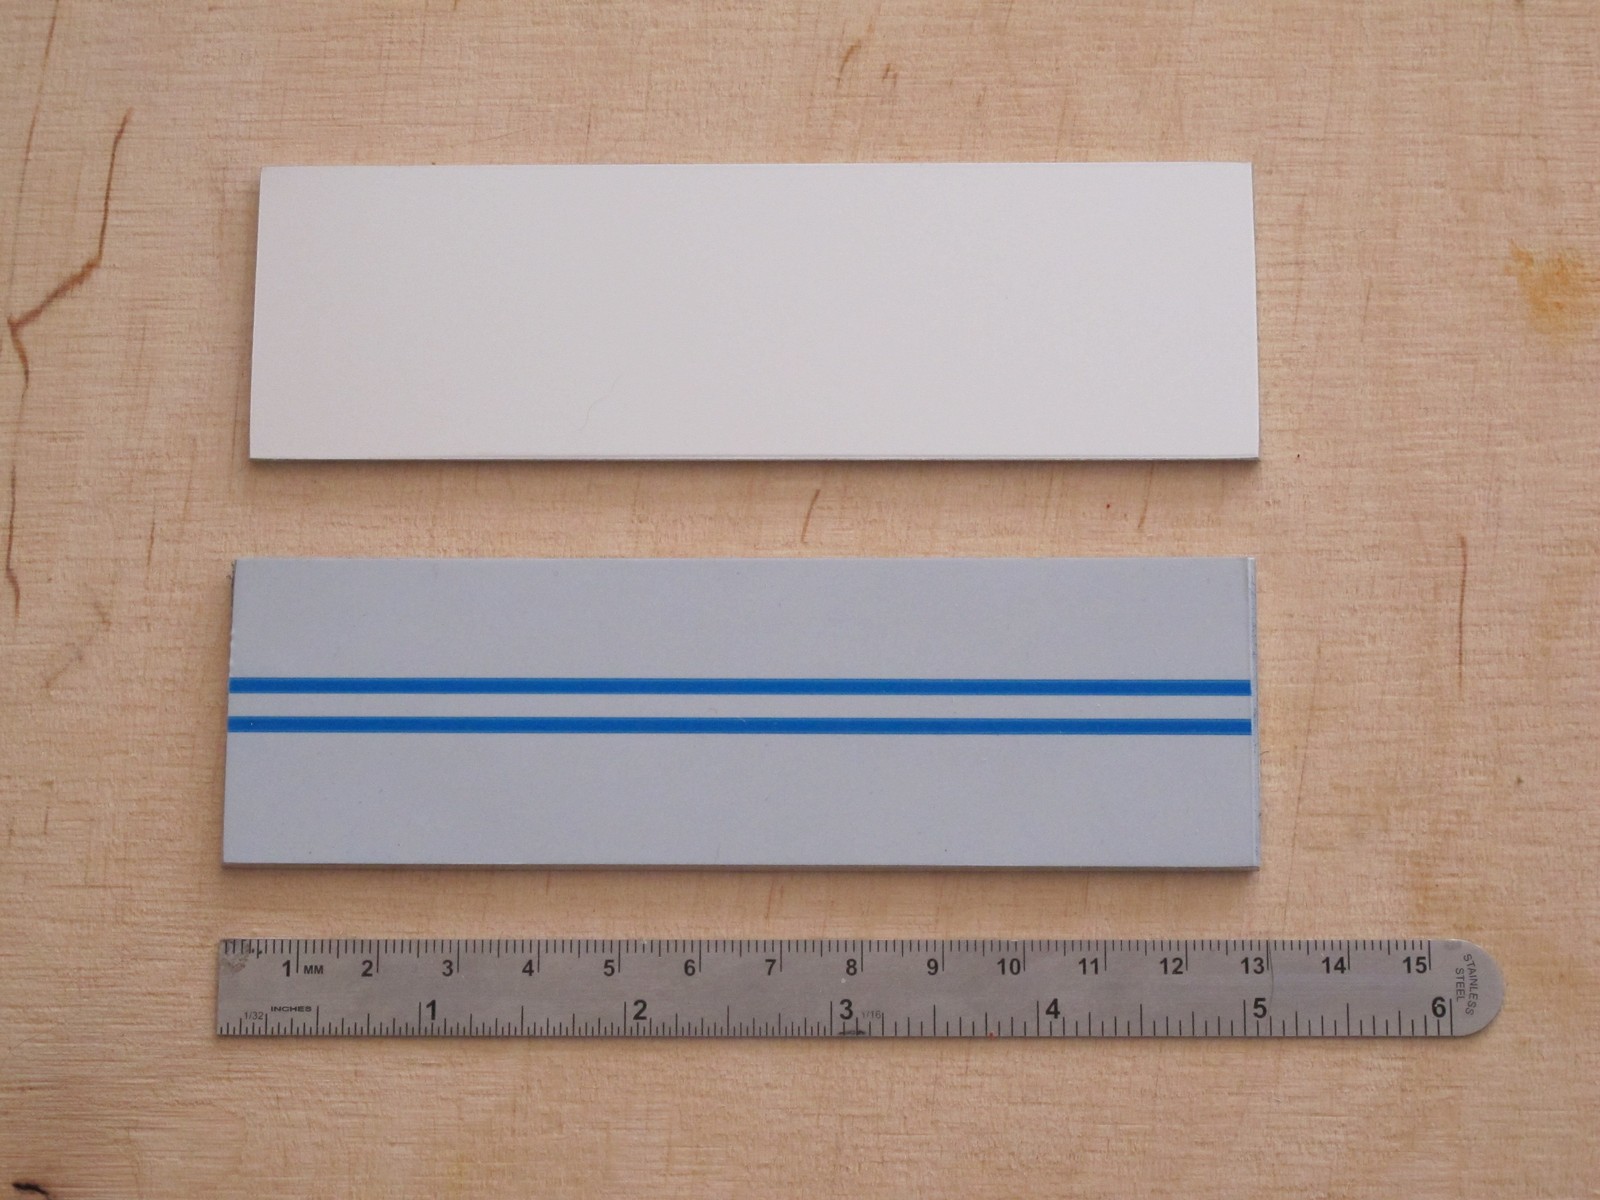
I made almost all of my eurorack panels with 2 mm thick anodized aluminum sheet. I’ve chosen it for durability and nice shiny look (but feel free to use another materials if you like).
All required dimensions of eurorack module can be found under “A100 construction details” phrase all over Internet. I decided to go for 8 HP panel, which is 40,3 x 128,5 mm according to Doepfers site. Then I ordered a cut sheet for 2$ per panel (I’ve got some more for future builds). It is cut with guillotine, not laser, but has really good tolerance and soft edges.
The measurements
In the past I had some printer scaling problems – it rescaled to about 101%. To keep hole position accurate, I use oldschool pencil and ruler. According to Doepfer, the holes should be 3 mm from the top and 7,5 mm from side. Of course this method relies on proper sheet dimensions.
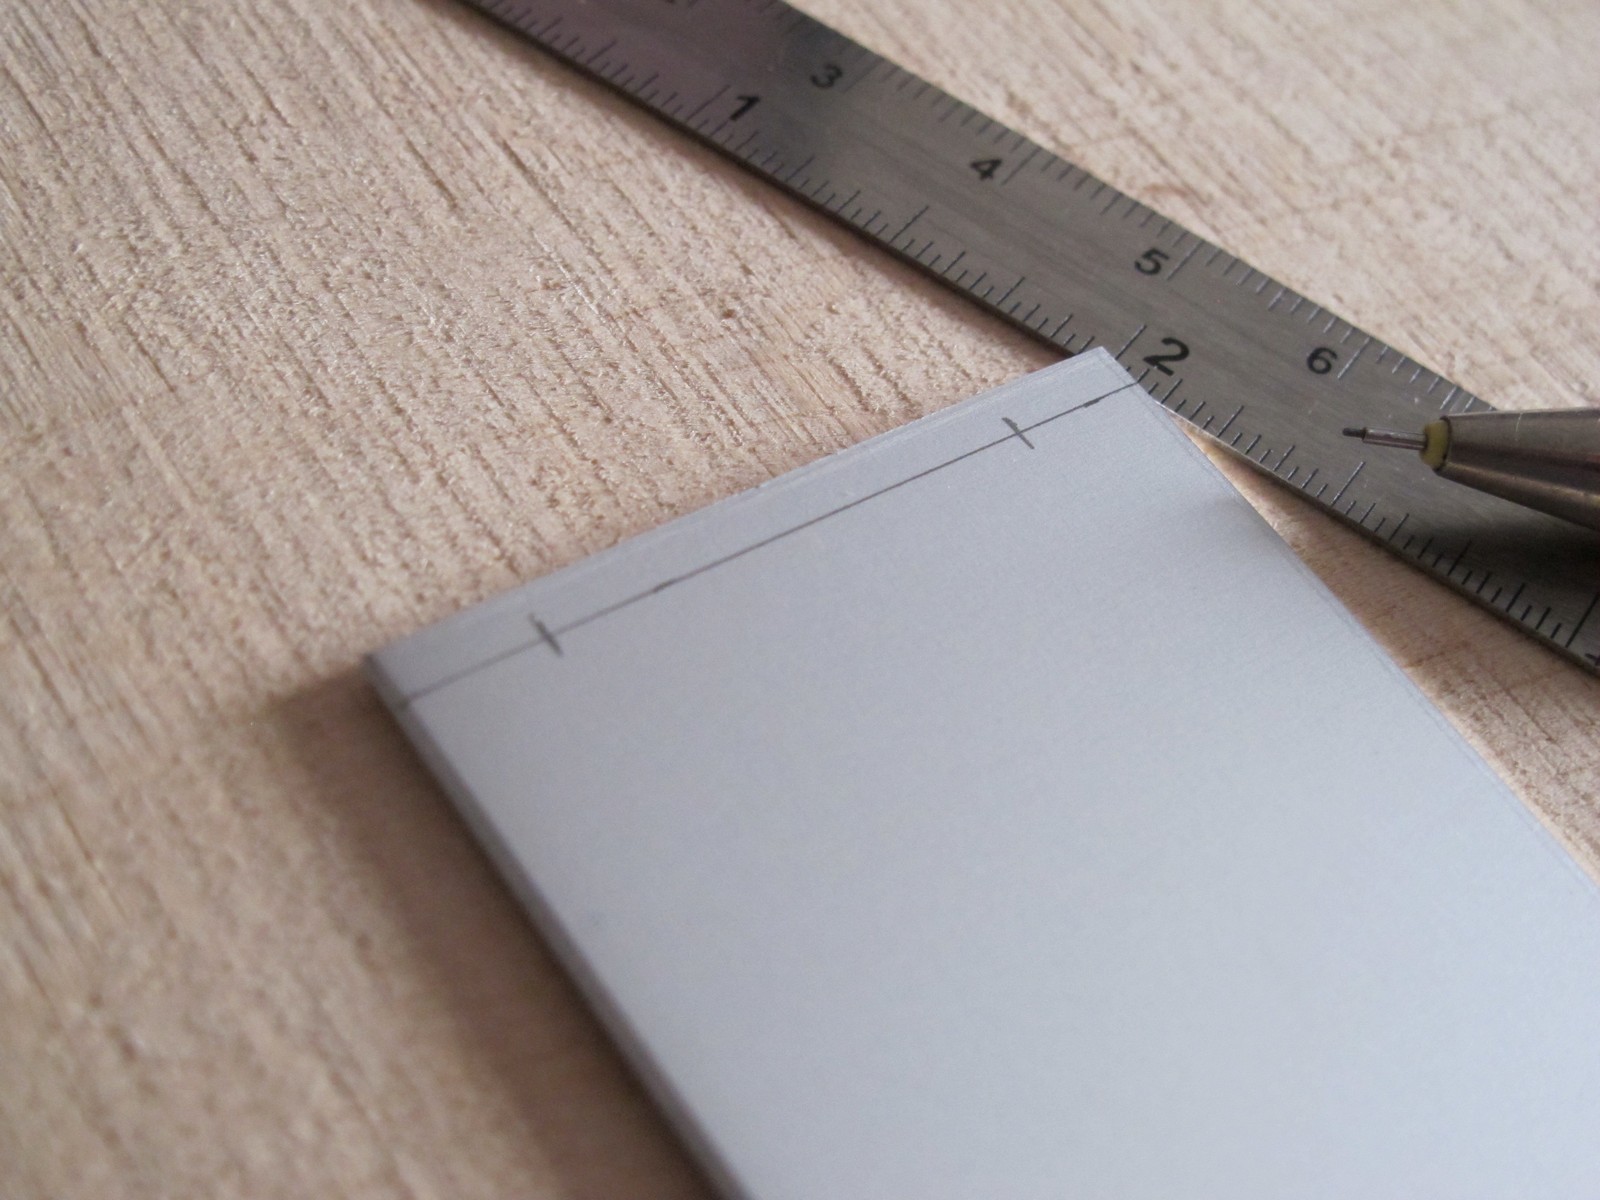
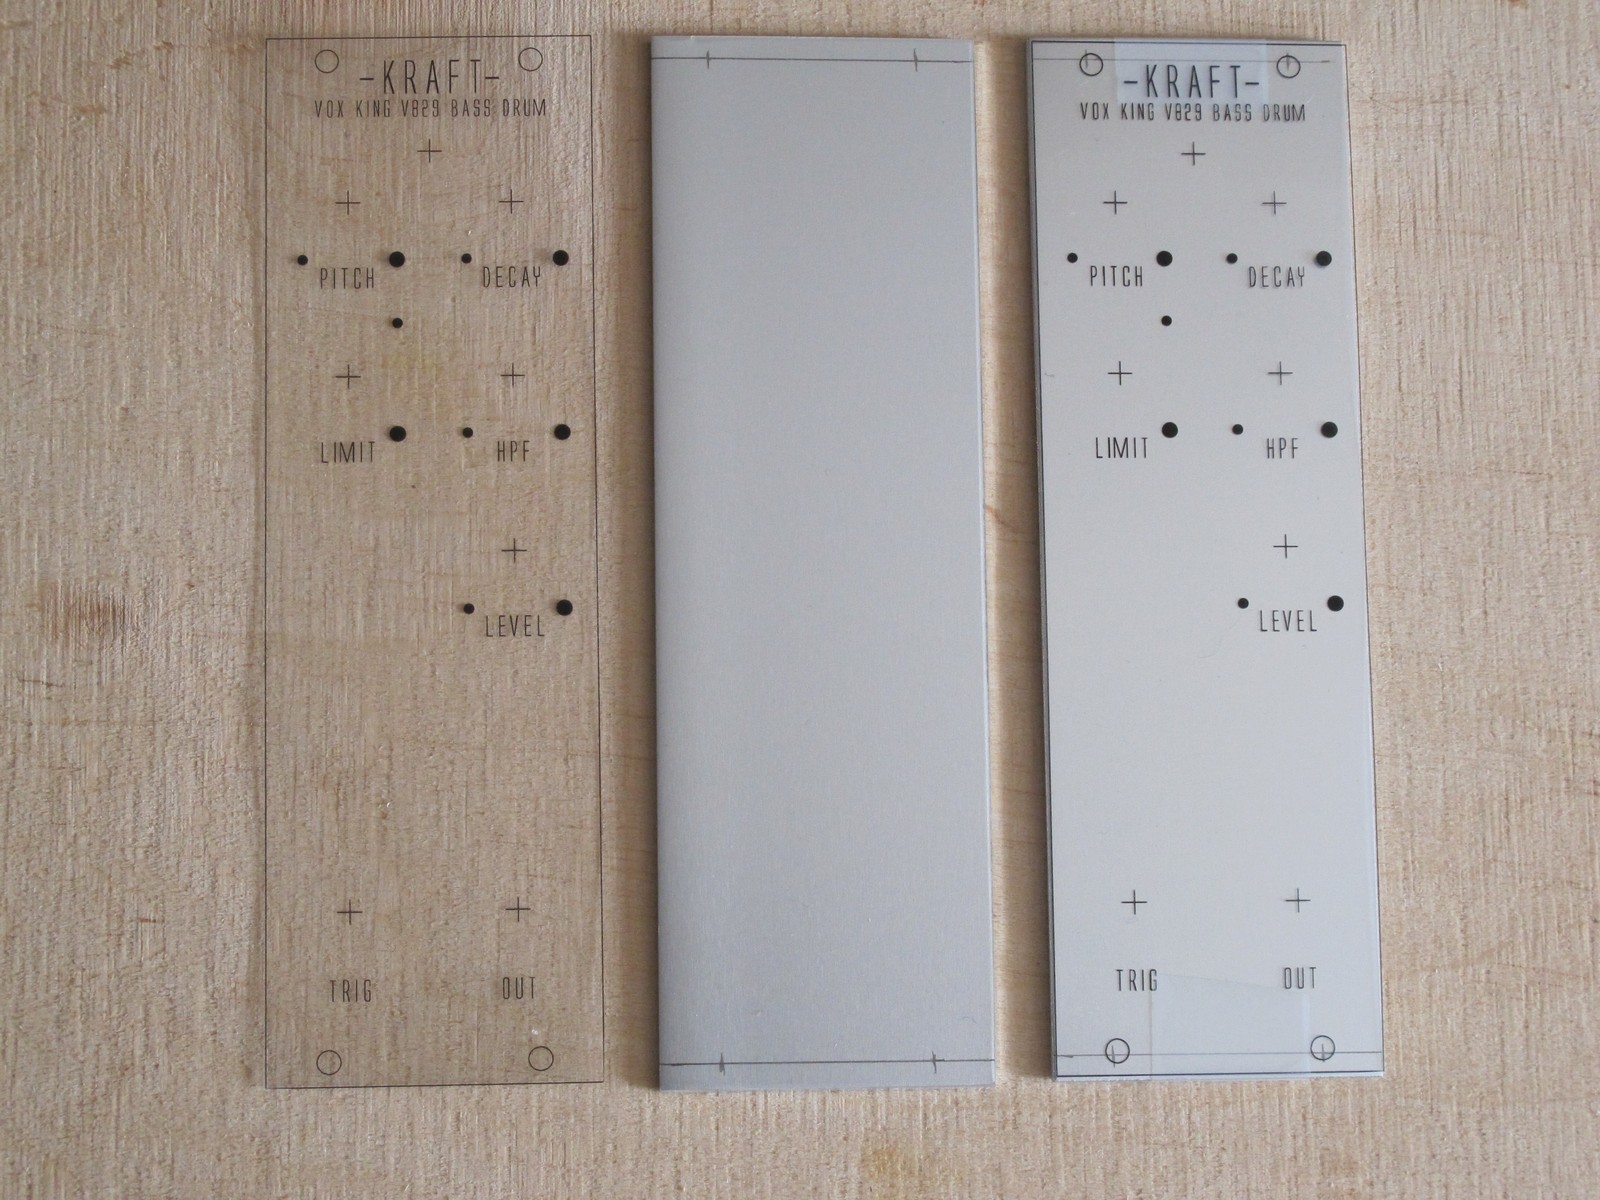
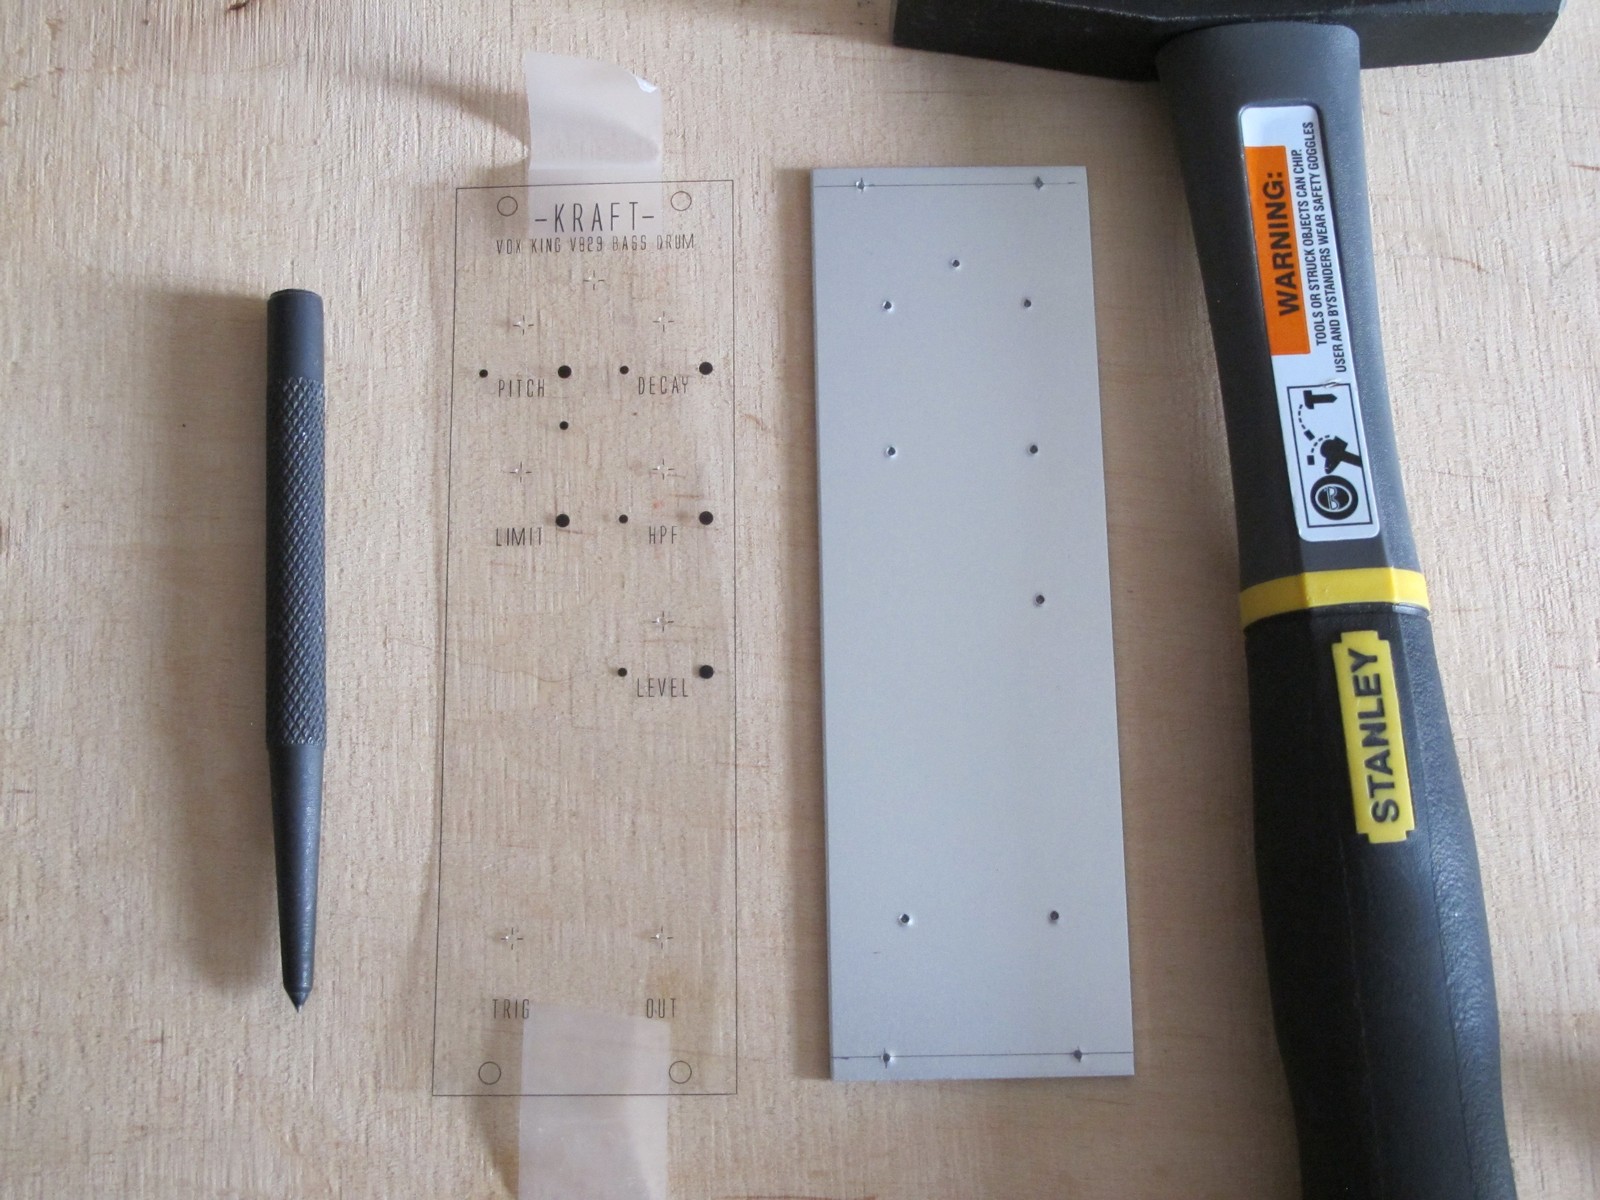
I use template printed on transparent foil to mark other holes position. Then I attach a template to sheet with transparent tape. Little crosses show points where drilling should begin.
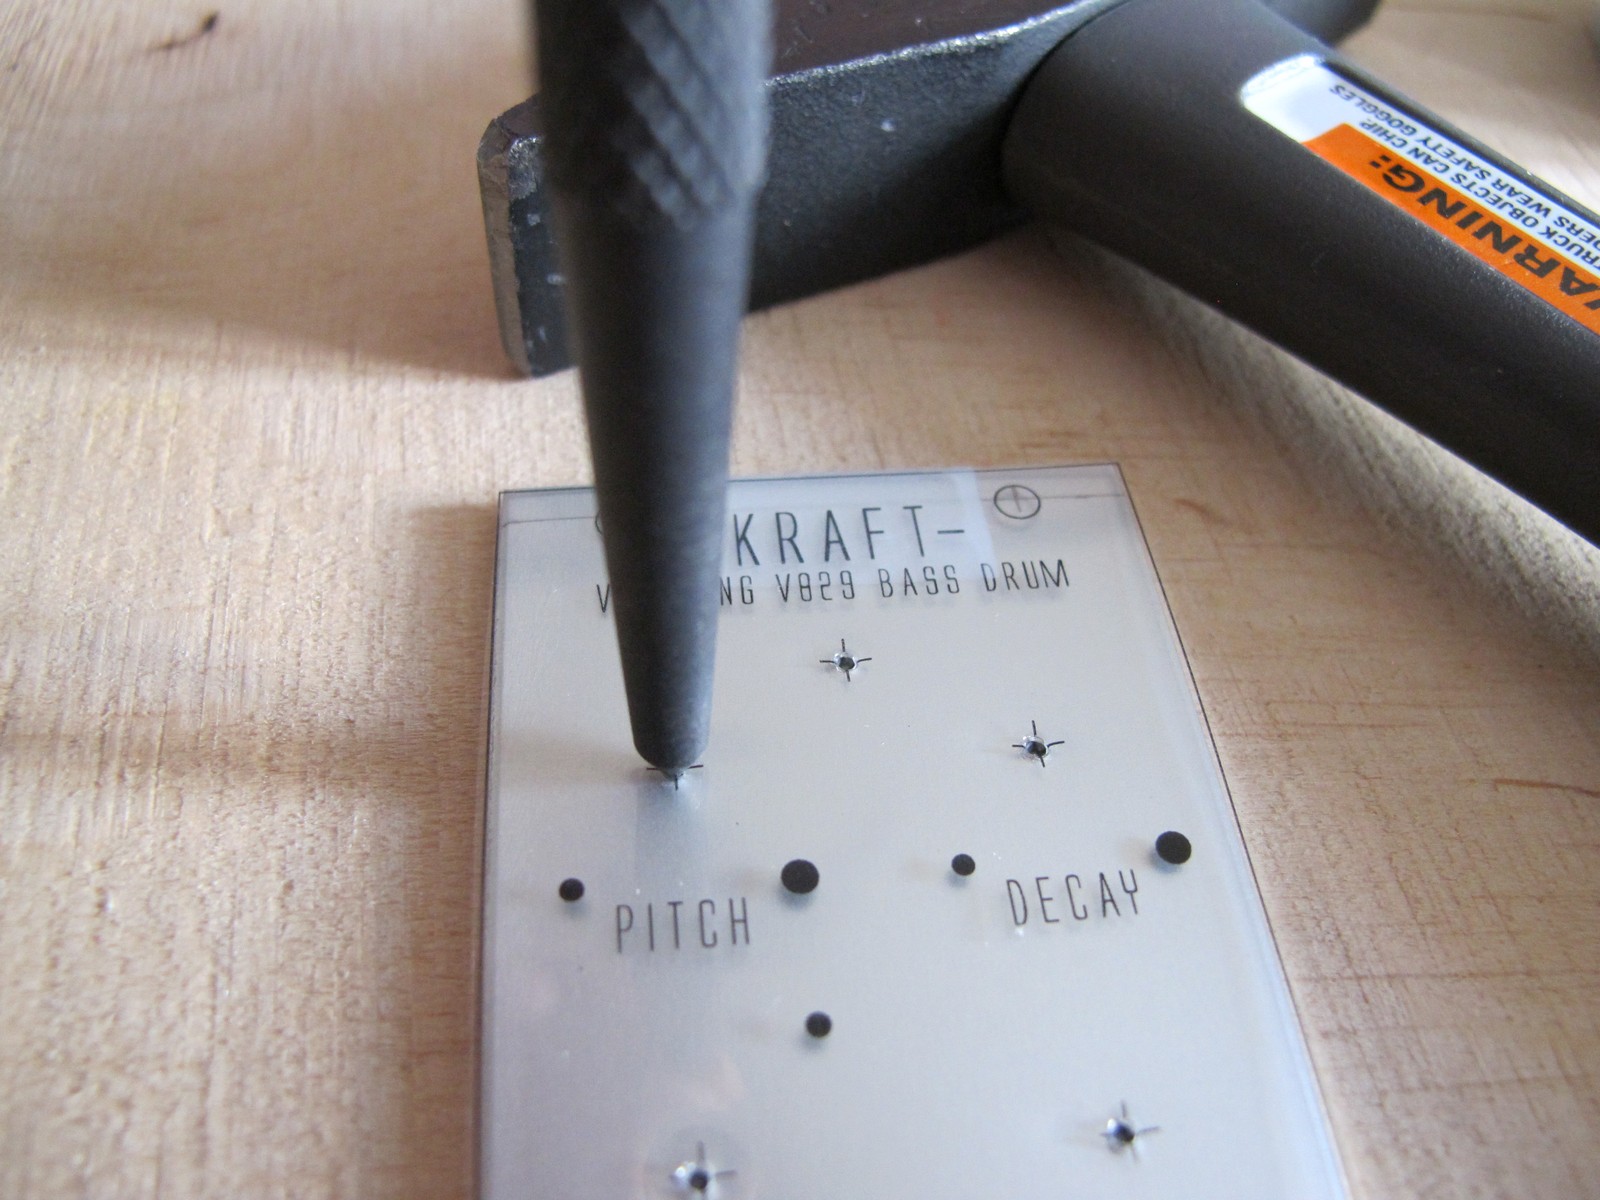
Next, I punch small holes thru the foil, they will help the drill to stay in a place. I own automatic punch, but I prefer to use simple hand center punch and hammer (not automatic one) to get better control over punching force.
Then I remove the foil from the sheet and panel is ready for drilling. The printed template will not be used anymore.
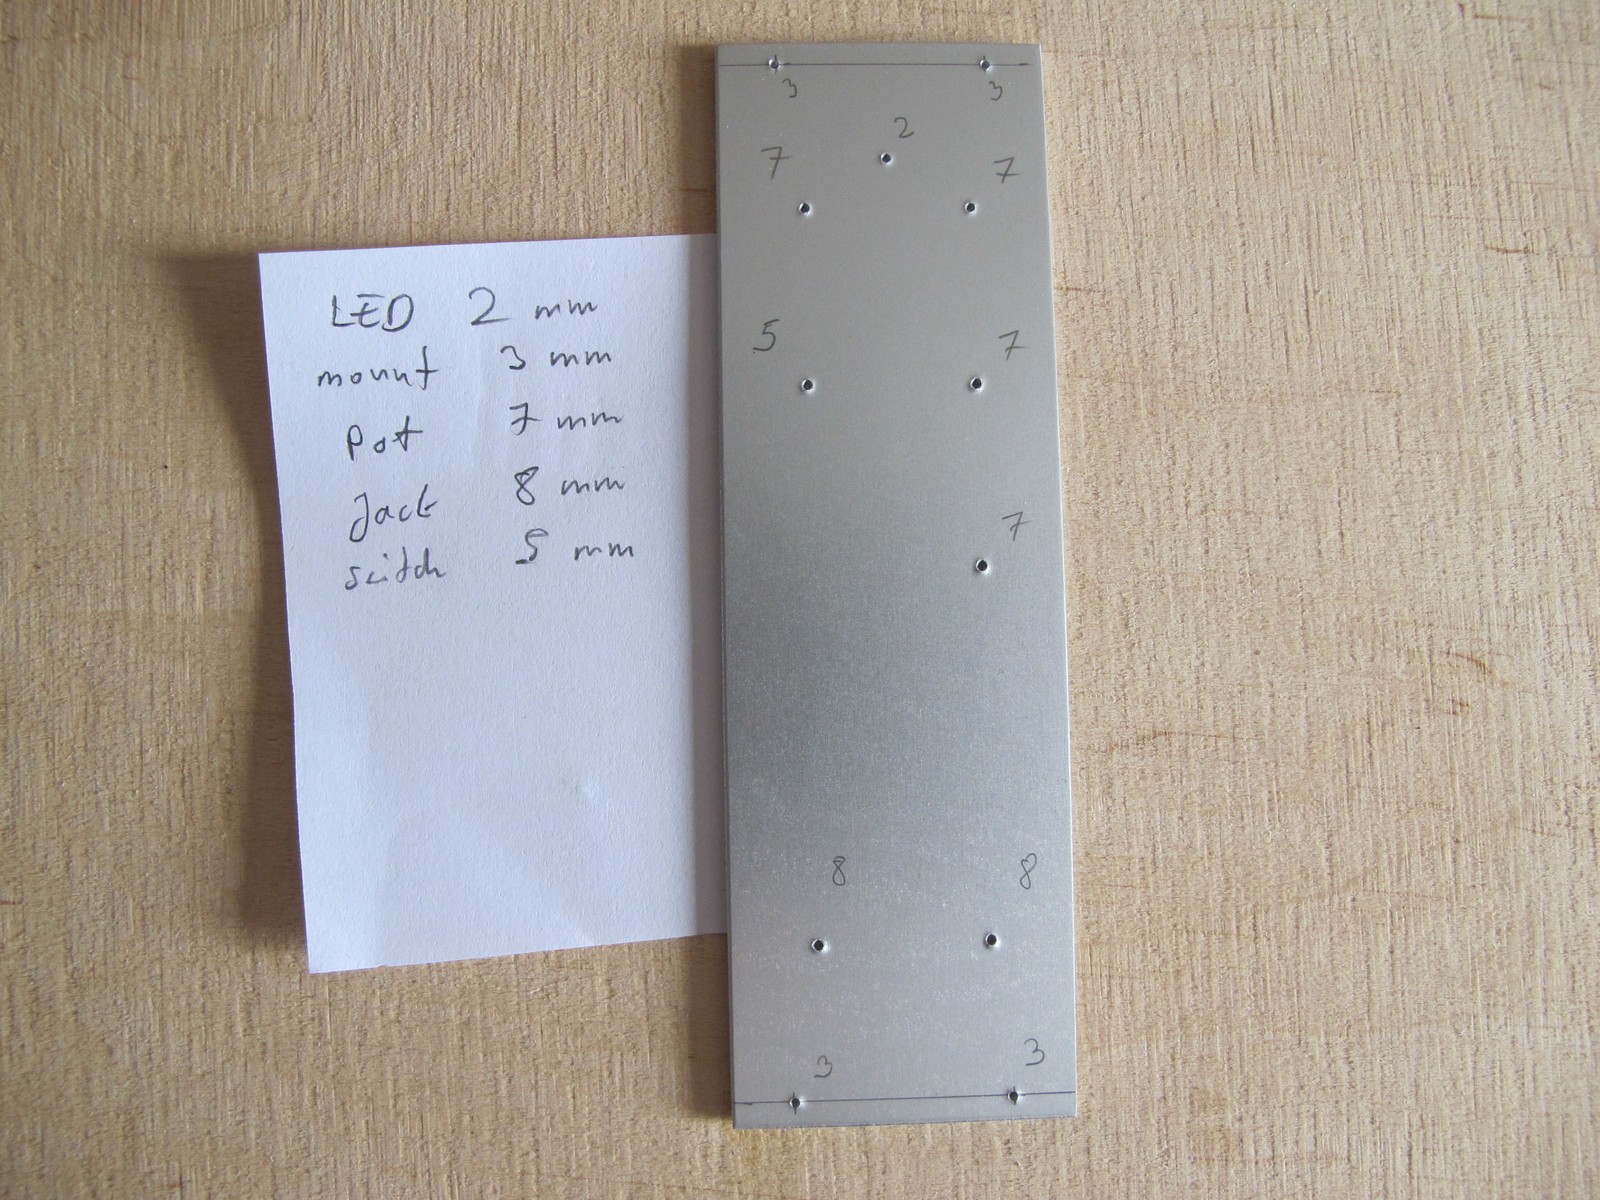
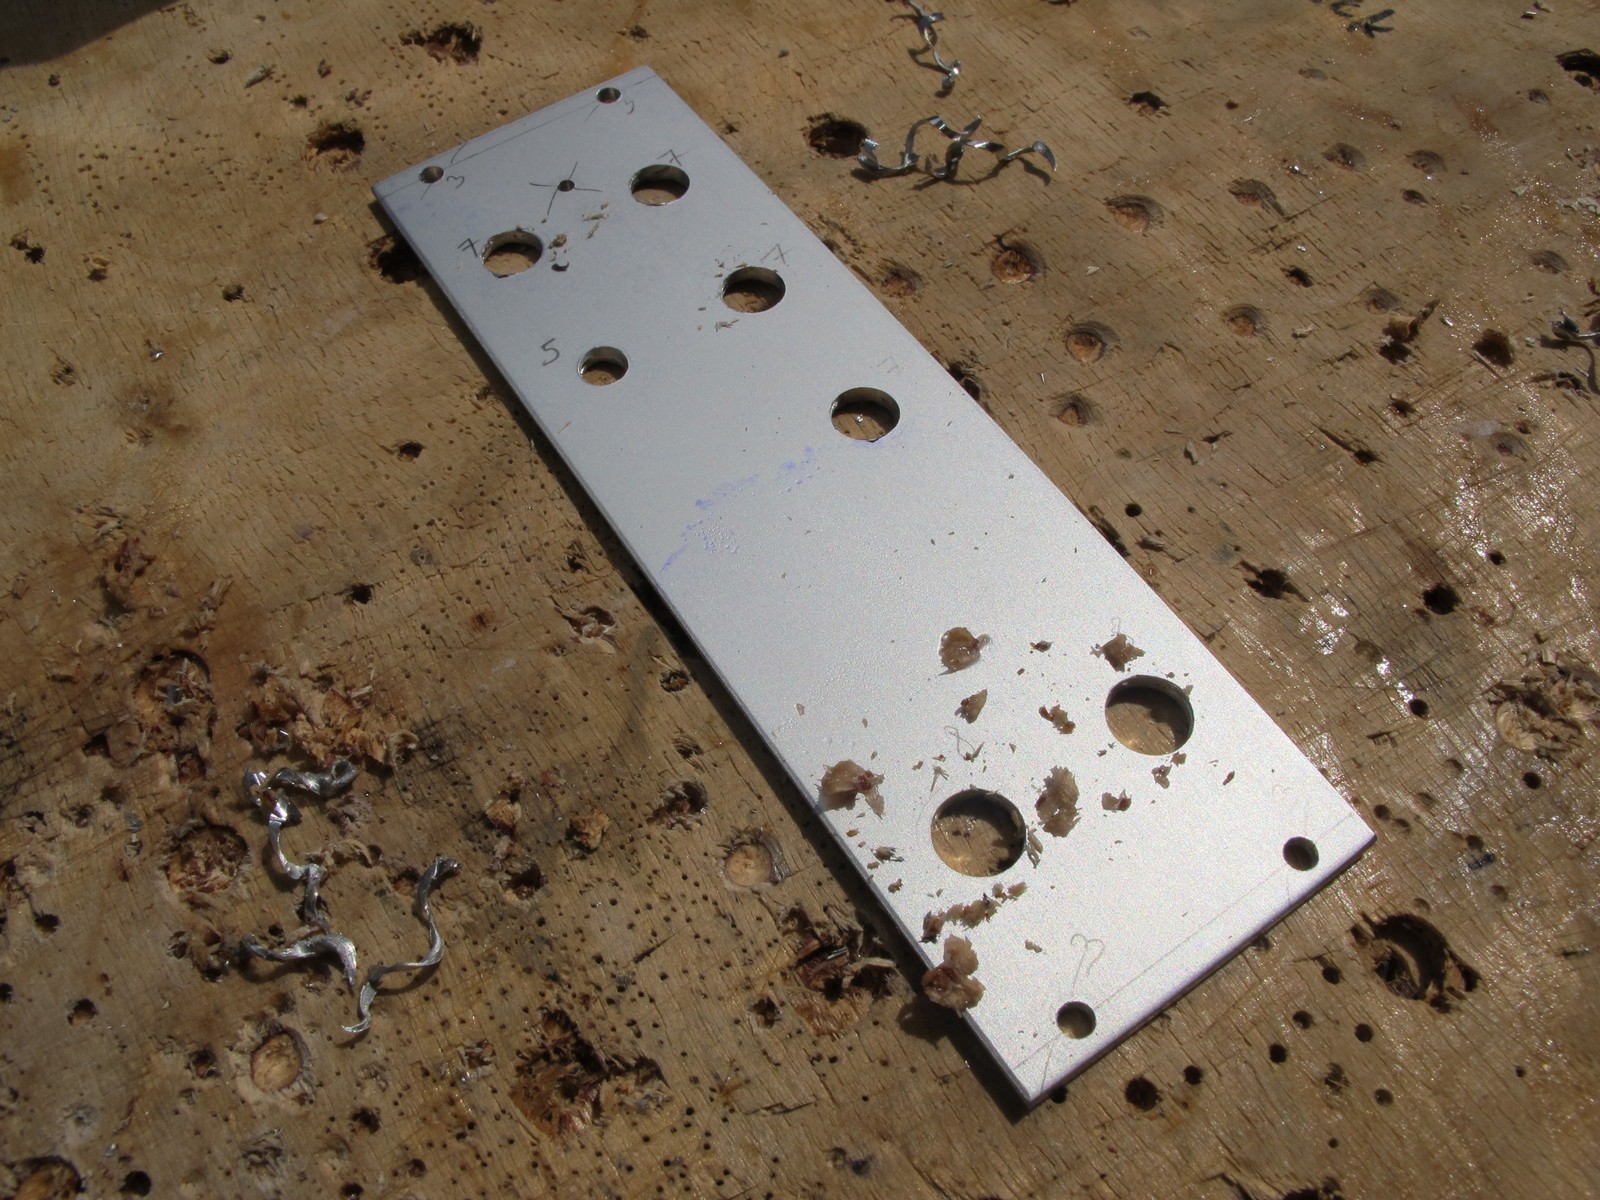
The worst thing you can to is to make an 8 mm hole for 2 mm LED. I usually make a phisical measurements of components (I don’t trust to datasheets and I have a good reason for it), then write final holes dimensions on front panel. It will prevent from making any stupid mistakes (and I’m very good at it!).
Drilling
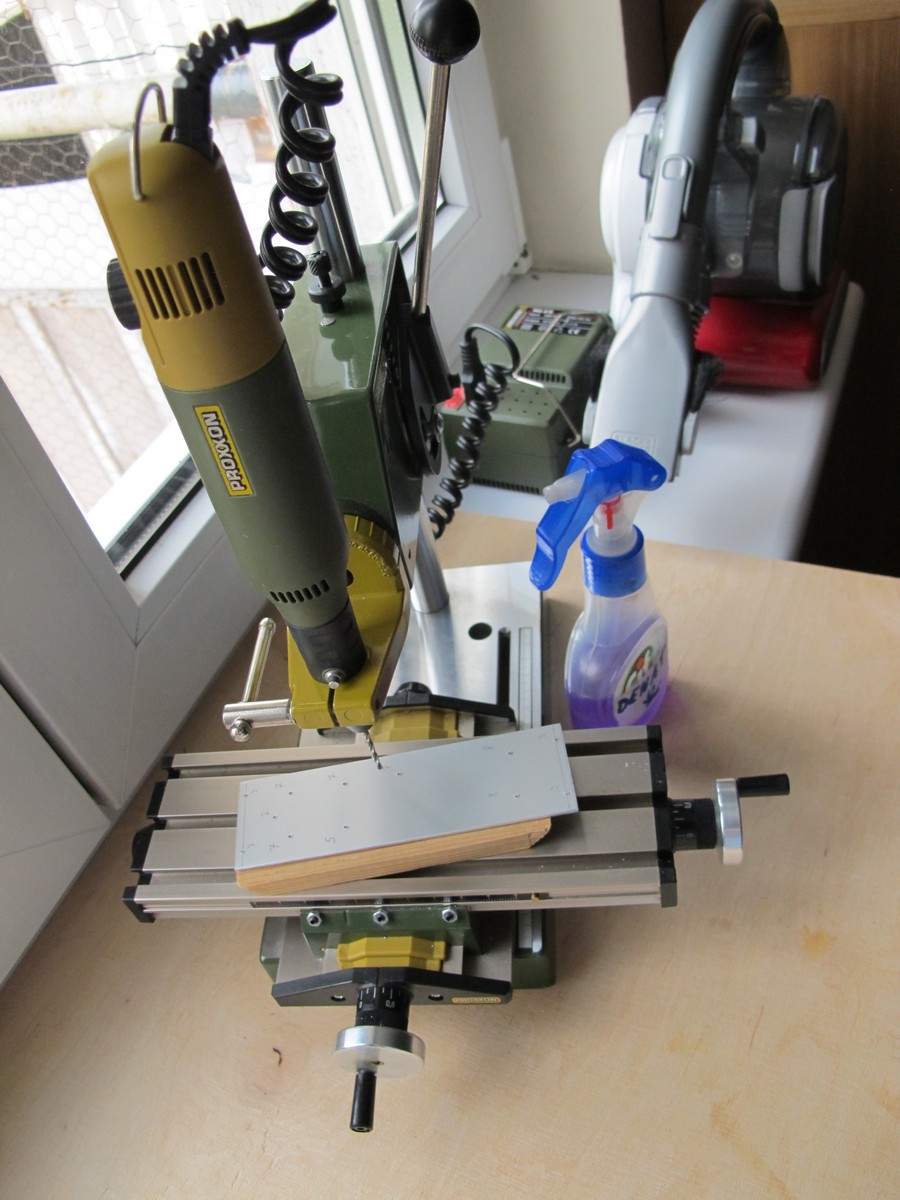
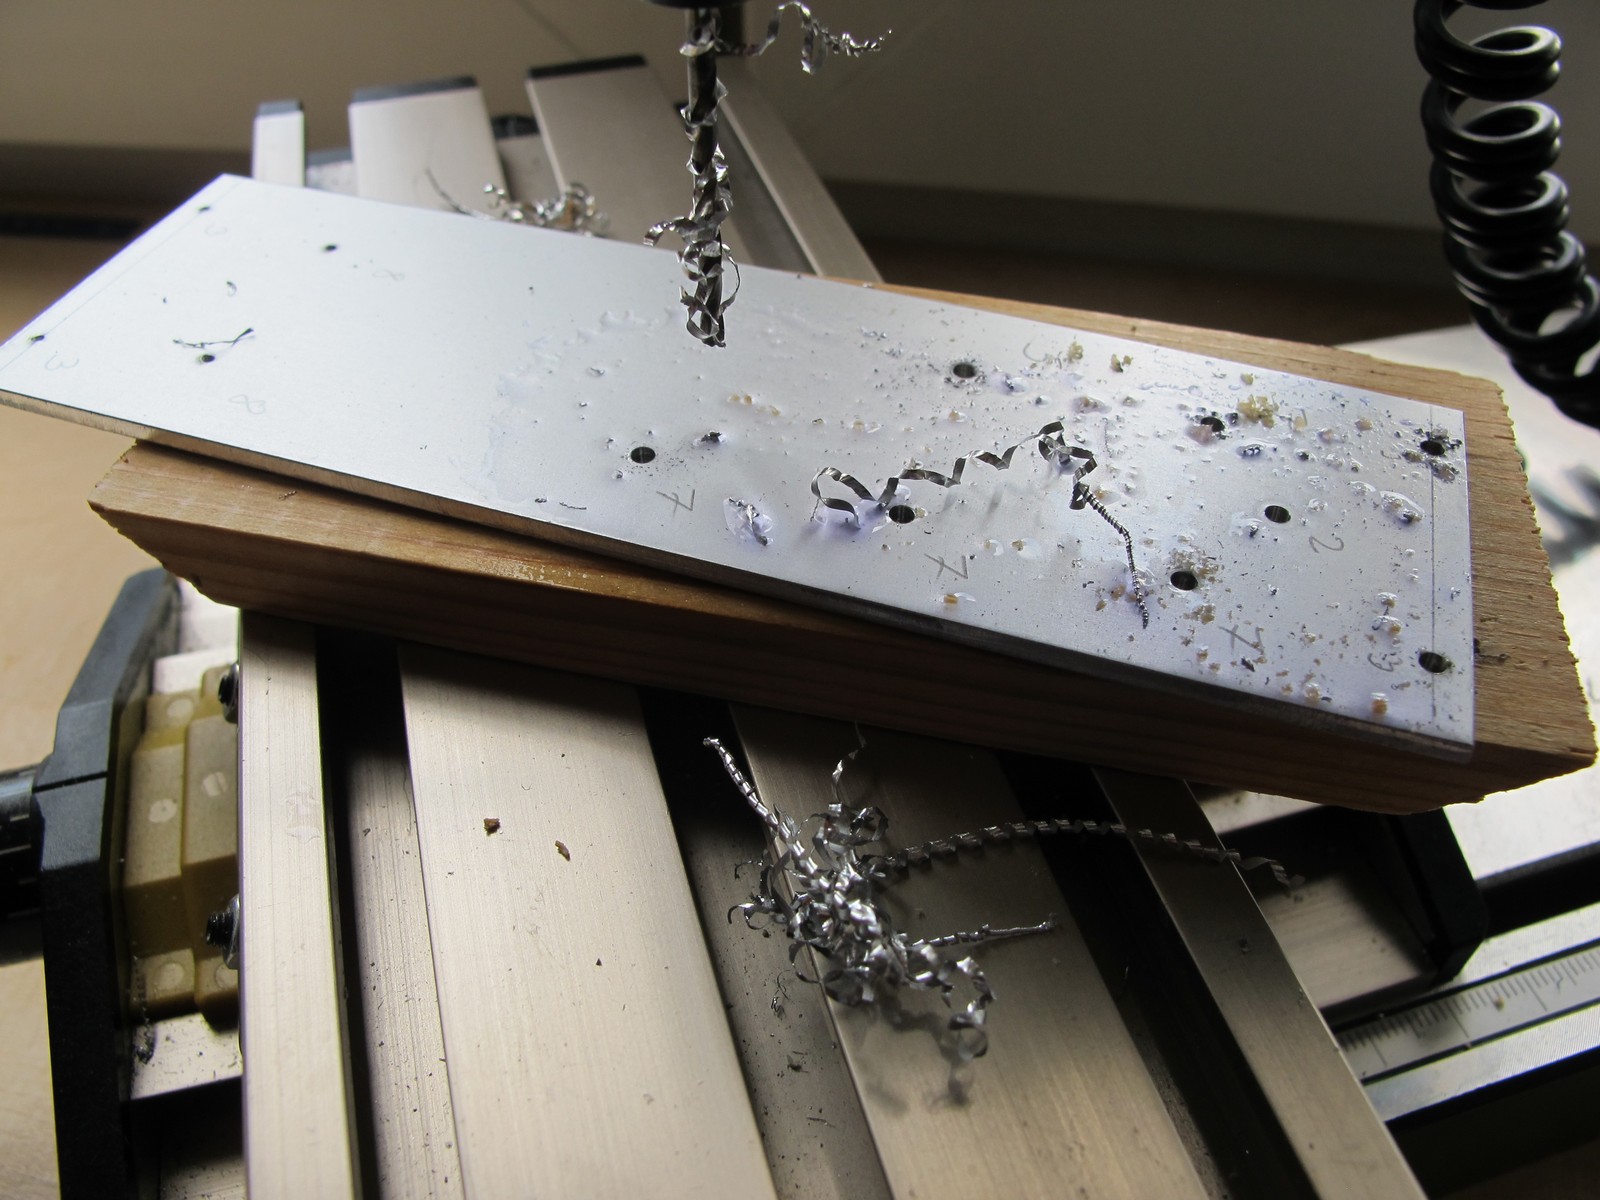
I almost always start with small 2 mm holes, mostly because I use 2 mm LEDs. It is the only drill stand I own, also every hole over 3 mm is a problem for Proxxon Micromot 50. Usually I use denaturated alcohol in a sprayer as a lubricant. The vacuum cleaner is also very helpful, a lot of aluminum pieces will be flying in the air in few minutes.
The job is nearly finished. Don’t care about purple stains, you can clean them easily with alcohol (fight alcohol with alcohol!)
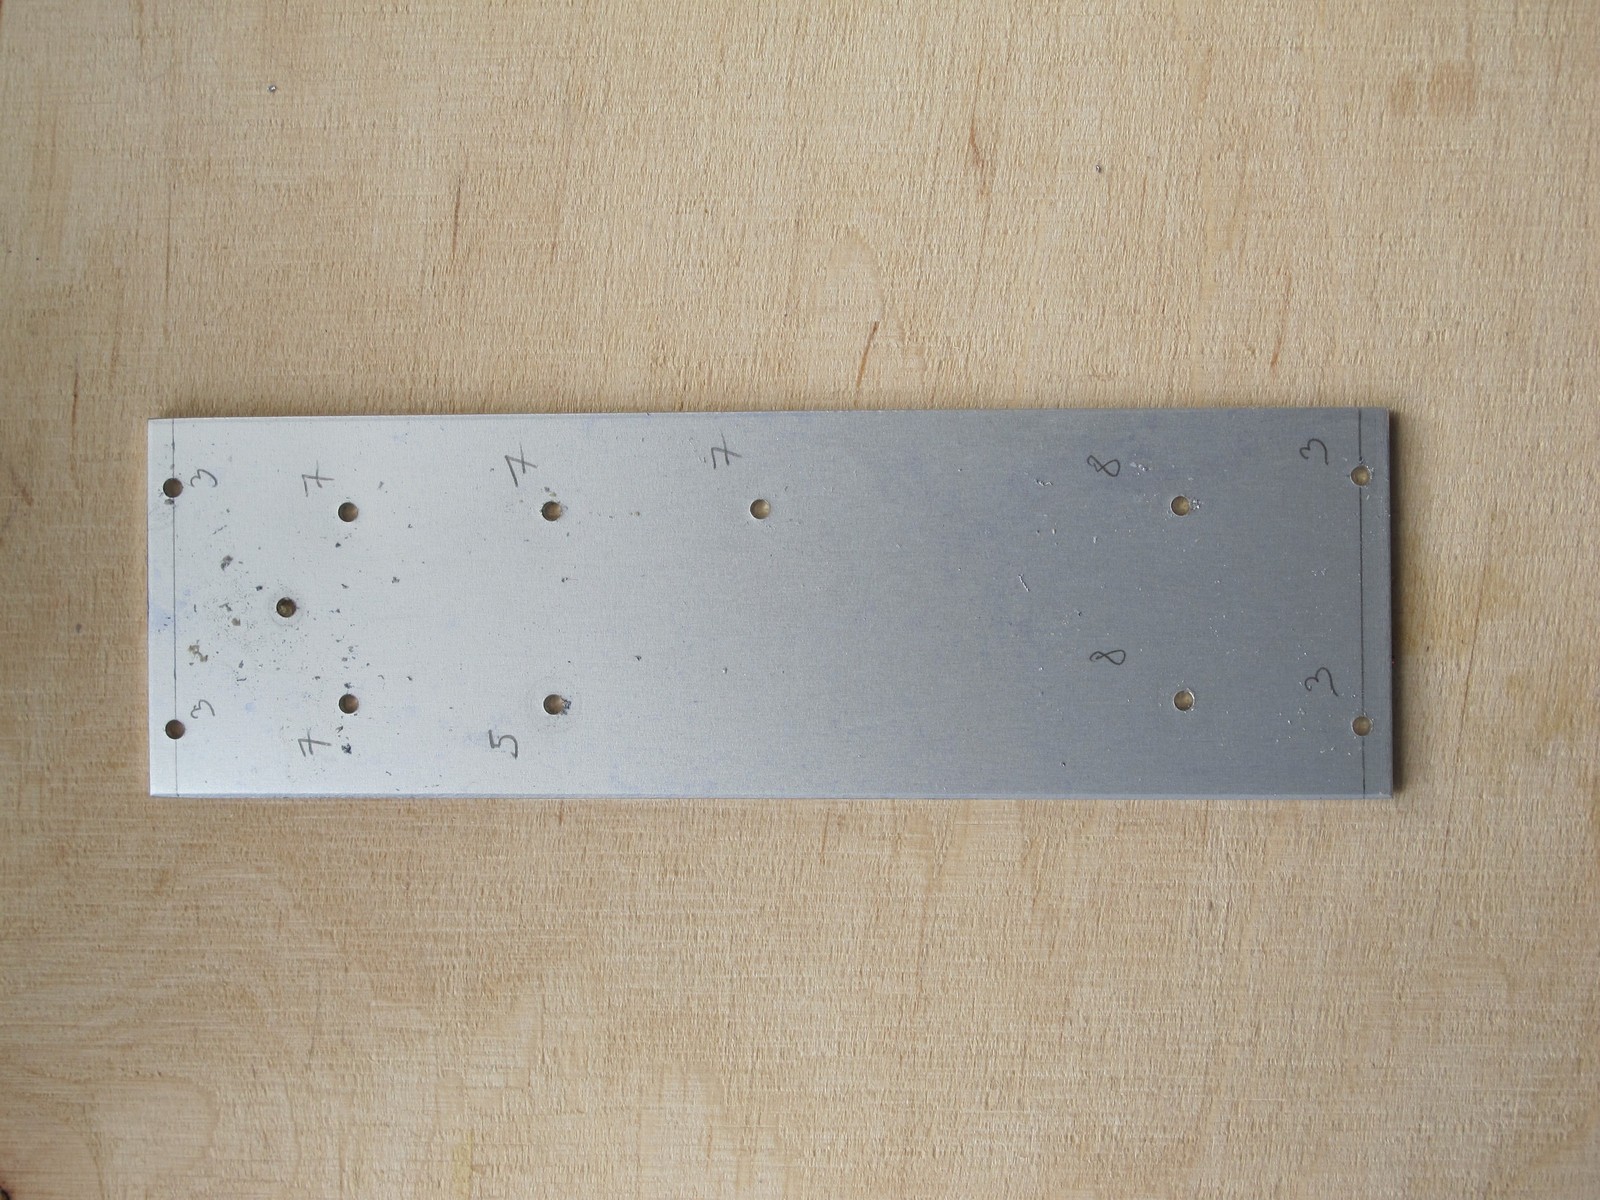
After a first drilling iteration, the panel looks like this. All holes have 2 mm (like the smallest LED), so I’m shure there is no error yet.
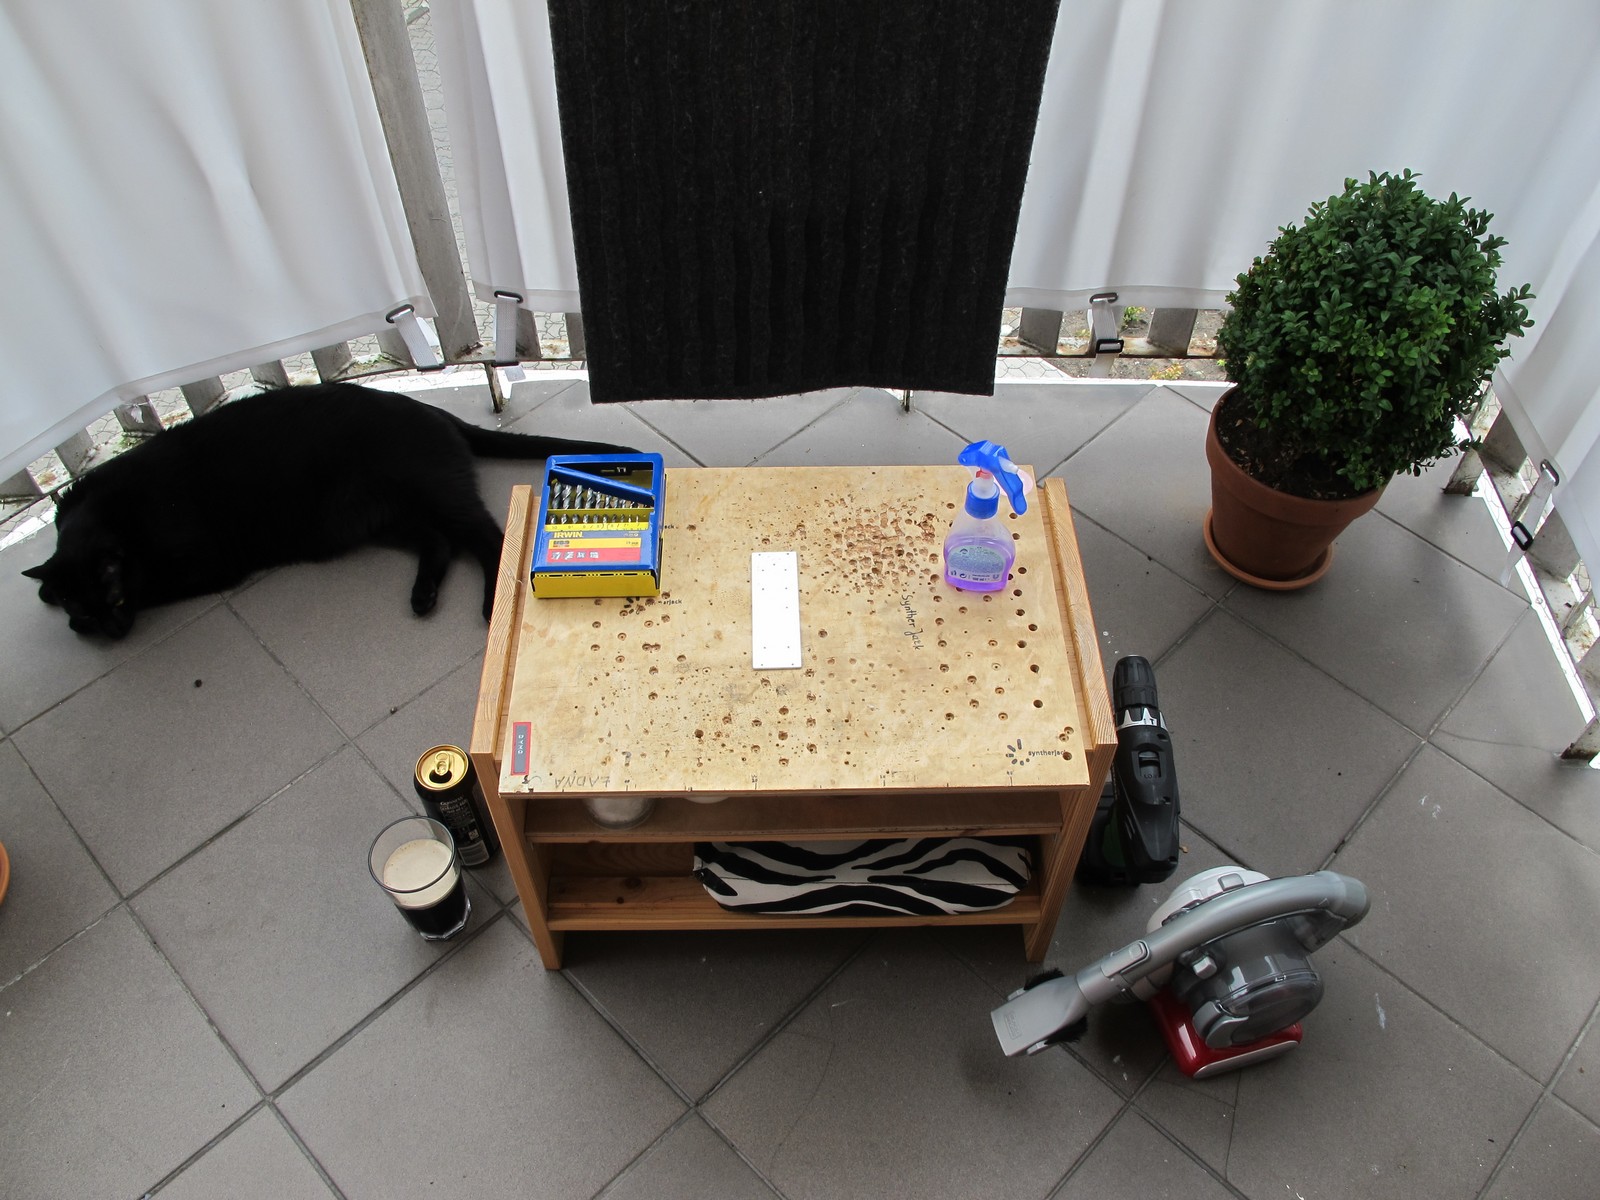
This is my improvised balcony workshop. I use my old IKEA Rast eurorack case with some old, 10 mm plywood on the top. The drill is Hitachi DV18DCL2 – I love it for high torque at small rev. As you see, I don’t have any vise – I just hold a panel with hand using thick, protective glove. This can be dangerous, don’t use this method if you don’t believe in your hands strength.
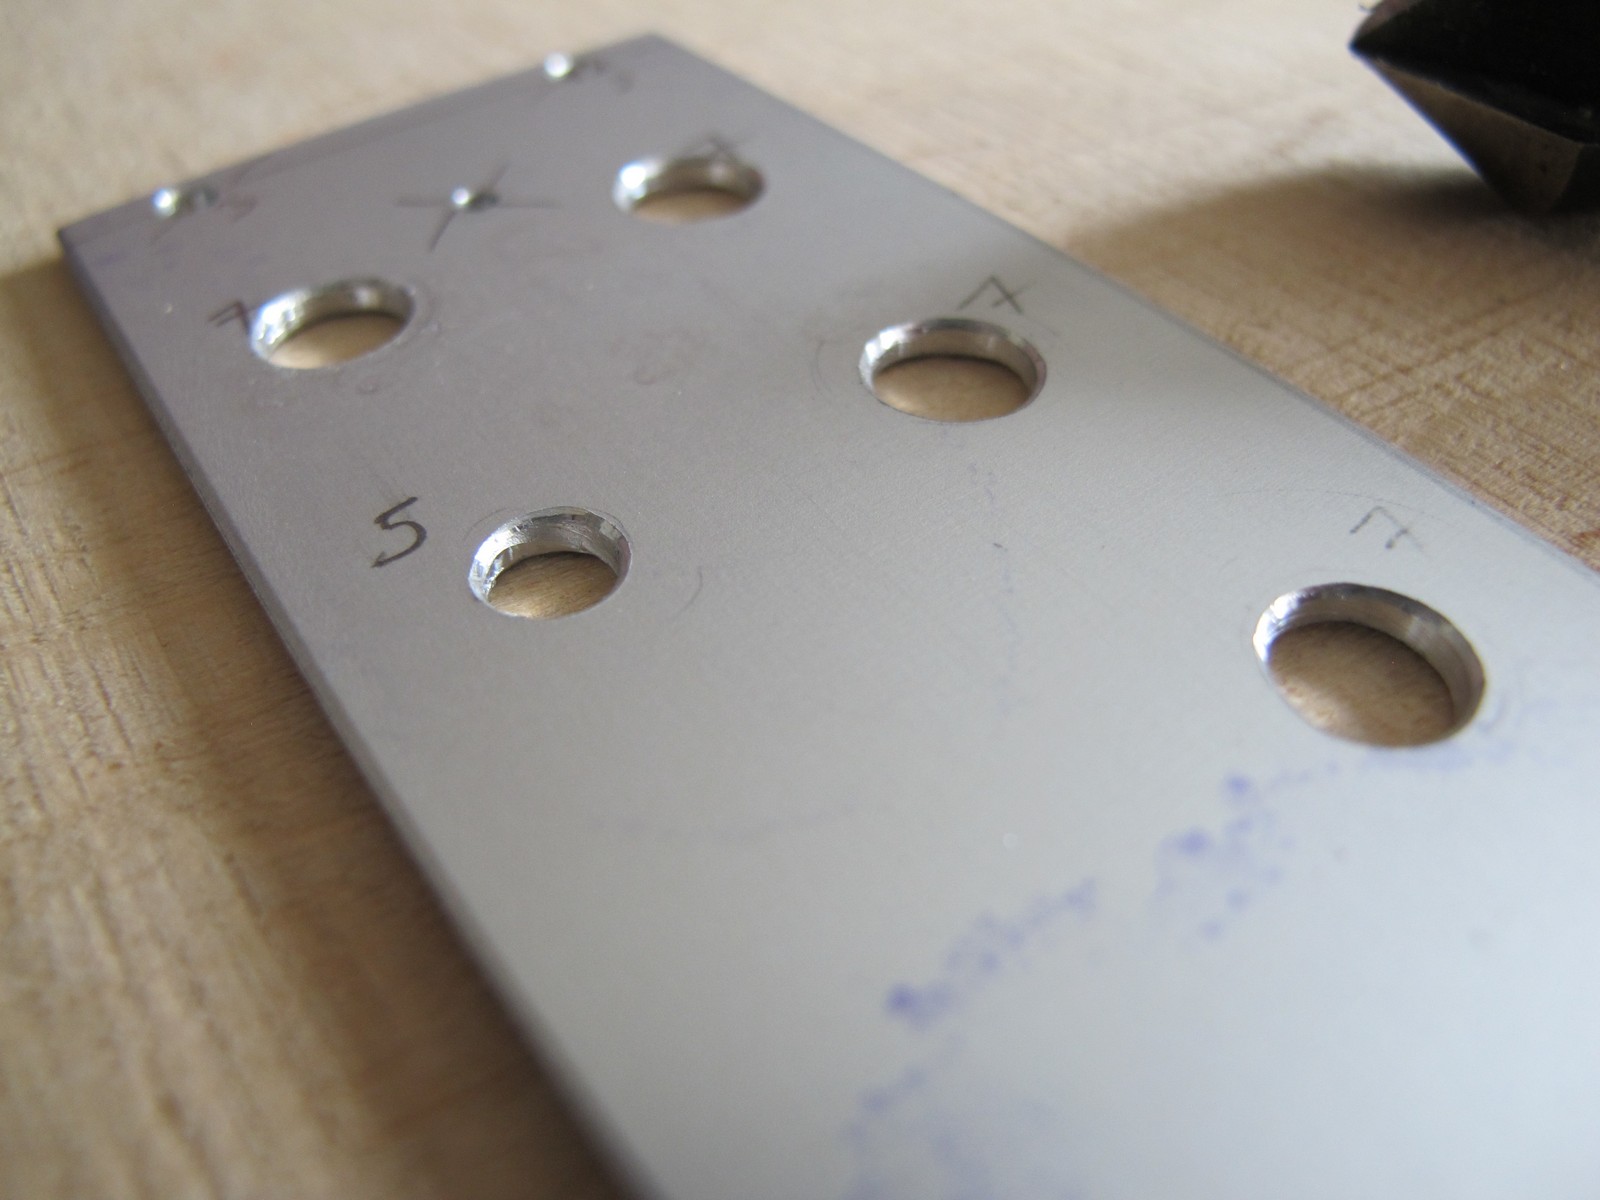
I start with 3 mm drill, reaming all holes with target diameter over 2 mm. The “finished” holes (here 2 and 3 mm) are marked with cross to not touch them by accident. Simple, but works for me.
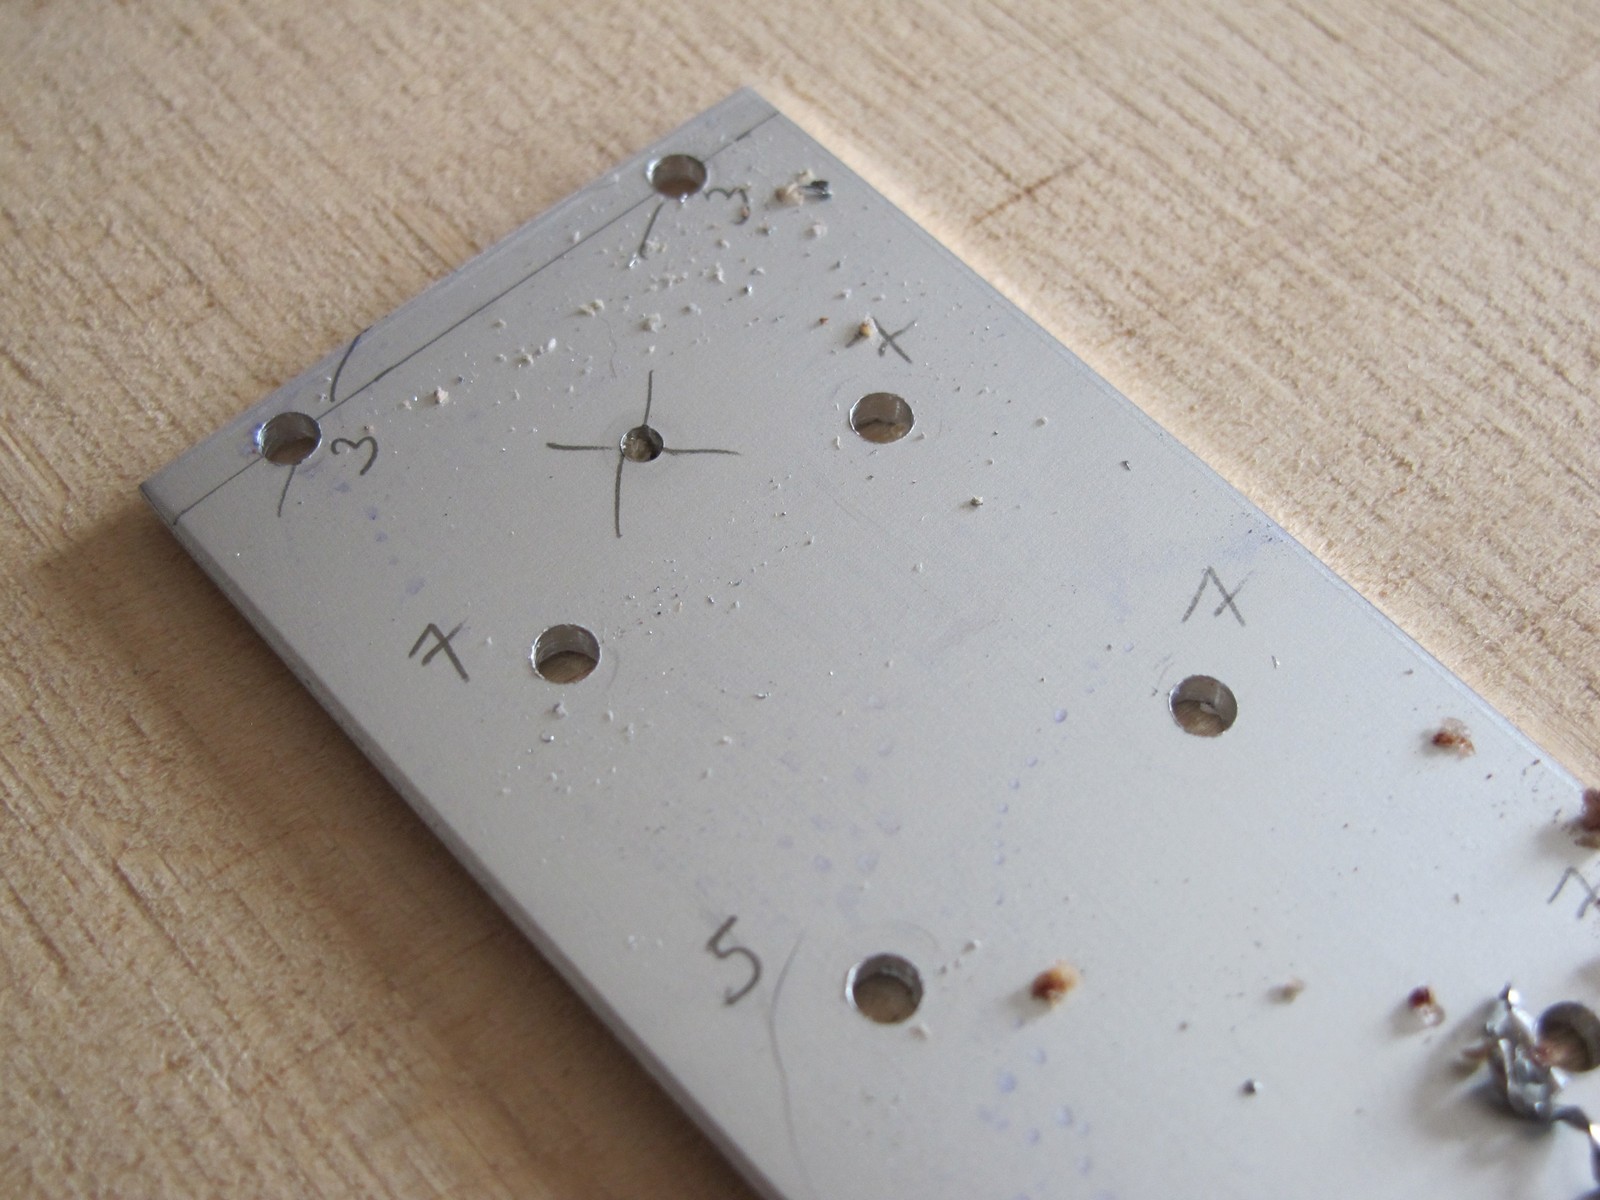
Then I use larger drills to get the designed hole size. If I drill f.e. from 3 to 7 mm, I try to use drills I don’t use too often (f.e. 5,5 mm) – I want to have sharp 5 mm drill for future jobs and not really care about 5,5 mm one. This way the panel is drilled, but hole edges are still nasty and need some love. It would be also resonable to try to fix all the parts (pots, jacks) to see if there are no errors.
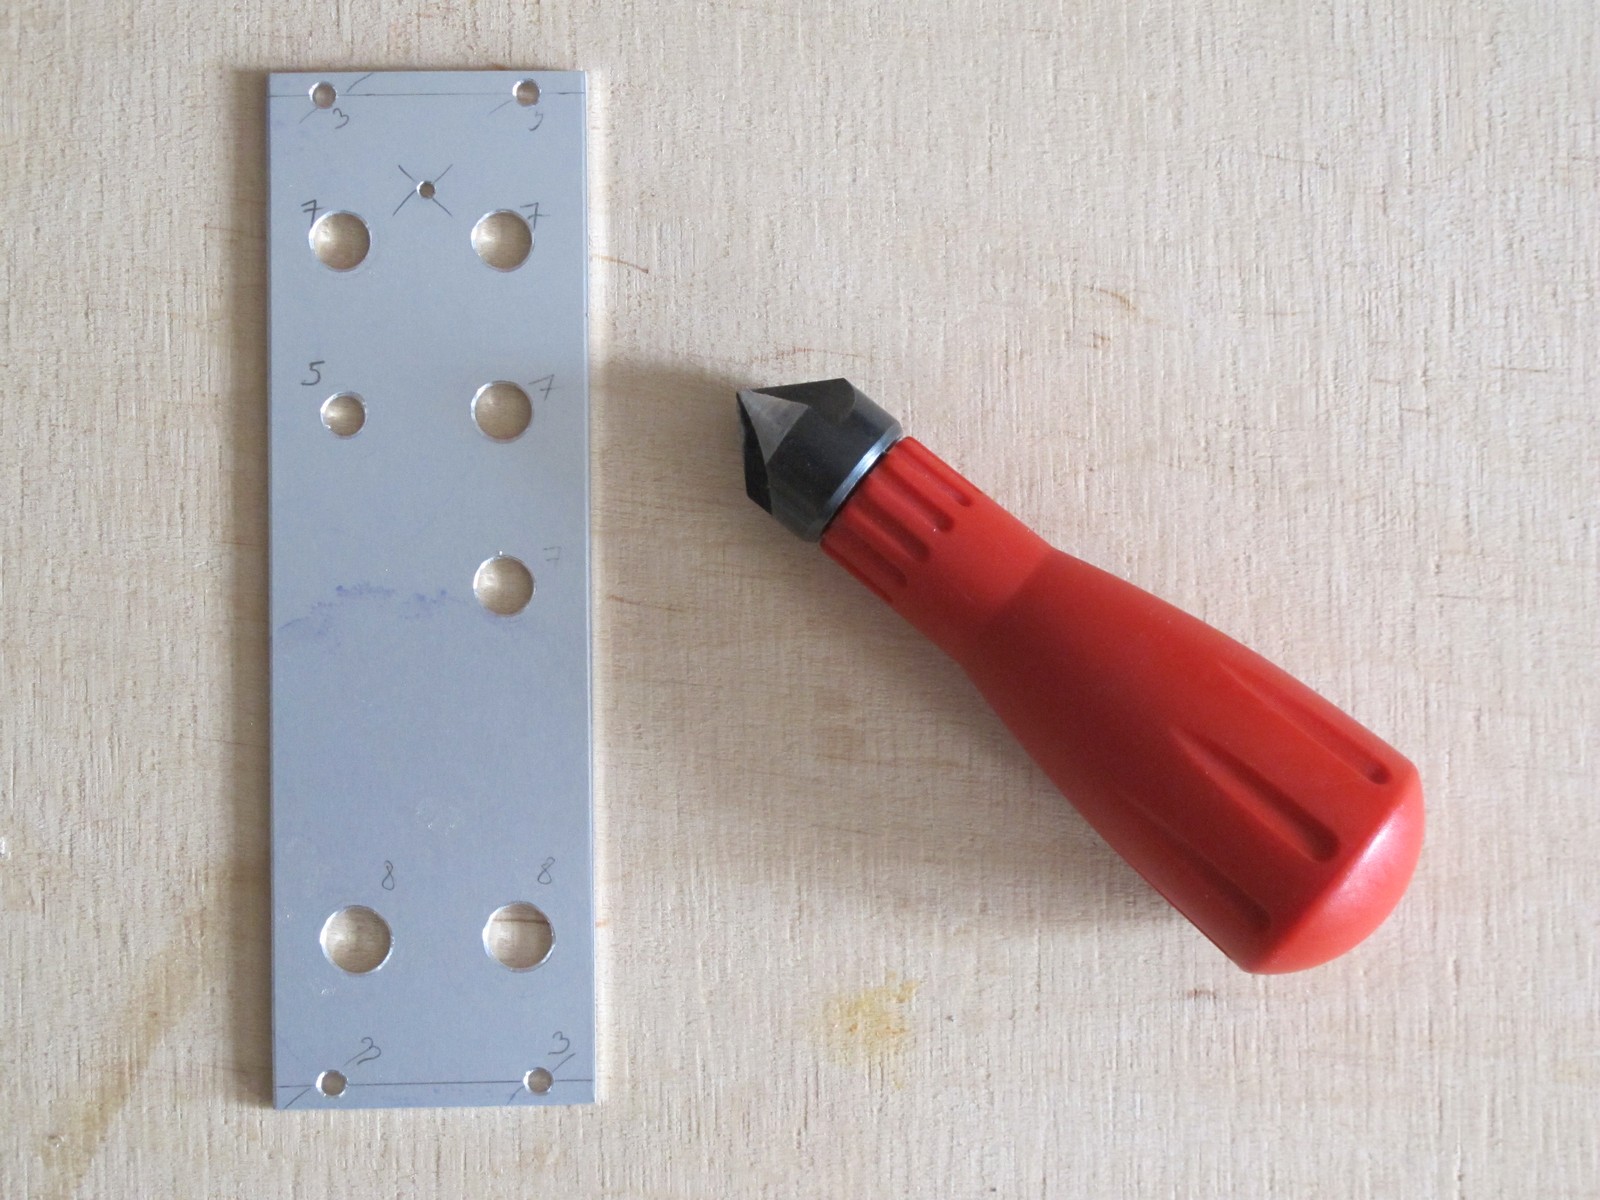
Reaming and cleaning
To get smooth hole edges I use small hand reamer . This step is especially relevant as I want to use waterslide decal for graphics. Any protruding pieces of aluminum will ruin it. The ramer is made by Wolfcraft and is really handy. Few twistes do the job.
The panel is nice, but dirty. Therefore I use alcohol to get rid of stains and pencil, then the hot water and cheapest dish soap. Some more expensive has hand protective oils that will cause water decal to come away. Cheapest don’t.
After few minutes of cleaning you can enjoy your perfect front panel, without any graphic yet. All edges should be smooth, you can check it with the tip of your finger.
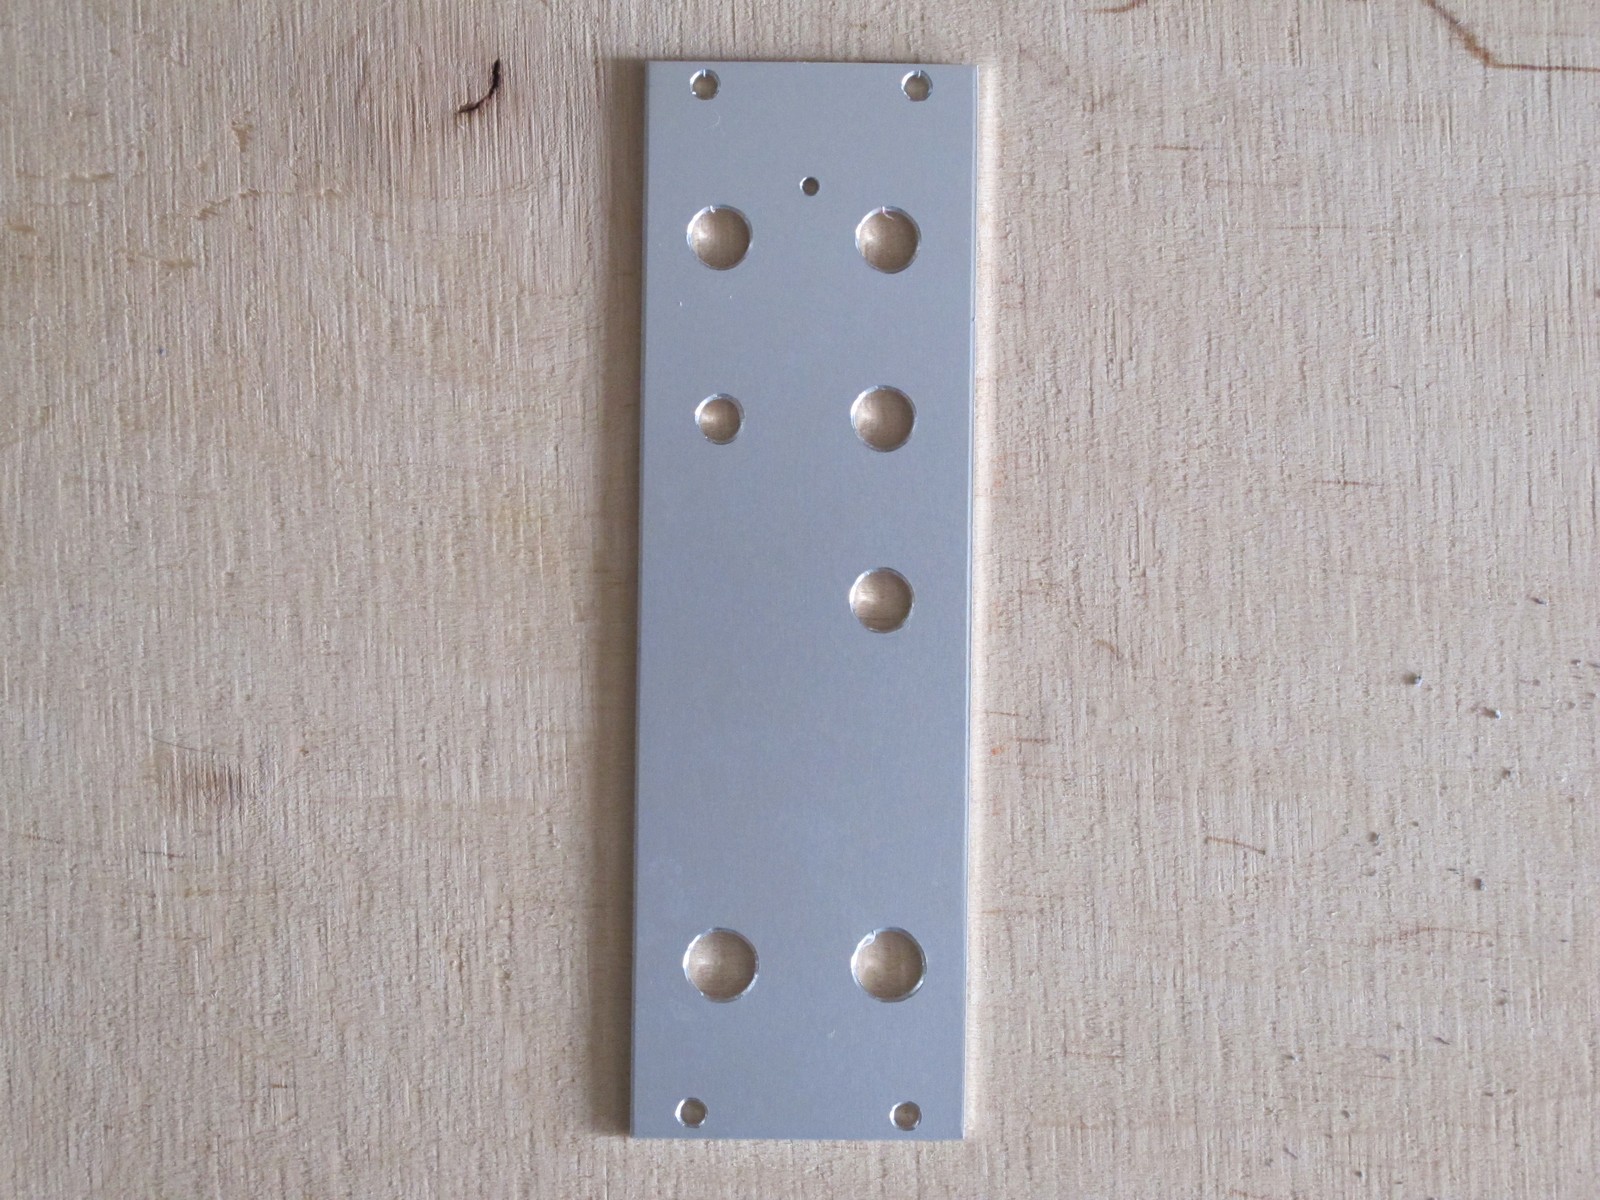
Described method is time consuming (it took about 1 hour), but the results are very good for a hand work, mostly without drill stand. The key is patience. In the next part I will discuss the graphic placement with water decal method.
Cheers
Jack
Great Article, thank you !
Keep posting articles like this one! great work!
Hi, great tutorial, if you didn’t, could you make one for plywood panels? That would be great!
You mean something similar to Bastl modules 🙂 I don’t like drilling in plywood, if I have something small to make, I just ousource it. Laser cutting with 3 mm plywood included costs below 1,5 euro/meter. Cheers!
It was a real pain for me to get proper punches on the panel, without any tiny offset that would be very big after the drilling. Especially when there are a lot of jacks or pots aligned.
Now I m using a magnifier to help me to make it perfect but it is really a pain.
Did you experienced the same thing ? Am I missing something ?
Great tutorial! There is one small issue with the drilling holes. According to de Doepfer instructions the holes on the left side should be 7,5 mm from the side and the right hole should be on a horizontal distance equal to N*5,08 mm. In your 8HP front panel this will result in a distance of 40.3-(7.5+5.08*(8-3)) = 7,4 mm from the right side in stead of 7.5 mm. This may sound like an insignificant ground for arguing but it can get quite annoying if the pannels are just not fitting. Most makers use horizontal wider holes to overcome this i guess, but that is much more difficult to realize with a normal drill.
All the best,
Hans