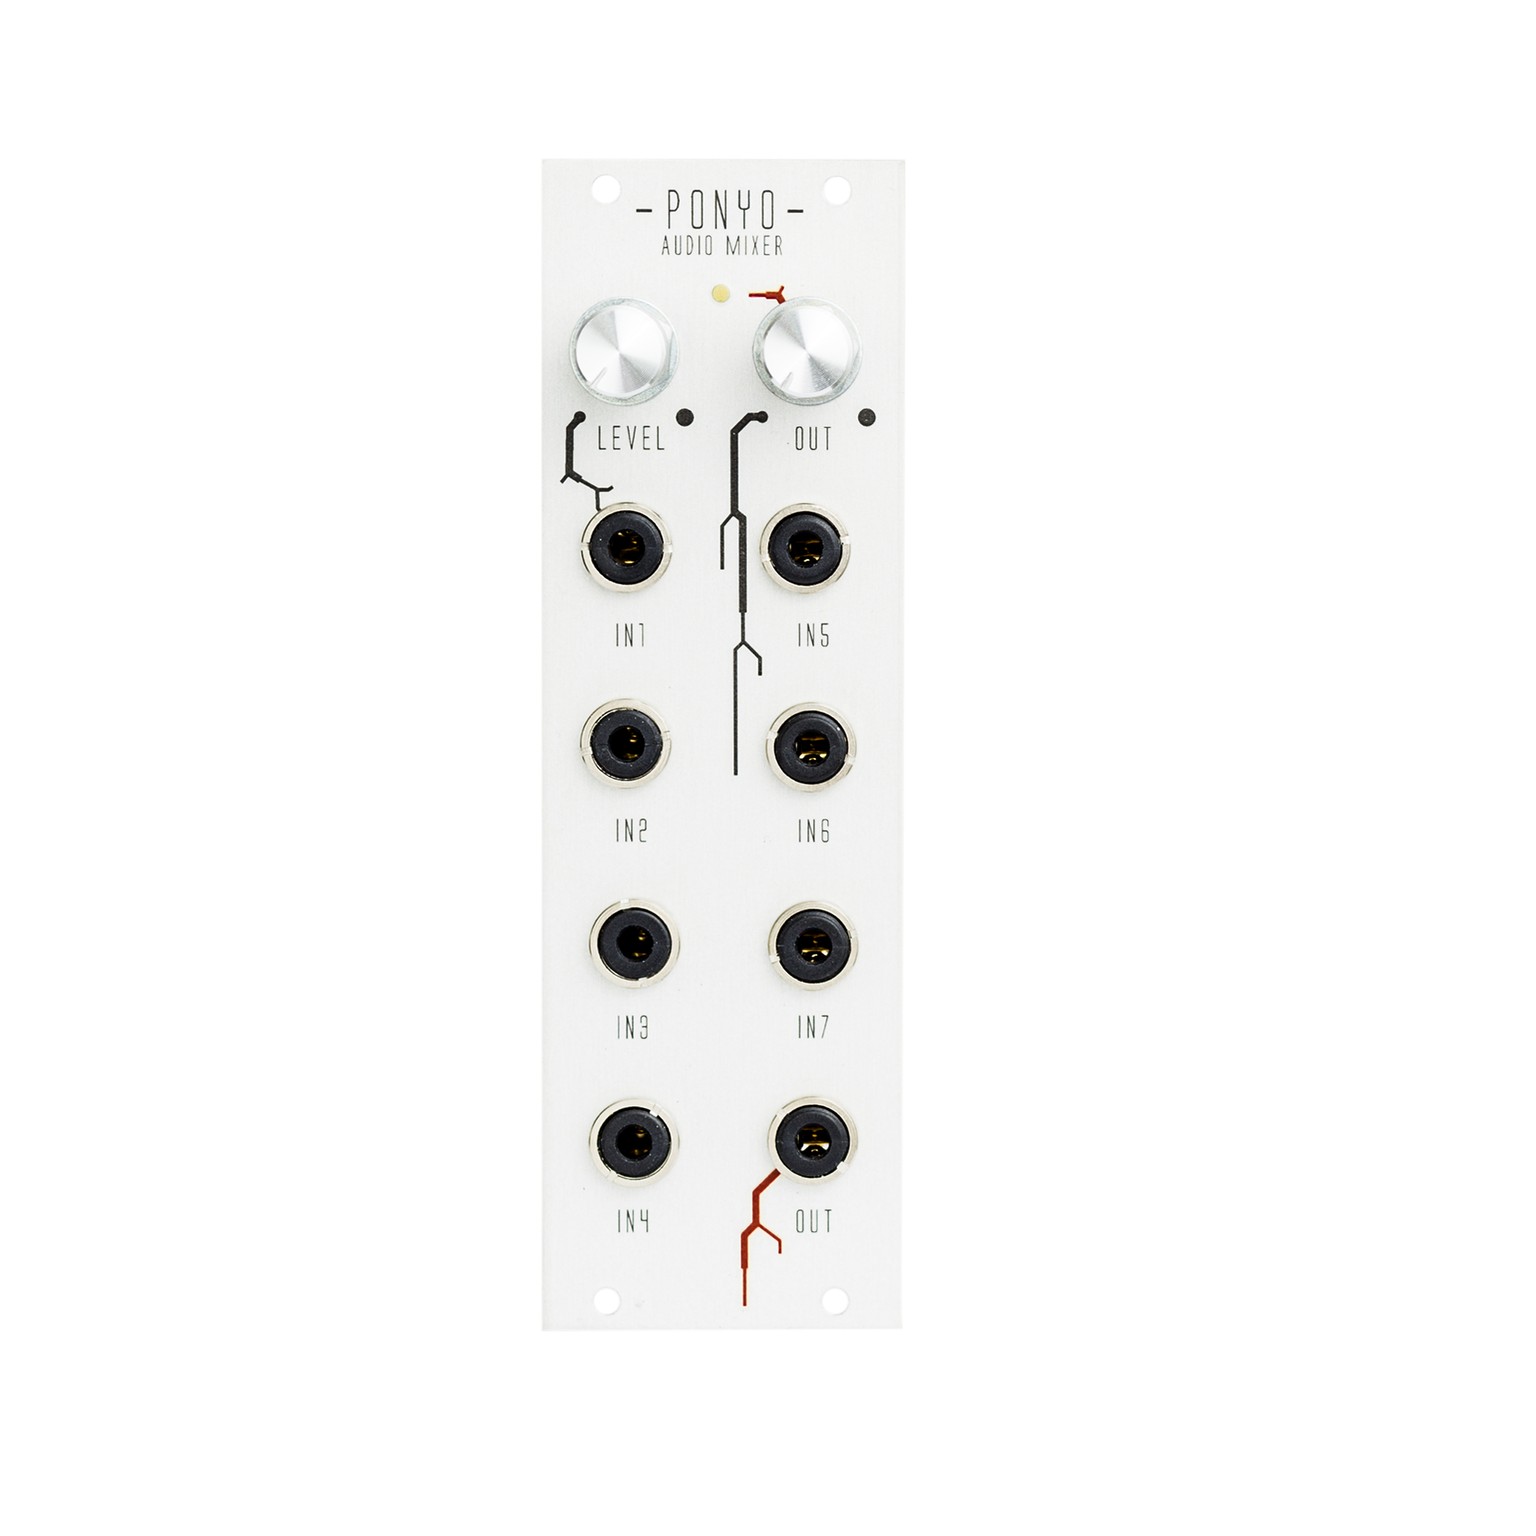
Every source needs an outlet. After I build about 10 drum modules, it was time to connect them and make some sounds. The requirements for my first eurorack audio mixer were simple:
- a lot of inputs without level control,
- some amplified inputs with level control for low output drum modules,
- output with level adjustment,
- output level indicator LED.
Schematics & PCB
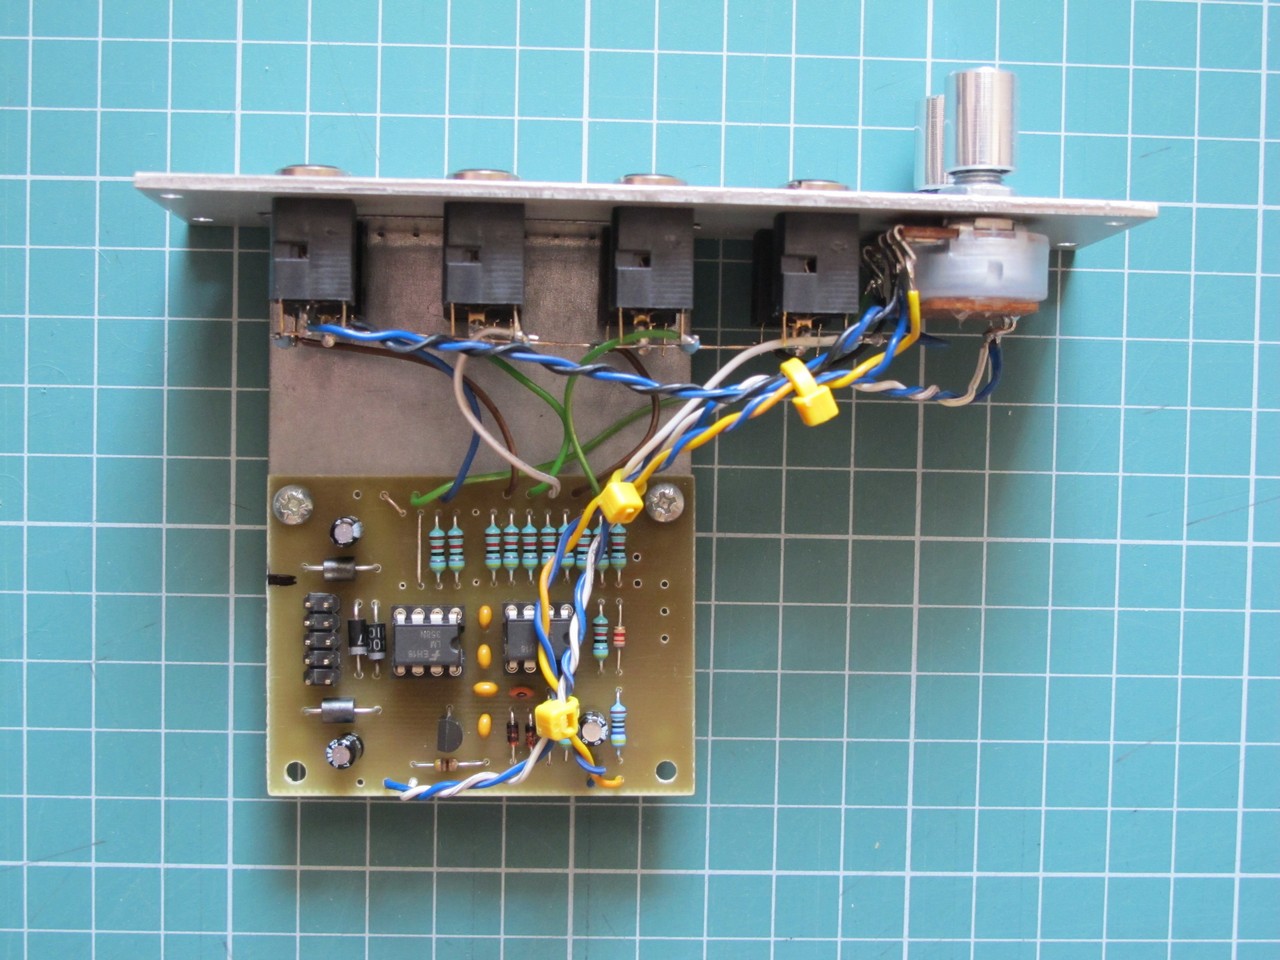
I checked a lot of mixer schematics and designed one that suited my needs. Finally I decided to include six no-amplified inputs and two with level control with maximum amplification of 2x. I used only one amplified in Ponyo because of limited space – I wanted to build two units anyway.
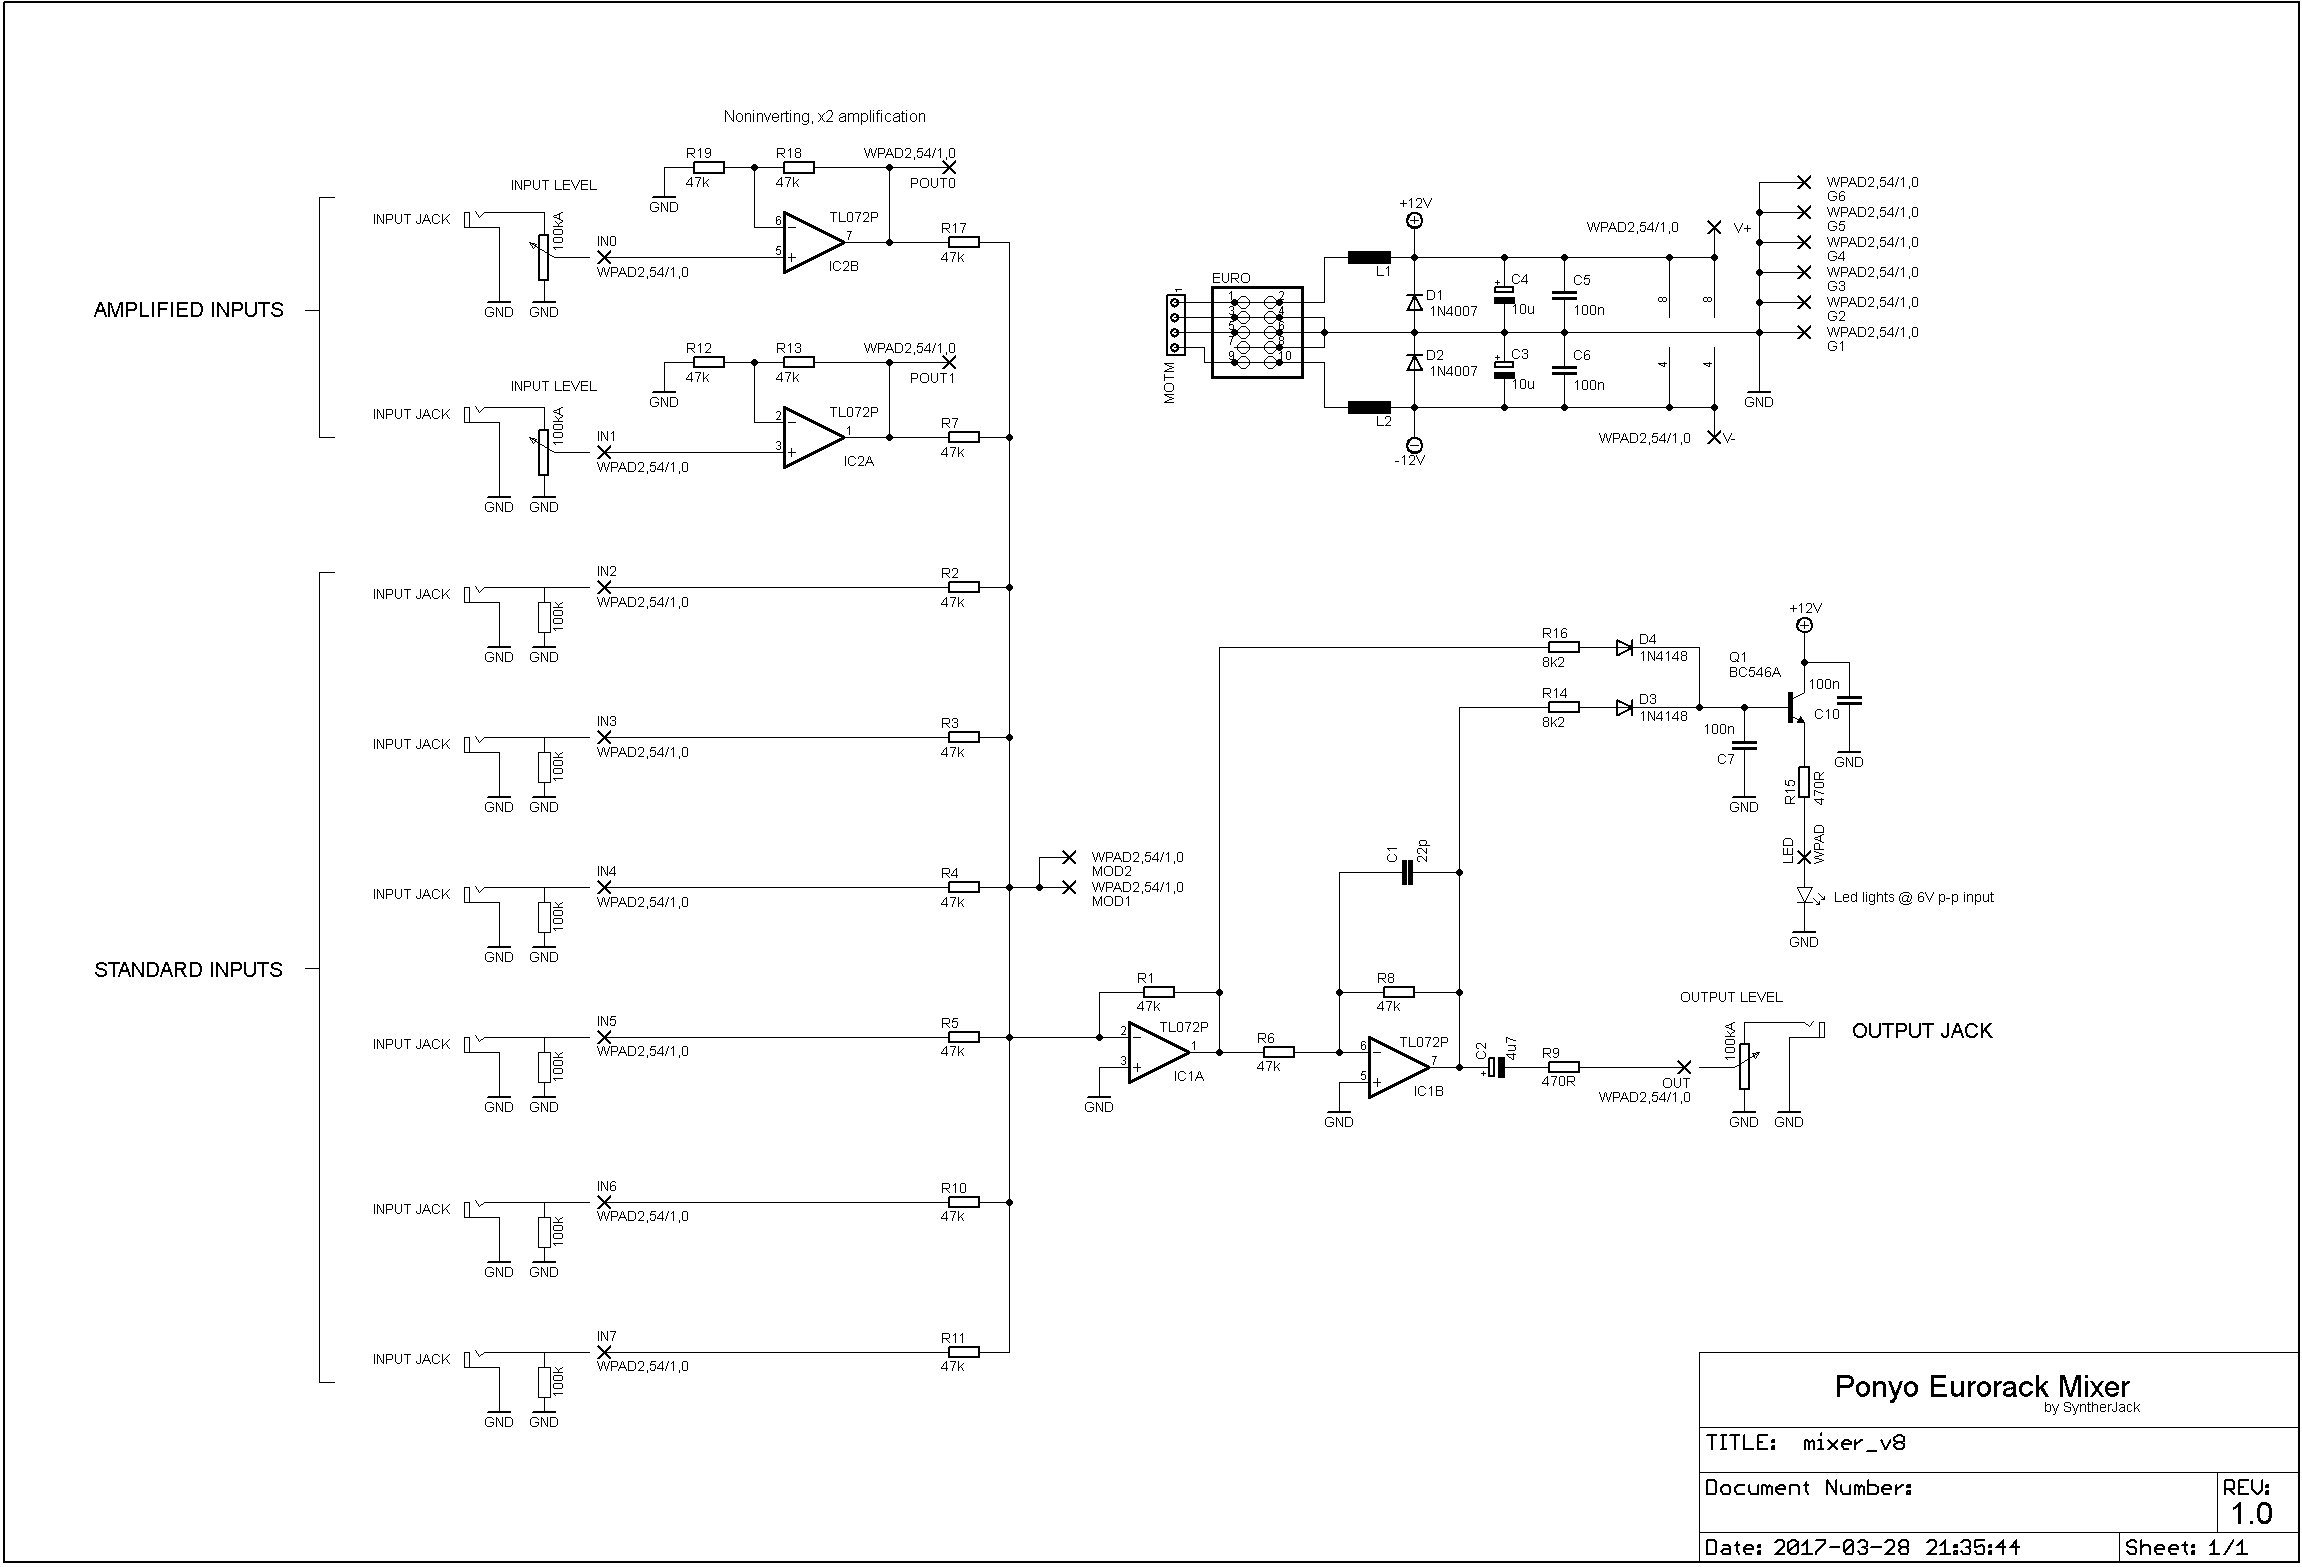
The circuit is build around standard mixer circuit (IC1A) and additional inverter (IC1B) to keep input signal non-inverted. The amplification of mixing stage is equal to one. A simple LED driving circuit gives some information about presence of output signal – a very handy feature. R15 is 470R to give LED current ~20 mA, but you can make it greater (f.e. 1 – 2k) to make module more power efficient. Synths primary goal is to make sound, not to blink. Two mod points (MOD1 and MOD2) near IC1A input let you add more inputs, just with two resistors and a jack socket. The power connector is standard eurorack 2×5 raster pin header, but you can also use 4-pin MOTM. The device accepts +/- 12 and 15 V power supplies.
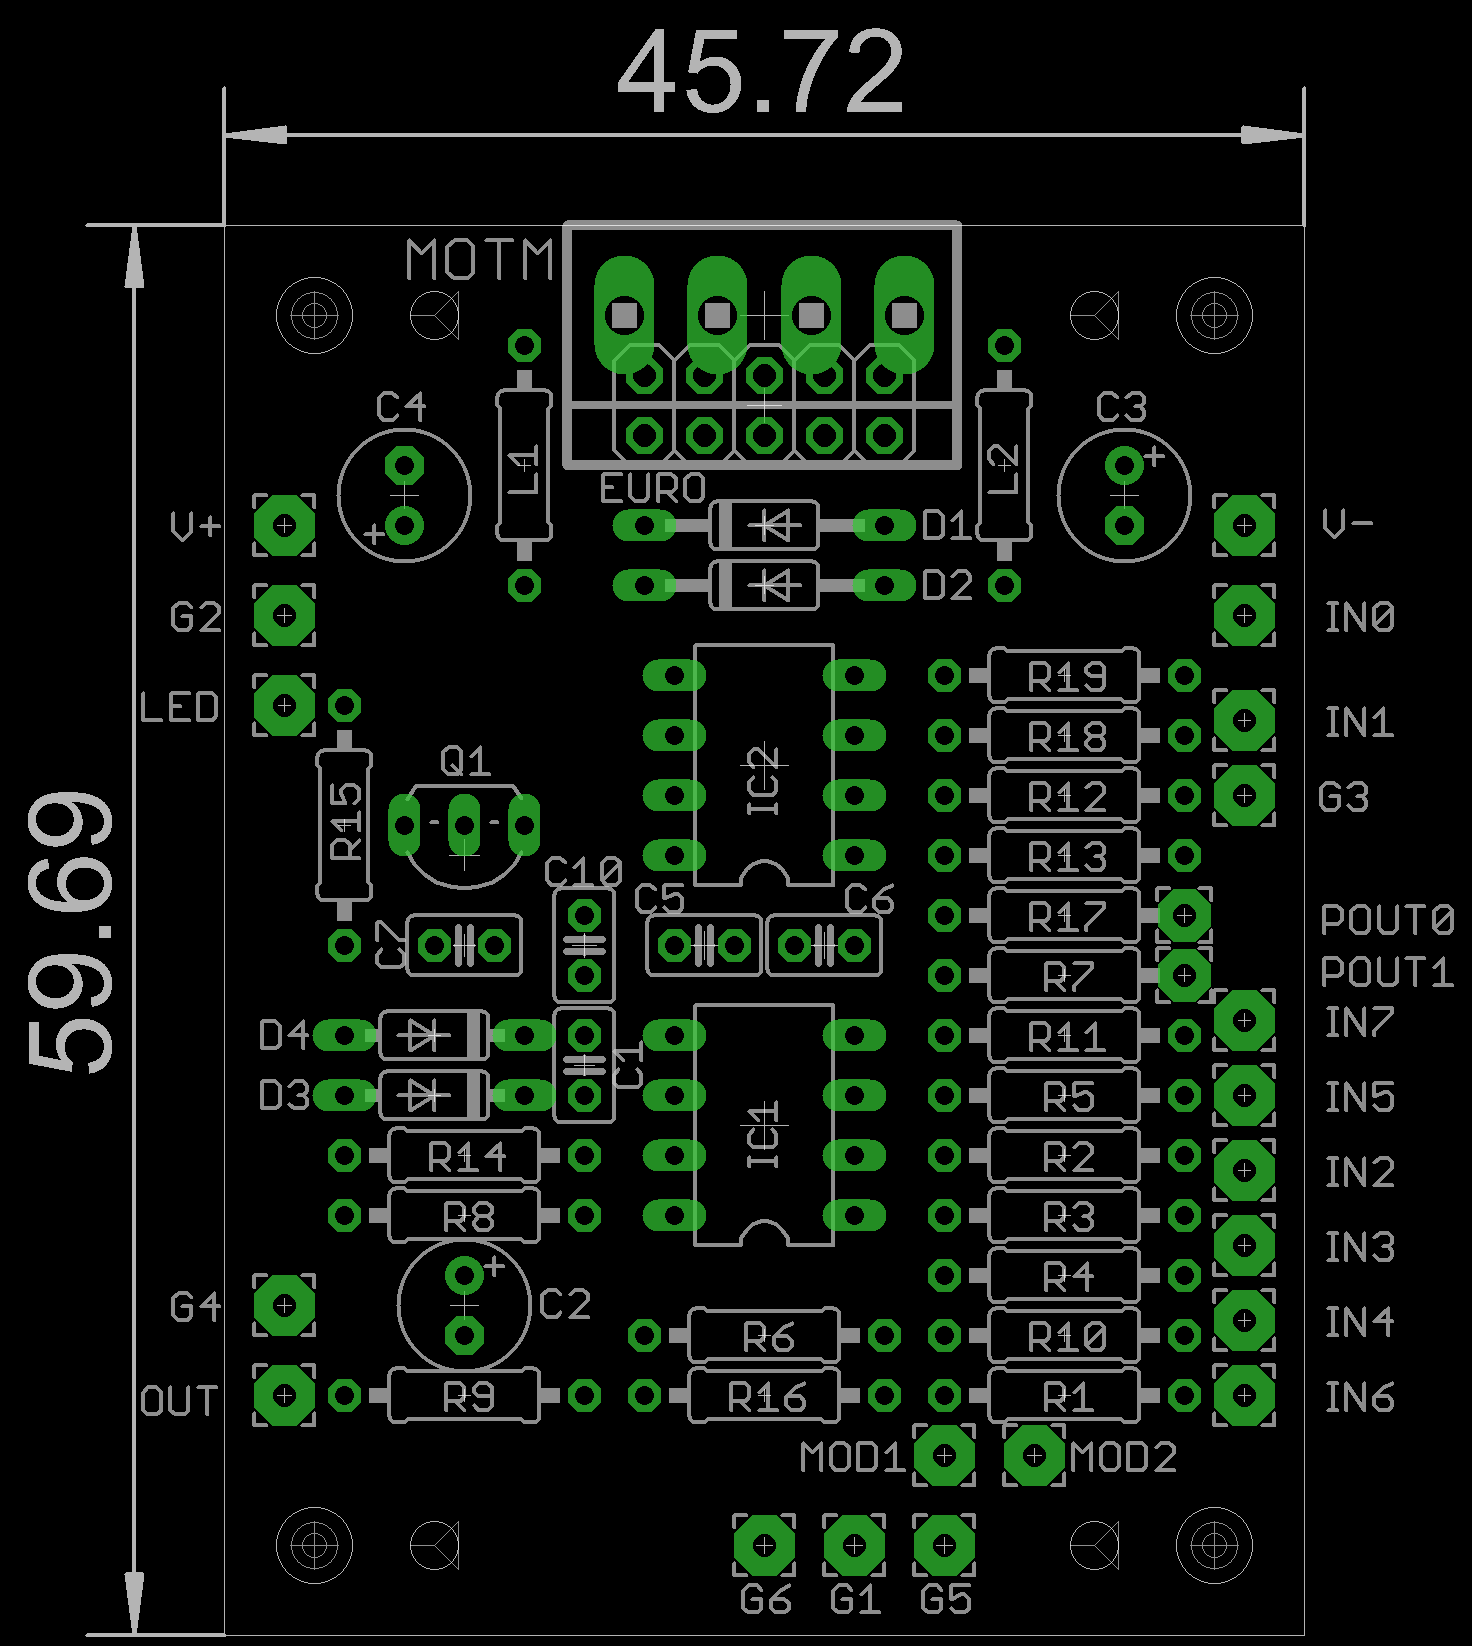
The PCB size is around 46 x 60 mm. The printable version (standard and mirrored) of layout along with BOM can be found as attachment.
The build
Not all components were used in my build. As I needed only one amplified input, IC2B is terminated – R18 is shorted, R17 and R19 not used and pin 5 of IC2 connected to ground. For the opamps I’ve chosen generic TL072 – cheap and low-noise. Pots are Alpha Taiwan I bought from Tayda Electronics. All audio path resistors are 1% tolerance metallized.
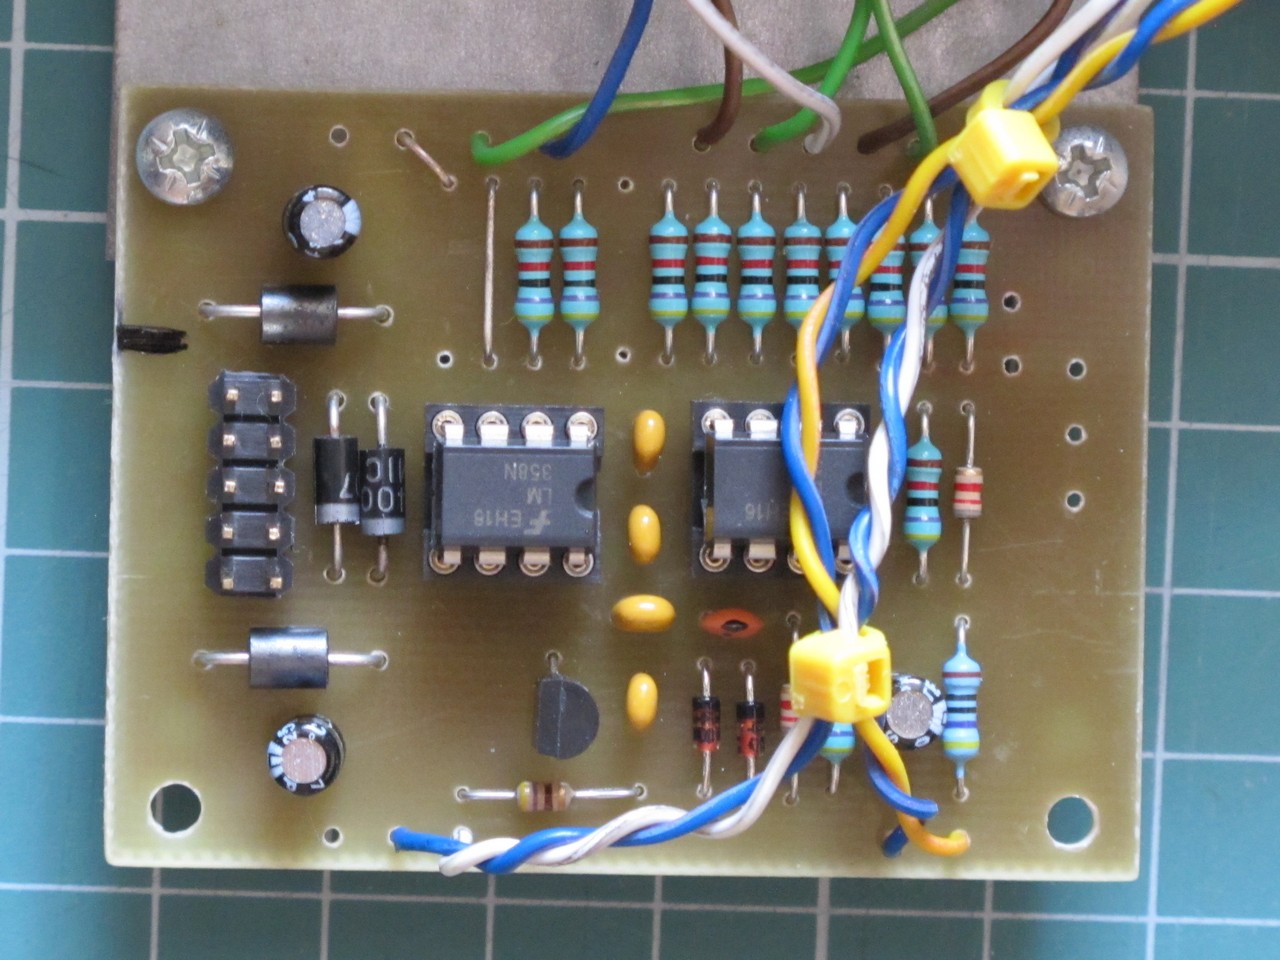
I mounted bended aluminum sheet under the jack socket shich acts as a holder for PCB – this way front panel has no visible screws and looks very clean. Finally I’ve connected the grounds between jacks (and 100k resistors) with uninsulated wire (It is faster to solder uninsulated one, but no one is stopping you from testing other methods).
I have disigned the front panel in Inkscape, then printed on water decal, protected with transparent acrylic paint and put on 2 mm, 8 HP aluminum sheet. Some may say it is a waste of space – only 8 jacks in 8 HP, while some designers are able to put those in 2 HP. My answer is: I am not a hamster, but an adult human.
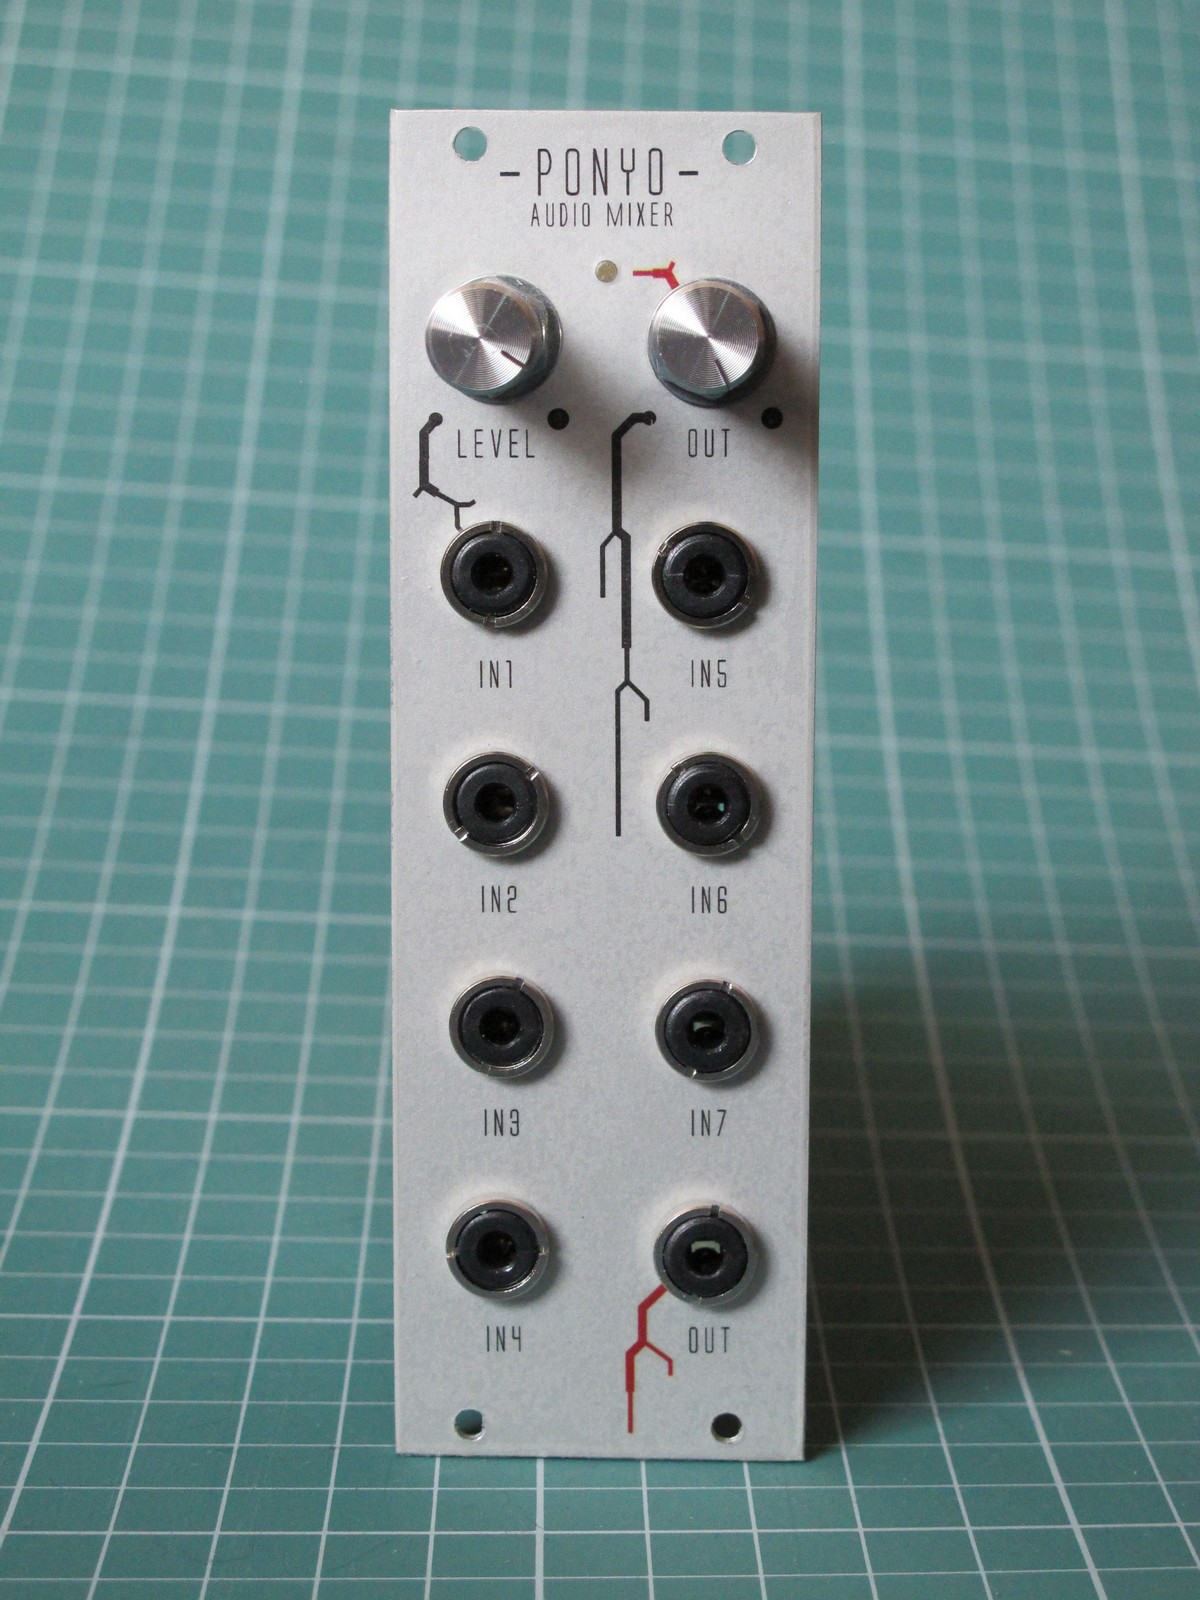
I have tested this eurorack audio mixer in my small system and it works fine. It is not as universal as other designs, but meets my drum eurorack modular needs very well.
Cheers
Jack
amazing minimalistic design, I like it!
glad you’re not a hamster, sometimes there is so much focus on minimizing sizes that it goes at the expense of ergonomics & the totality of the modular system
great little mixer! i would love to build one myself — could you by any chance share the eagle schematics? i am getting started milling PCBs on a small iModela CNC, and this would be a perfect project to try out – having the eagle files would simplify the process a lot!
Hello! IC2A 2 and 3 are reversed?