Some techniques described here may seem weird (or stupid), but all of them are based on my own experience. For last 4 years I made around 35 eurorack DIY panels for different kind of devices using water decals.
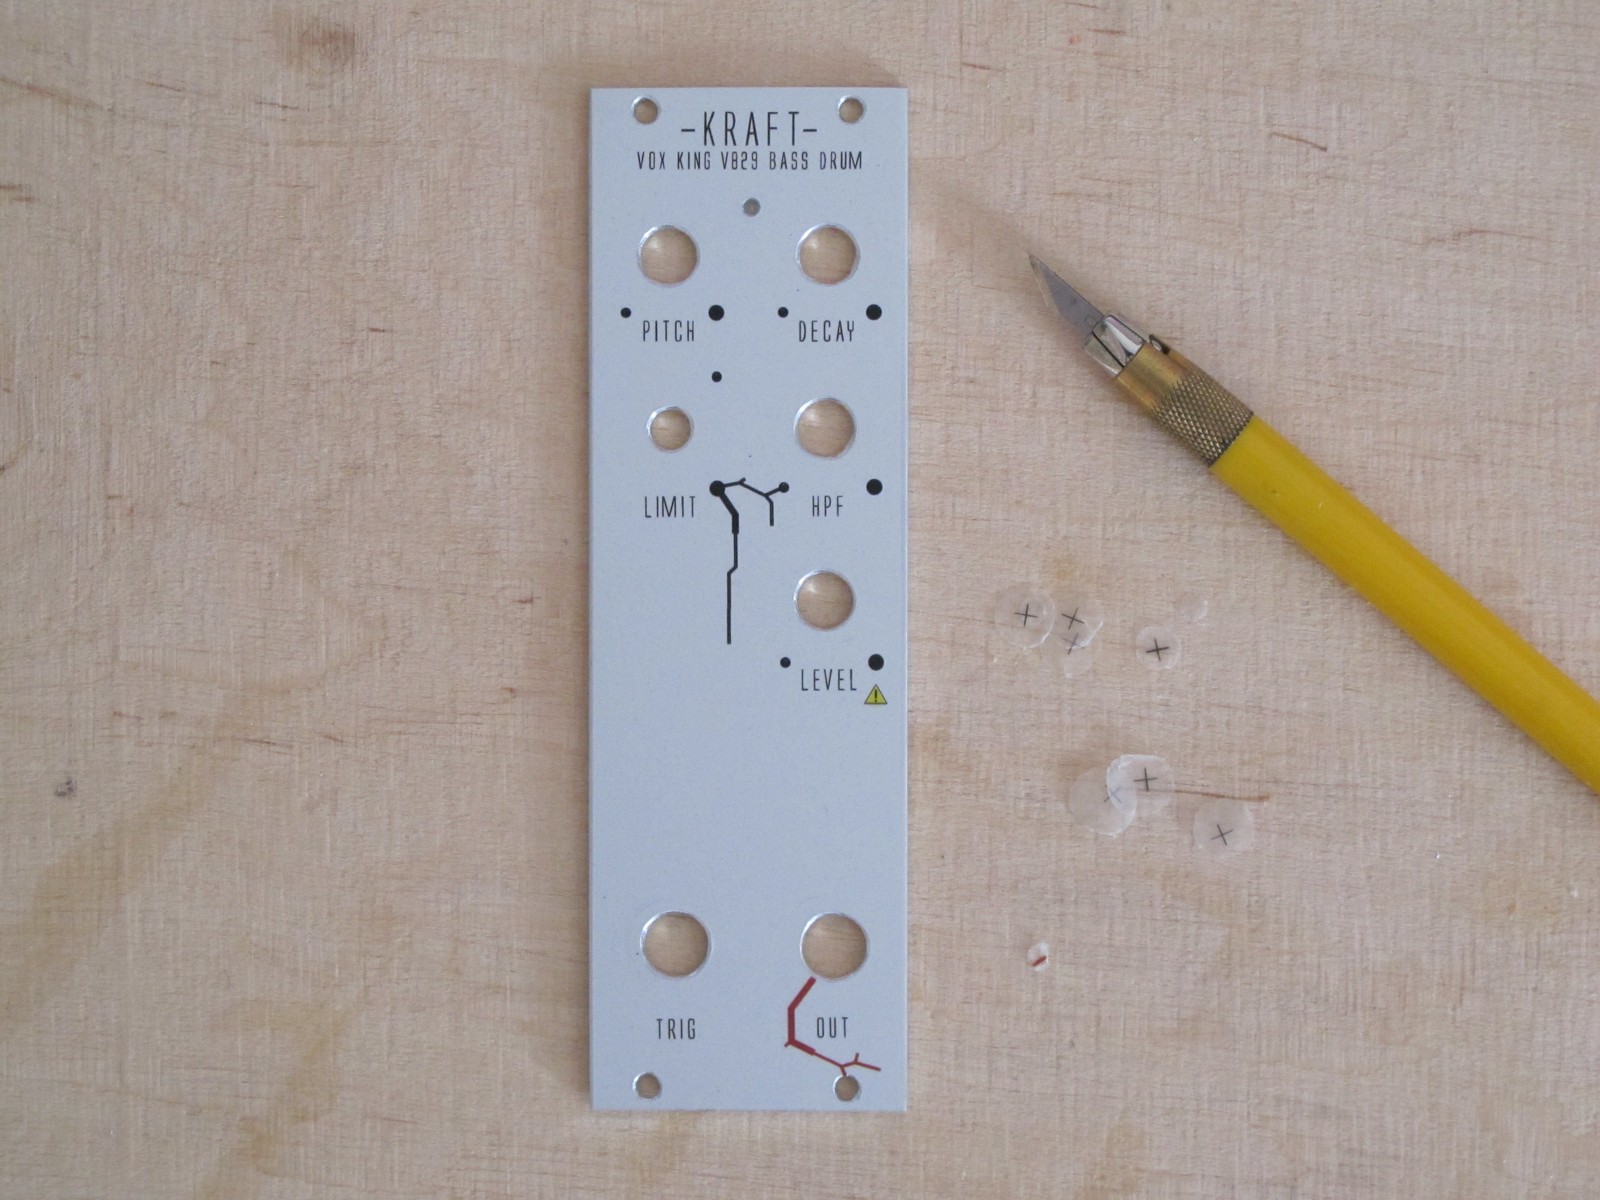
This is a part 2 of my eurorack DIY module building tutorial and it describes how to apply graphics on your blank panel. The previous part was mostly about drilling the holes in aluminum sheets, quite boring stuff. You can read about it here. So, lets make our eurorack module more interesting by adding pots and jacks descriptions along with some decoration!
You will need:
- waterslide decal paper,
- water 🙂
- laser printer,
- scalpel, scissors, ruler,
- oven with fine temperature control,
- optional freezer.
Word about waterslide decals
Waterslide decal is made up of backing paper and thin, but strong, foil. The foil with print will stick to any smooth surface after you wet it in the water. I know this technique mainly from plastic models, as I assembled tons of them as a child 🙂
There are two types of waterslide decals available on the market:
- transferred “print to to the surface” on which we want to apply the graphic – the print is pre-protected by a layer of transparent foil (f.e. Lazertran decals),
- transferred “foil to the surface” to which we want to apply graphics, the print is not protected (f.e. Forever Waterslide) – we have to take care of the appropriate print protection; foil can be transparent or white – I use transparent as it is more versatile.
Lazertran decals seems better, but I wasn’t able to buy them in Poland (where I live). In this tutorial I used Forever Waterslide (non HT version), designed to work with laser printer. One A4 sheet costs about 2 euros and can be purchased easily with online stores or auction sites. With a little experience the results can be veeeery good at least.
How did I get here?
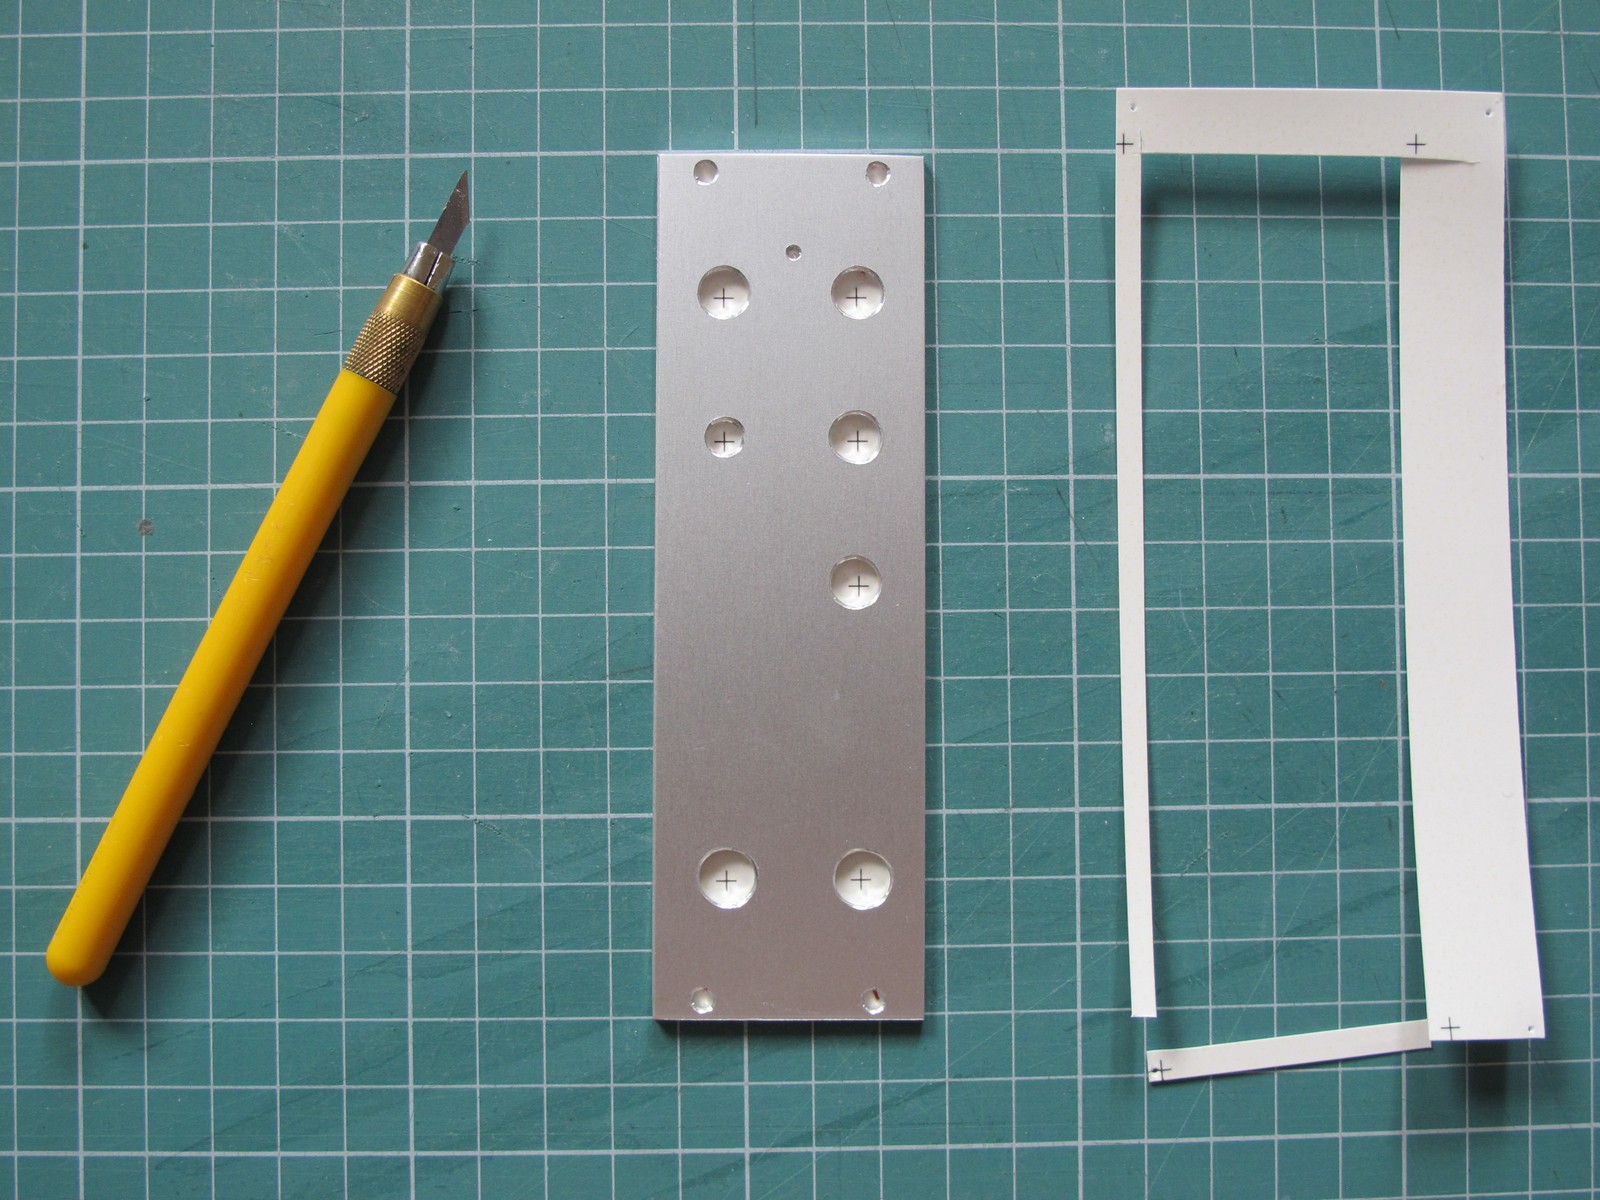
Before I made my first panel, I spend some time experimenting with waterslide decal I bought. I used old and trusted aluminum sheet to get the decal melting temperature. I’ve just printed my final panel design and some additional colourful strips I used for tests. Thats how I determined how the fixing (or preserving) the decal in the oven should look like. You can do the same before you start seriously. It is similar to baking a cake, but better!
Printing your graphics
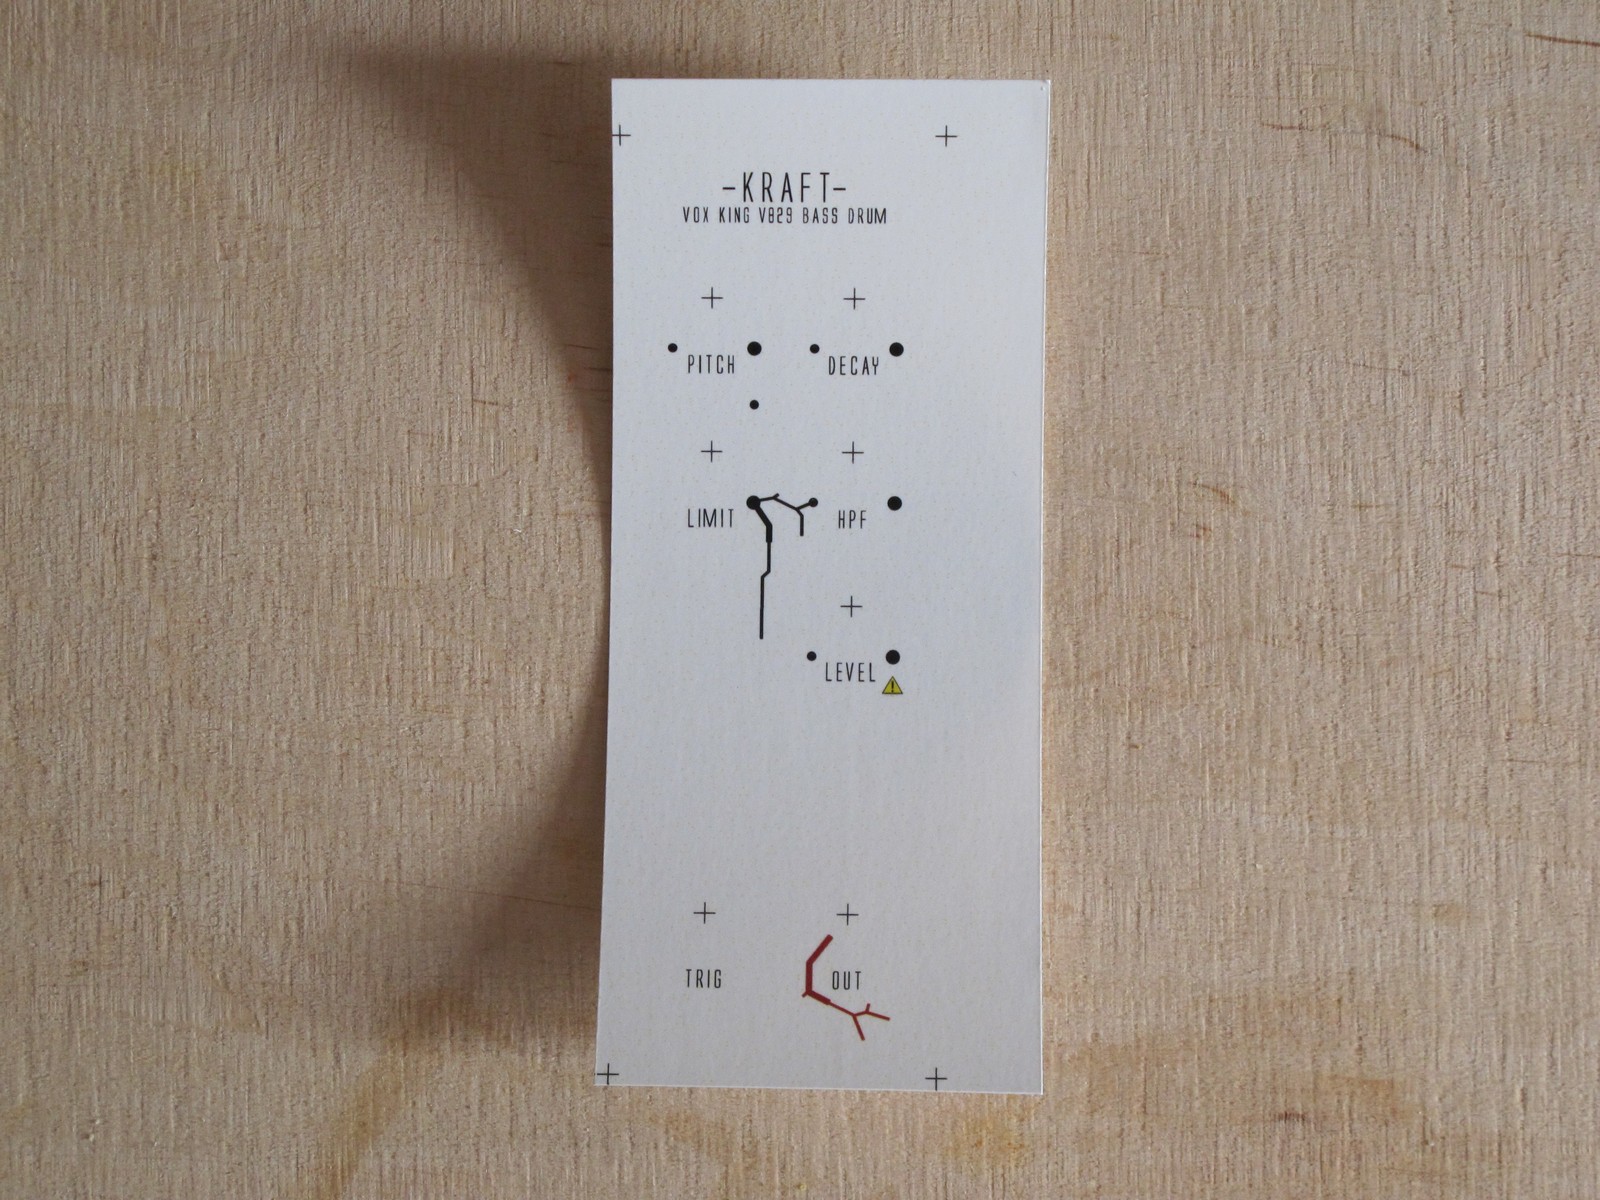
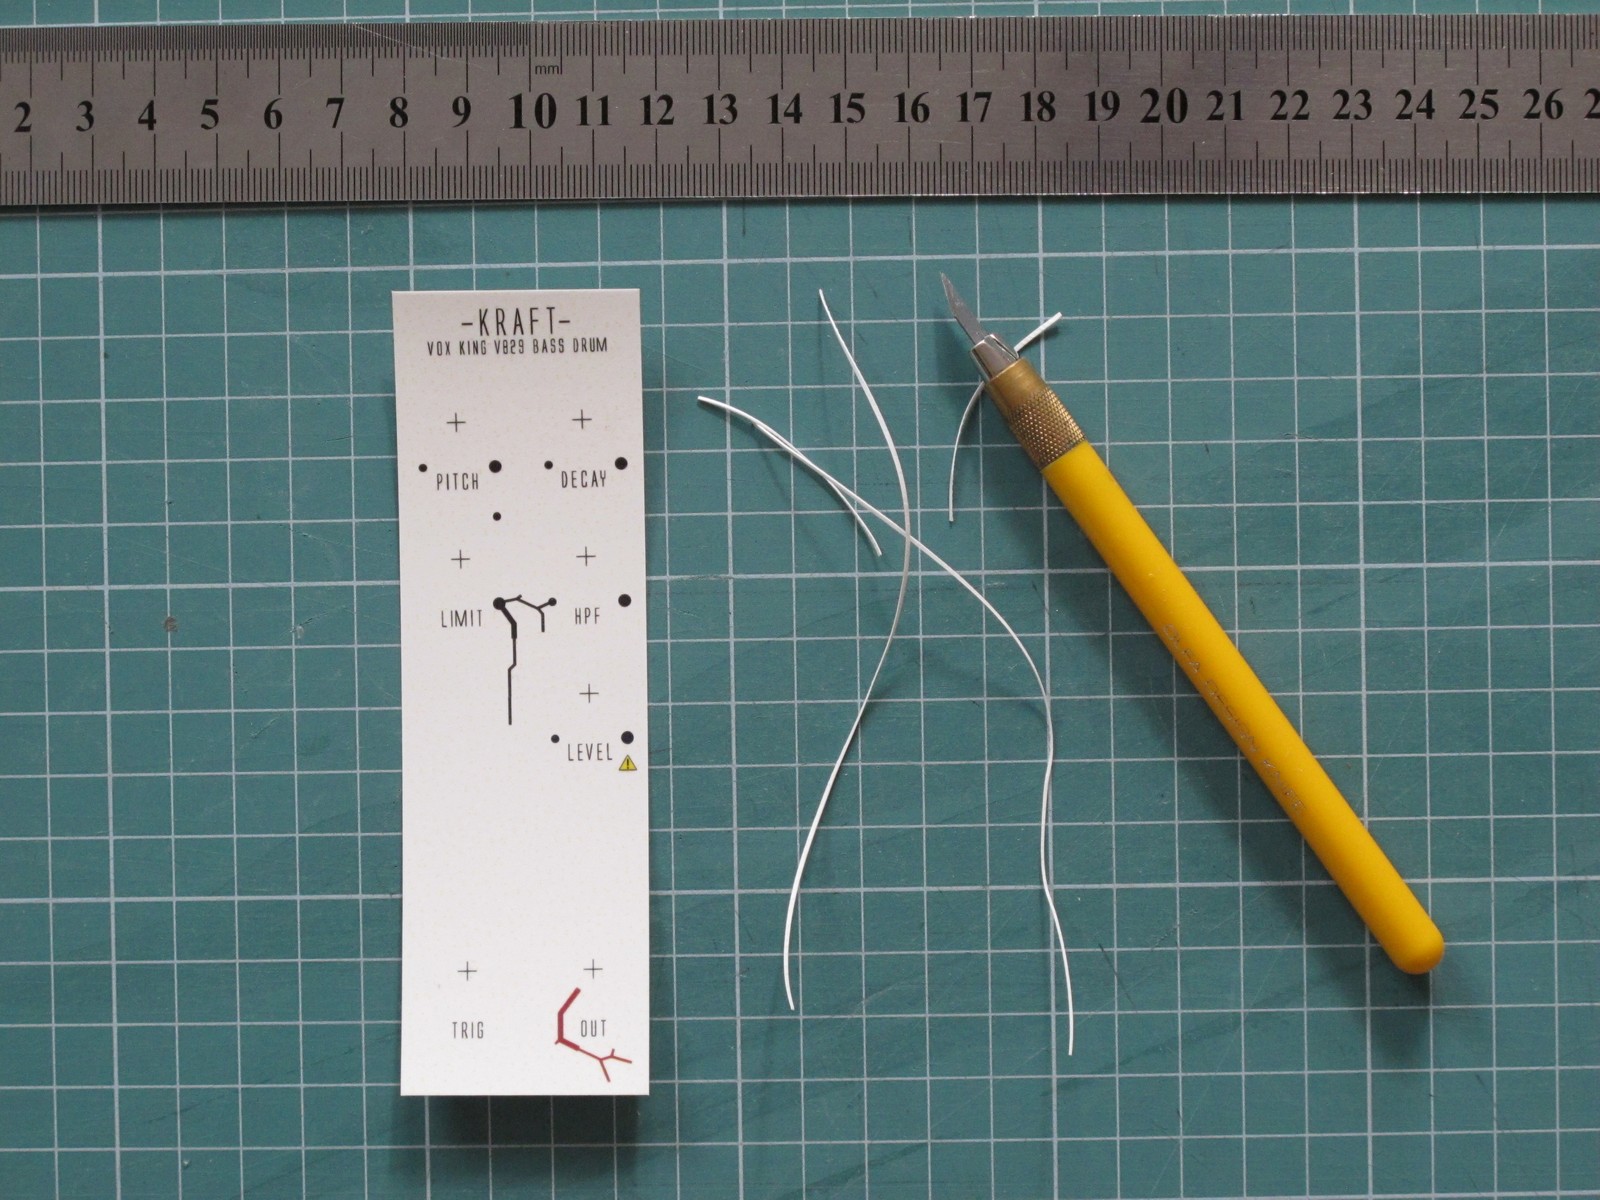
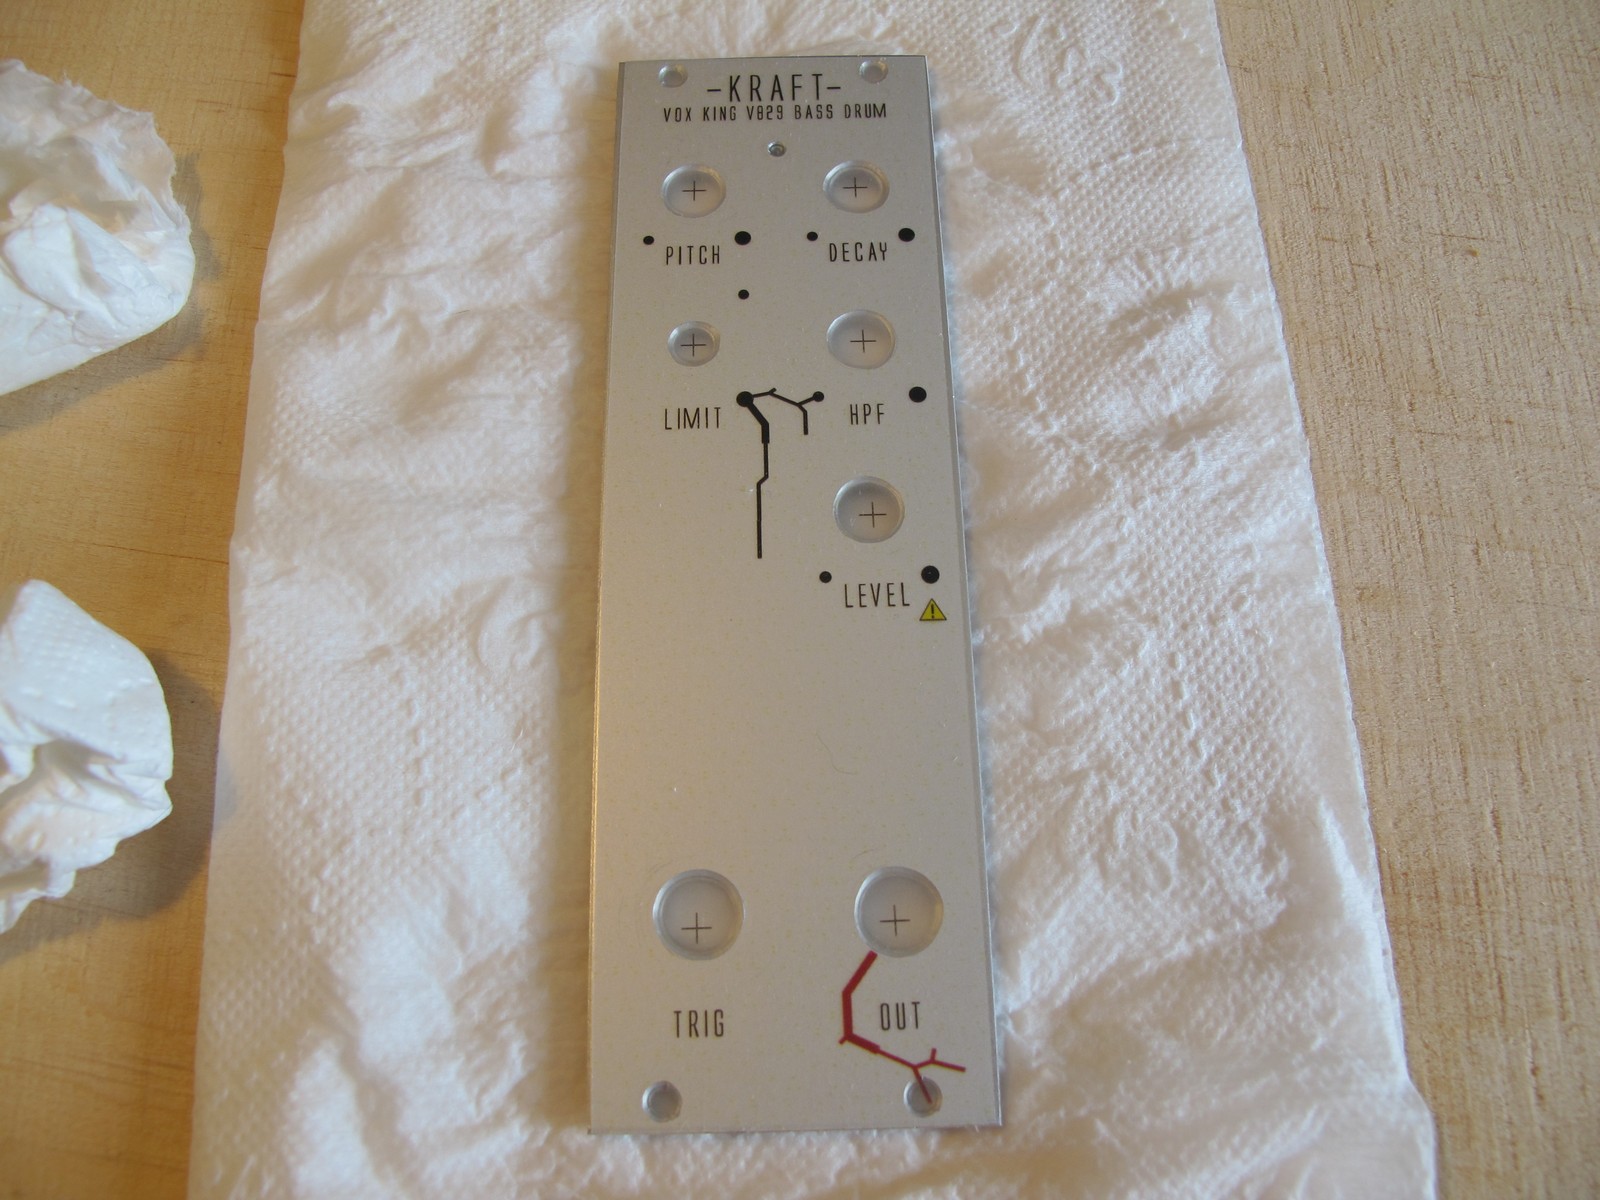
It is quite obvious that you should first design a panel you want to apply. But what should you print?
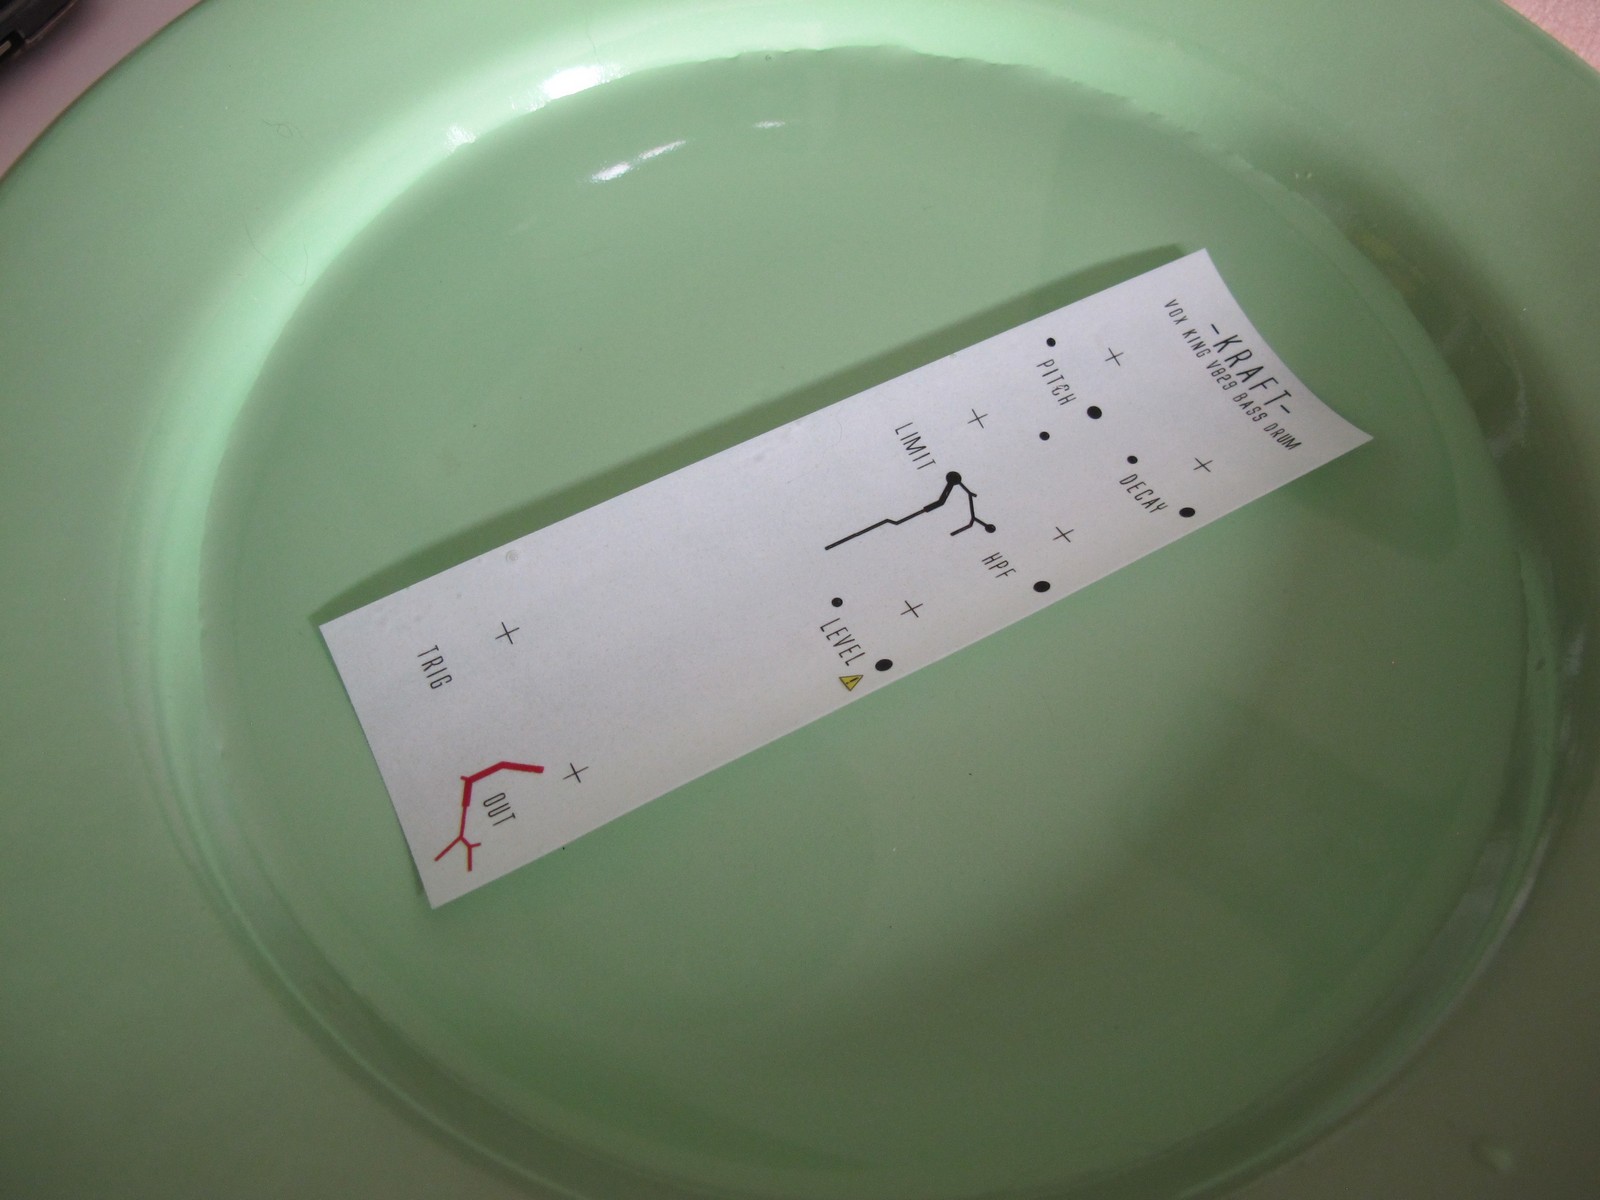
- the artwork (potentiometer scales, division lines, panel name, captions, your logo, small kittens… ),
- marks to signify a coarse panel outline (actual panel size + ~3mm on each side or more),
- marks for the holes center for large items f.e. potentiometer and socket (smaller then holes, they will help you align the decal on the panel).
The best results I got with printing directly from vector graphics software (like Inkscape or Adobe Illustrator). There is a big chance you bought < 10 sheets of water and don’t want to waste it, so think a little before you print something. First make a proof print of your project on plain paper and check if selected dimensions are correct (f.e. between top potentiometer center and bottom jack center). Seems silly? For many years I exported vector graphics to *.pdf and then printed it at my workplace – everything was fine. But then I bough a home printer, quite advanced one. The print from *.pdf file was about 1 mm per 100 mm larger then directly from vector software (but the direct print was ok)! That means, for 200 mm panel I had 2 mm error that causes extreme holes didn’t match with graphics. So, take masurements, it takes only a second a can save you a lot of time later.
The decal paper has its price, so it’s worth to prepare several projects to make good use of the entire A4 area. I repeat every project at least 2 times – in the next stages something may go wrong, the reserve will always be useful.
In printing options uncheck all print scaling (you want 100% zoom) and choose best quality. Play with other settings – some printers has “foil” setting, but it work only with transparent materials (printer checks it via some fancy photo sensor). If so, simply put your decal on the top of plain white paper sheets to fool the device (it worked for me).
As you may noticed, the decal paper is stiff and slippy. For some printers, I got very good results with manual tray (where the paper path thru the printer is almost straight), for other I just put decal in the standard automatic tray. Check which method will work better for you. For manual tray, the decal paper sometimes slips on the rolls – just push it a little to help your printer suck it.
After the print, you have some time to clean printing errors. It is foil, sometimes paint sticks to printers rolls and makes a copy of some detail. If I notice that, just take a pointing finger, lick it and clean off the paint. You can use another finger if you want.
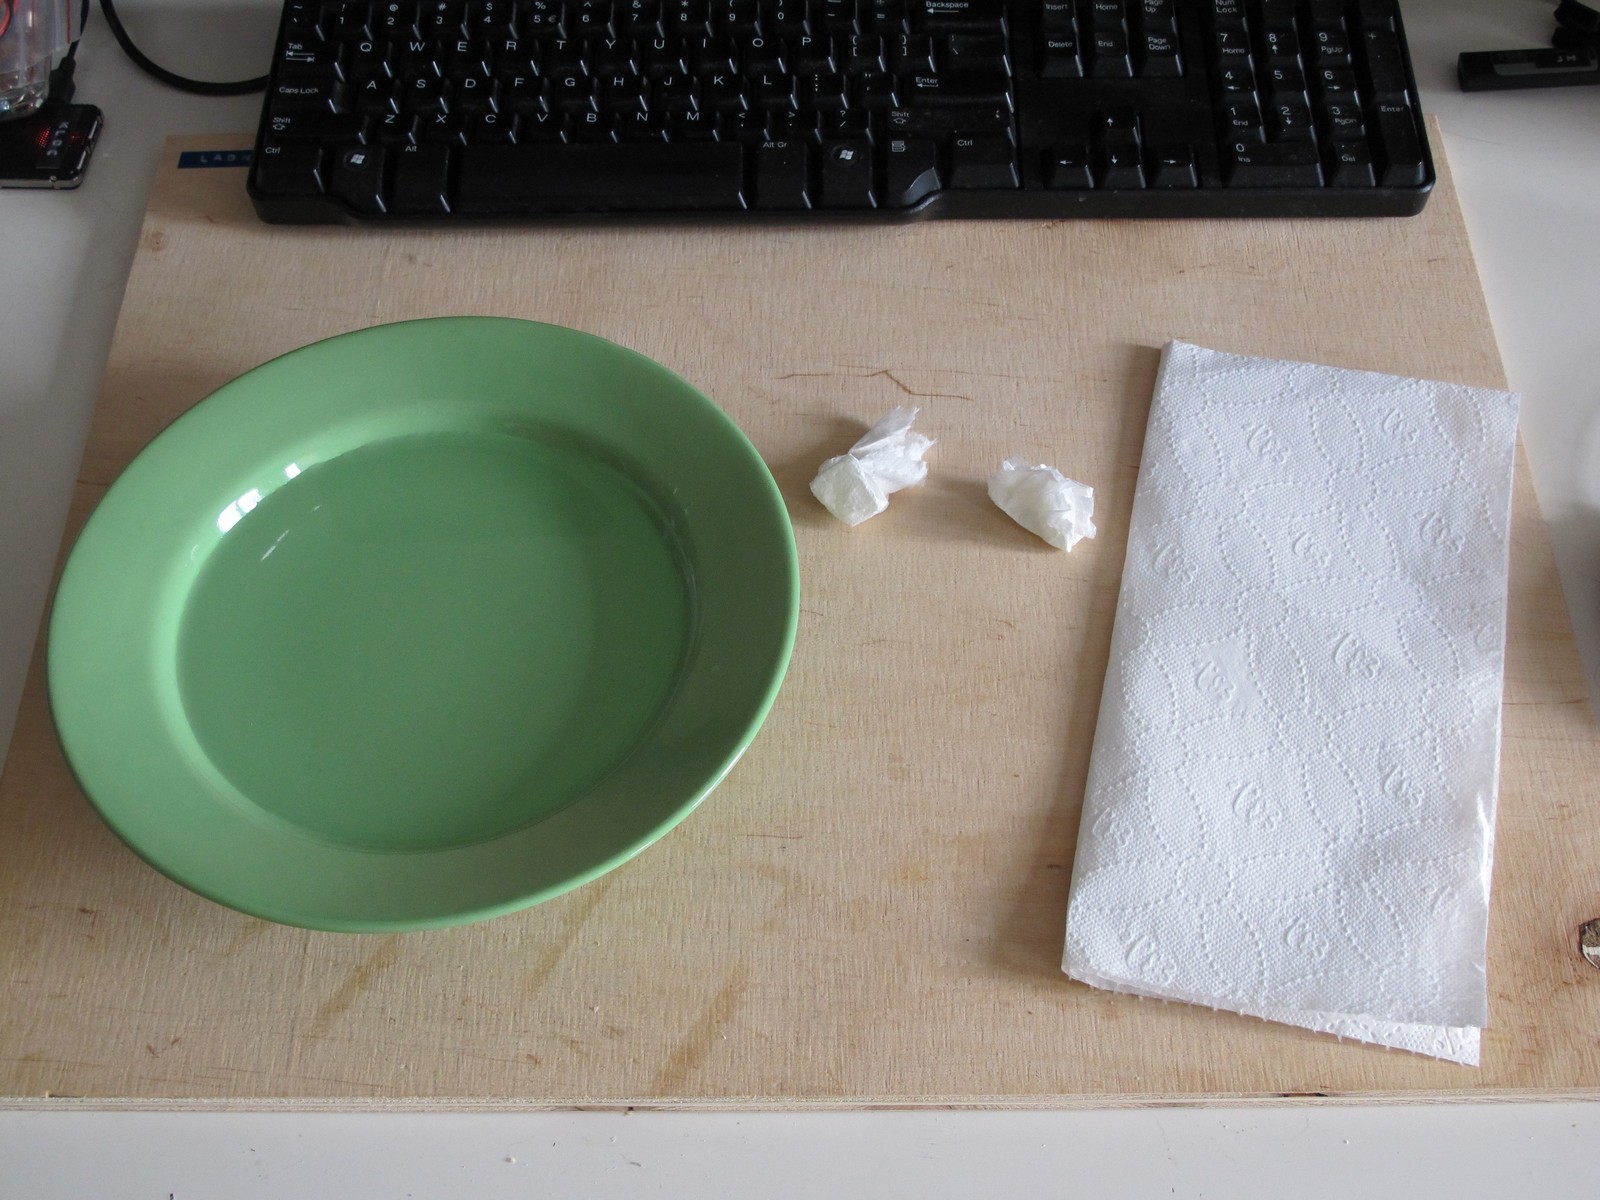
Preparing the water decal
After you’ve printed you project, it is time to put a protective coating on the decal. Prepare your painting chamber. Mine uses pizzabox and some paper sheets. Pieces of wood and pins will be also useful.
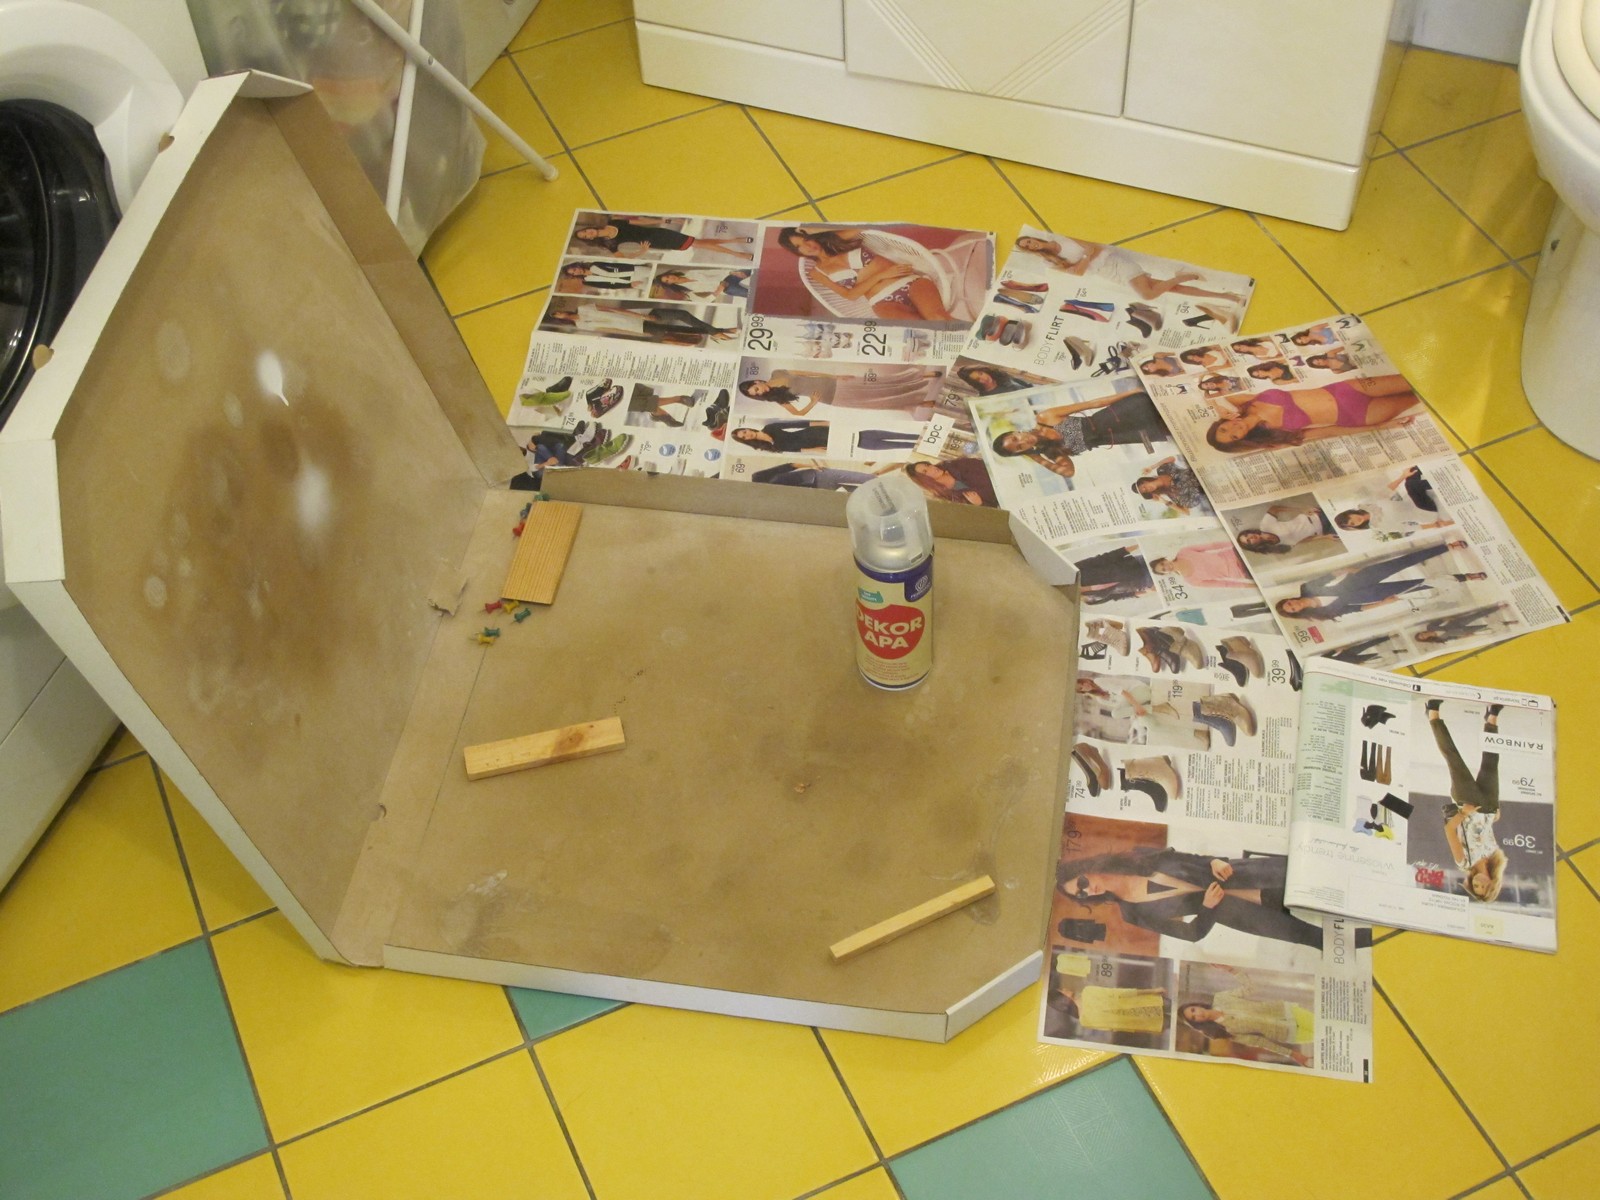
Cut the decal(s), you can also paint multiple at the same time. Don’t worry if margins are too wide, it doesn’t matter now. If you have an experience, you may choose the best printed one and keep other as spares.
What is the idea with wood? The foil carring paper sucks the varnish very easly. If you put your decal directly on something and start to spray, the varnish can soak into the paper and glue it with foil. Of course your print will be useless then. I use wood and pins to separate the decal from the base (pizzabox) to avoid that. Also it won’t let your decal to fly away while spraying.
I use decent quality Dekor Apa Transparente Satinato from Ferrario, a glossy acrylic enamel spray (~5 euro), you can put very fine layer of varnish with it. Earlier I tried some cheap paint produced by an automotive company, but the jet was to intense and it was hard to make a nice looking coating.
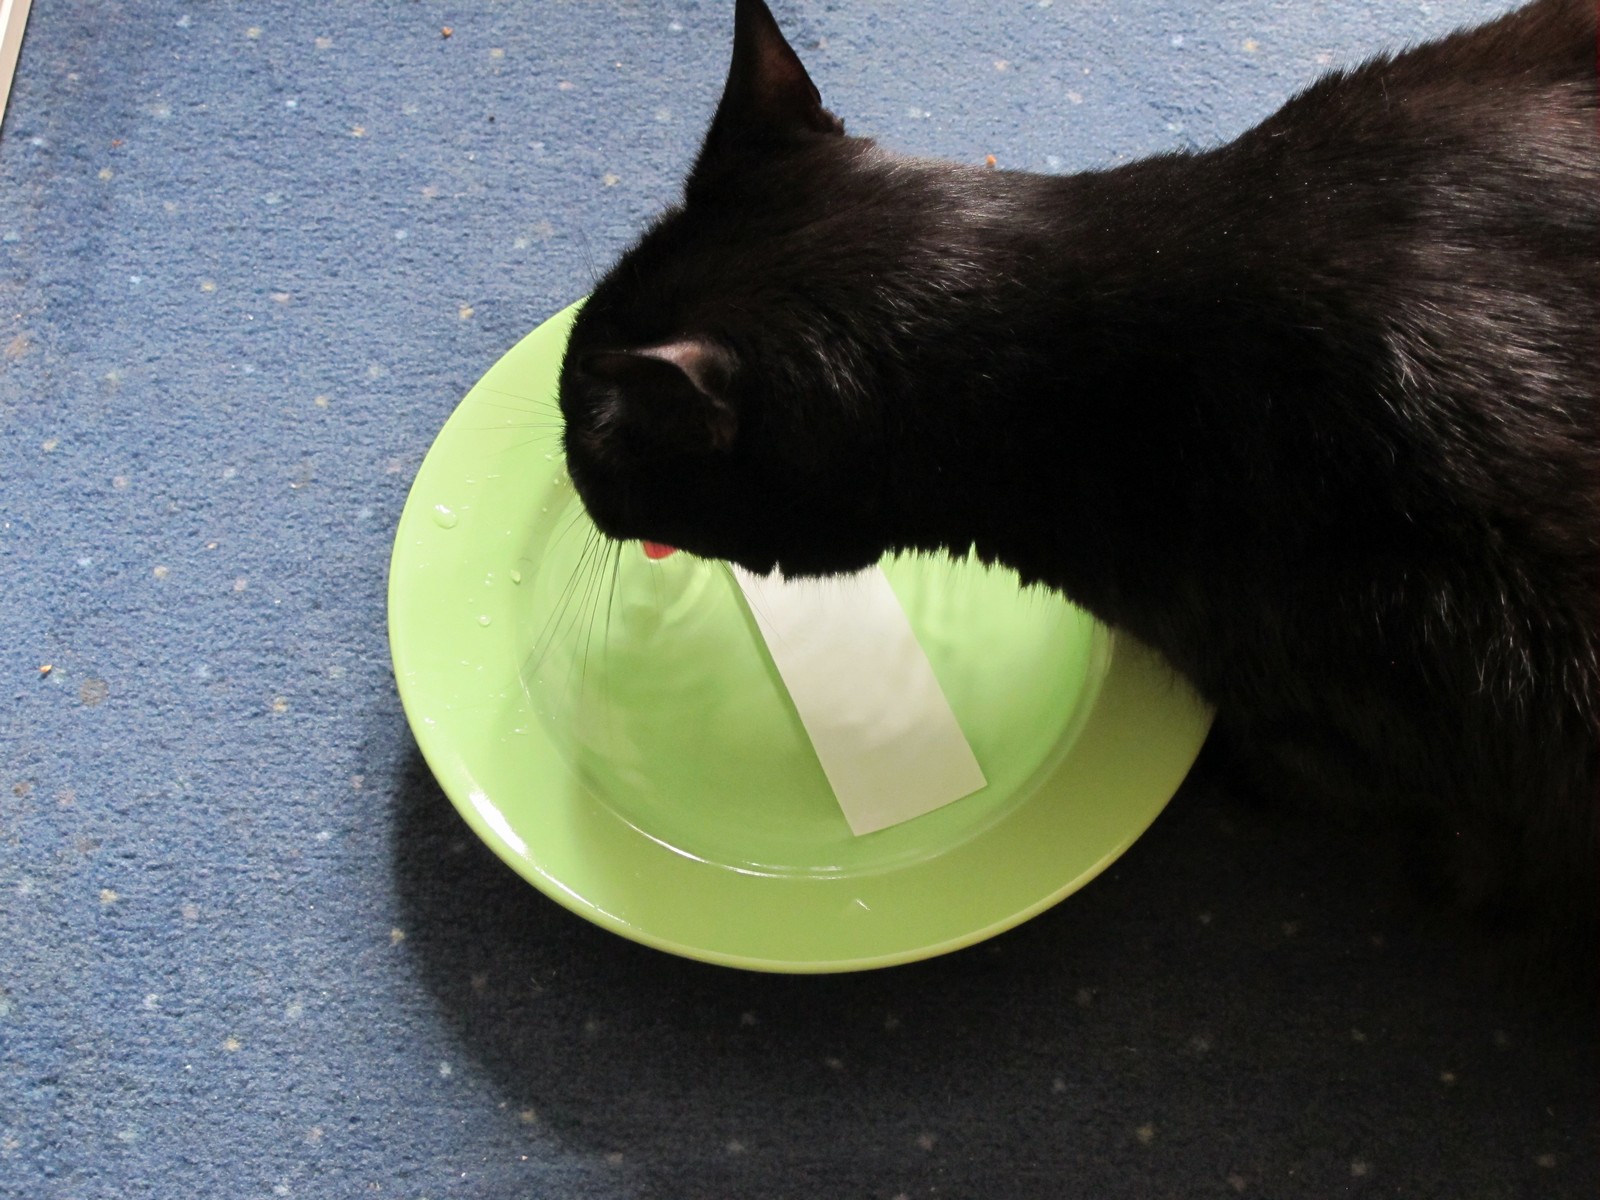
Usually I put 4 layers of transparent paint, in 10 minutes time period. Thanks to thick coating, the foil will be easier to transfer and help your finished panel to last longer. When painting, avoid unnecessary movements, just spray and go out of the room – otherwise the dust will start to fly everywhere end stick to your fresh, wet paint layer. For the same reason don’t let your cat run into painting area. If you see some unexpected fluff after putting a layer, gently remove it with clean finger.
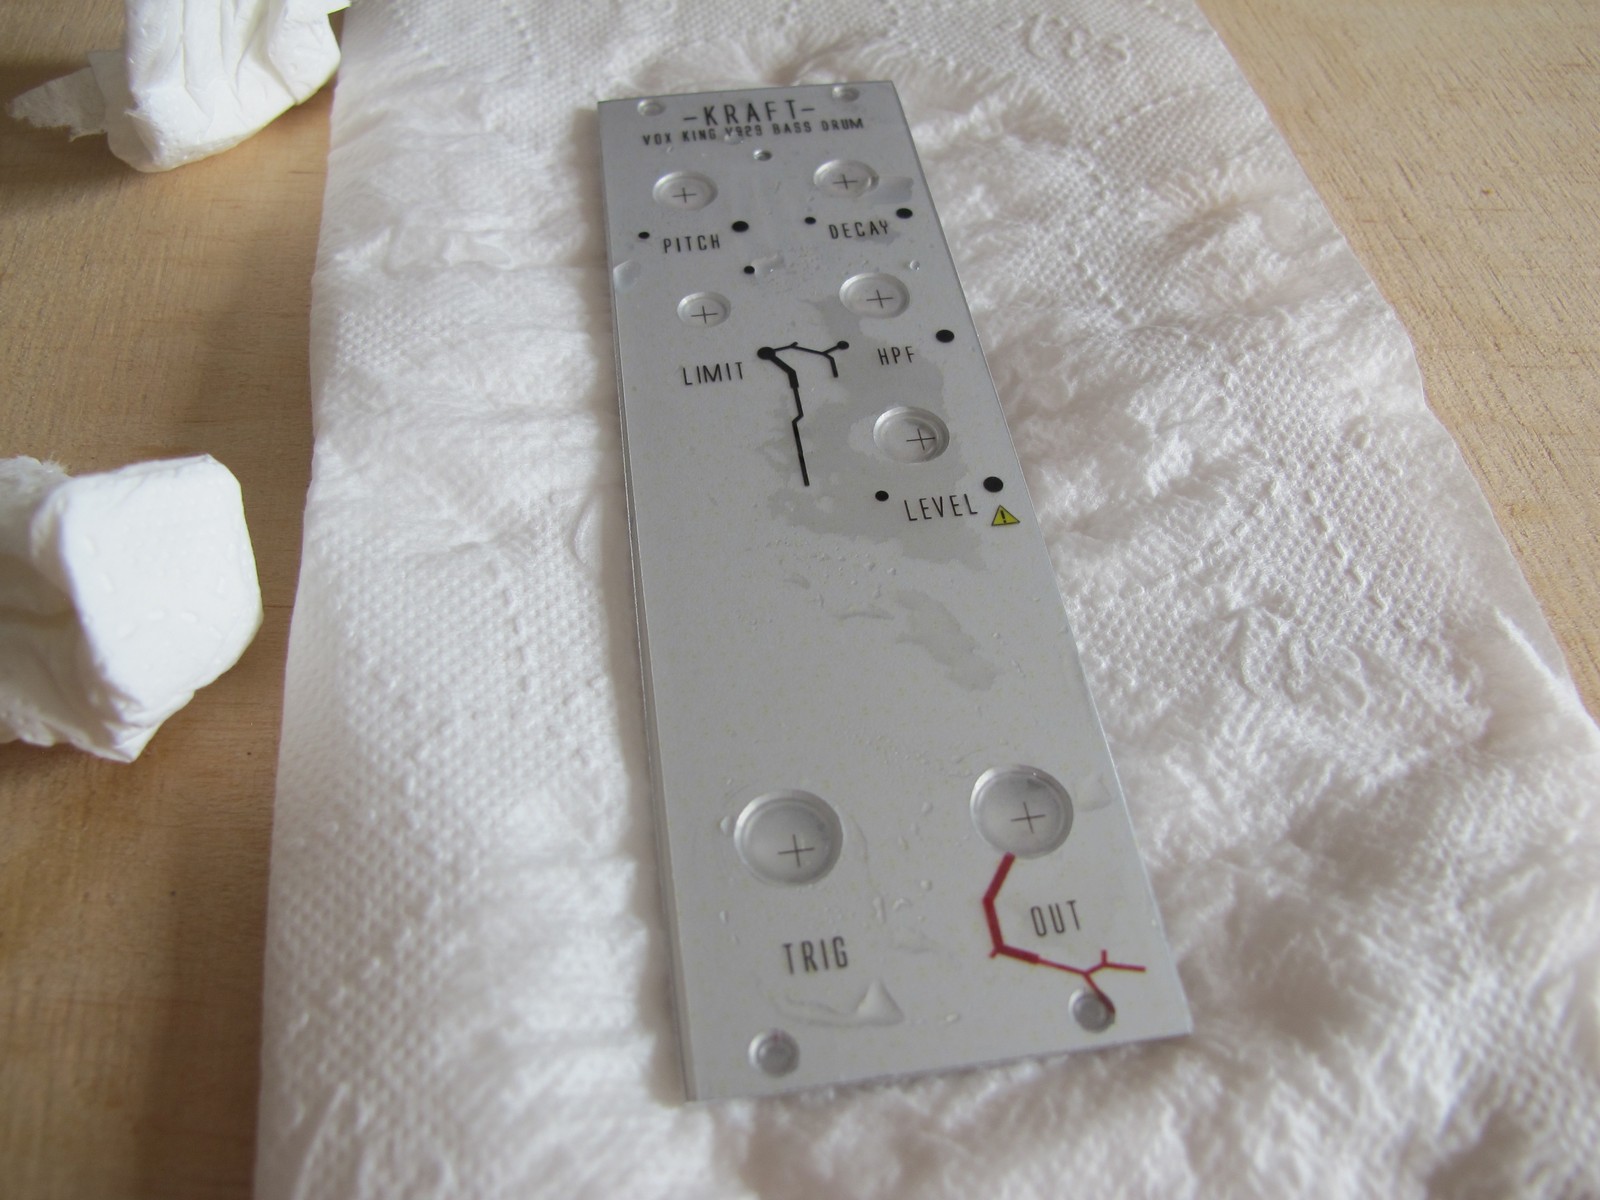
Once you’re shure the paint is dry, move to the cutting, simple, but very important step. Bad edge trimming can cause problems when preserving your print in the oven. So, get the scalpel (or other sharp knife), a steel ruler and get to work!
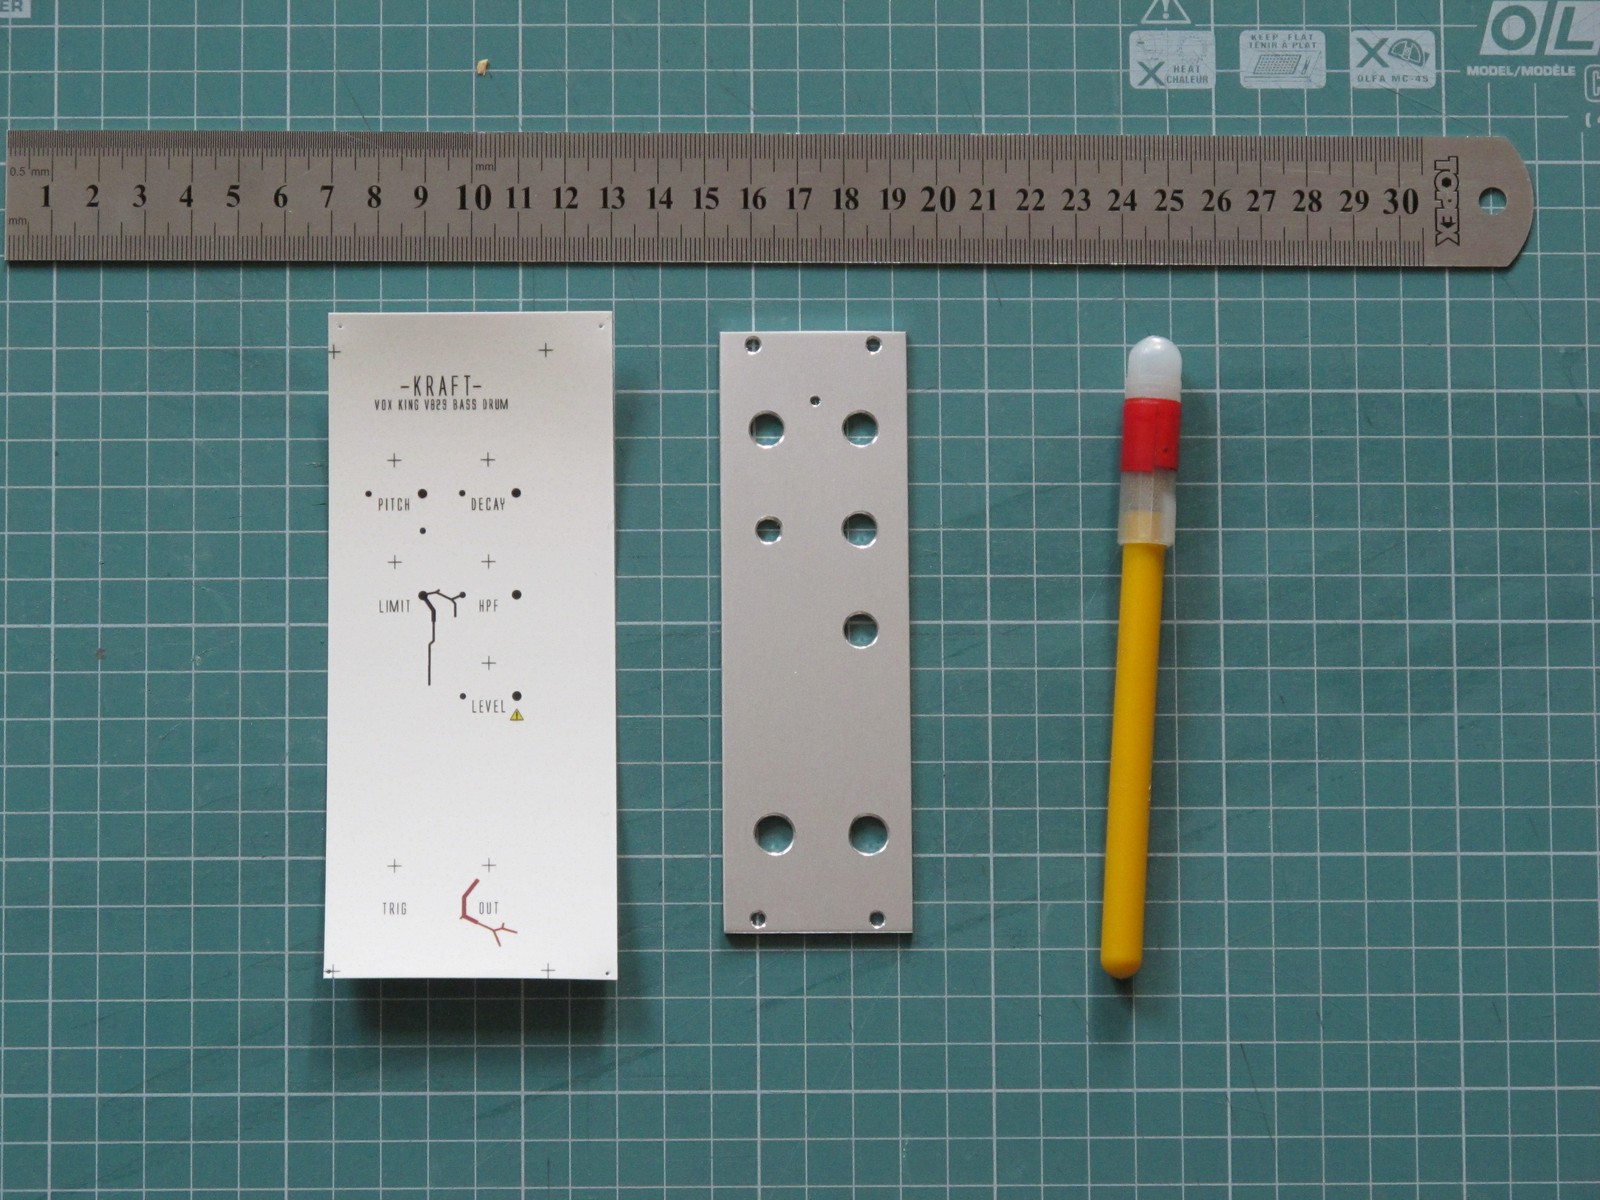
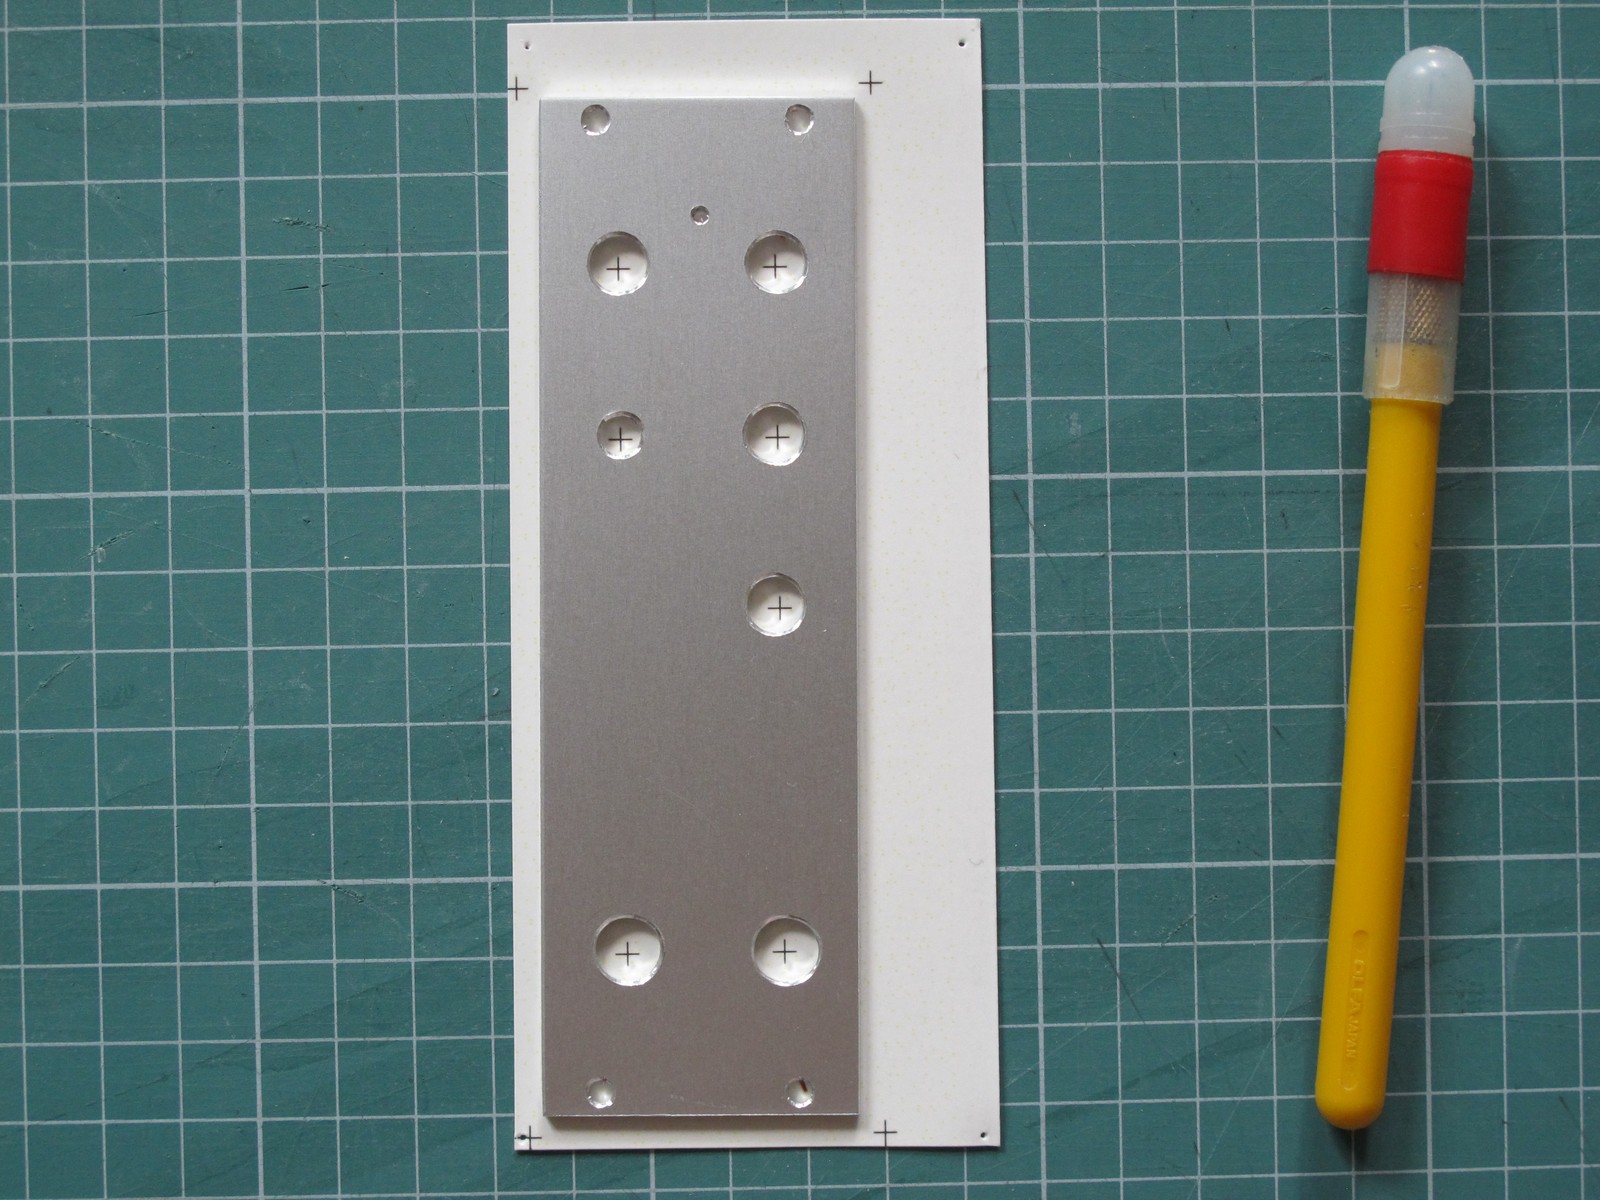
Thanks to center hole marks, you can easly align print with the blank panel. Push it firmly to the paper below and using panel as a template, cut around it.
That was easy, but we need to cut some more. The reasons are:
- decal can stretch a bit,
- any foil outside the panel outline will start to tuck and melt in the oven, causing very uneven edges.
So we just cut an additional narrow strip on every side, around 1 mm. This should be enough.
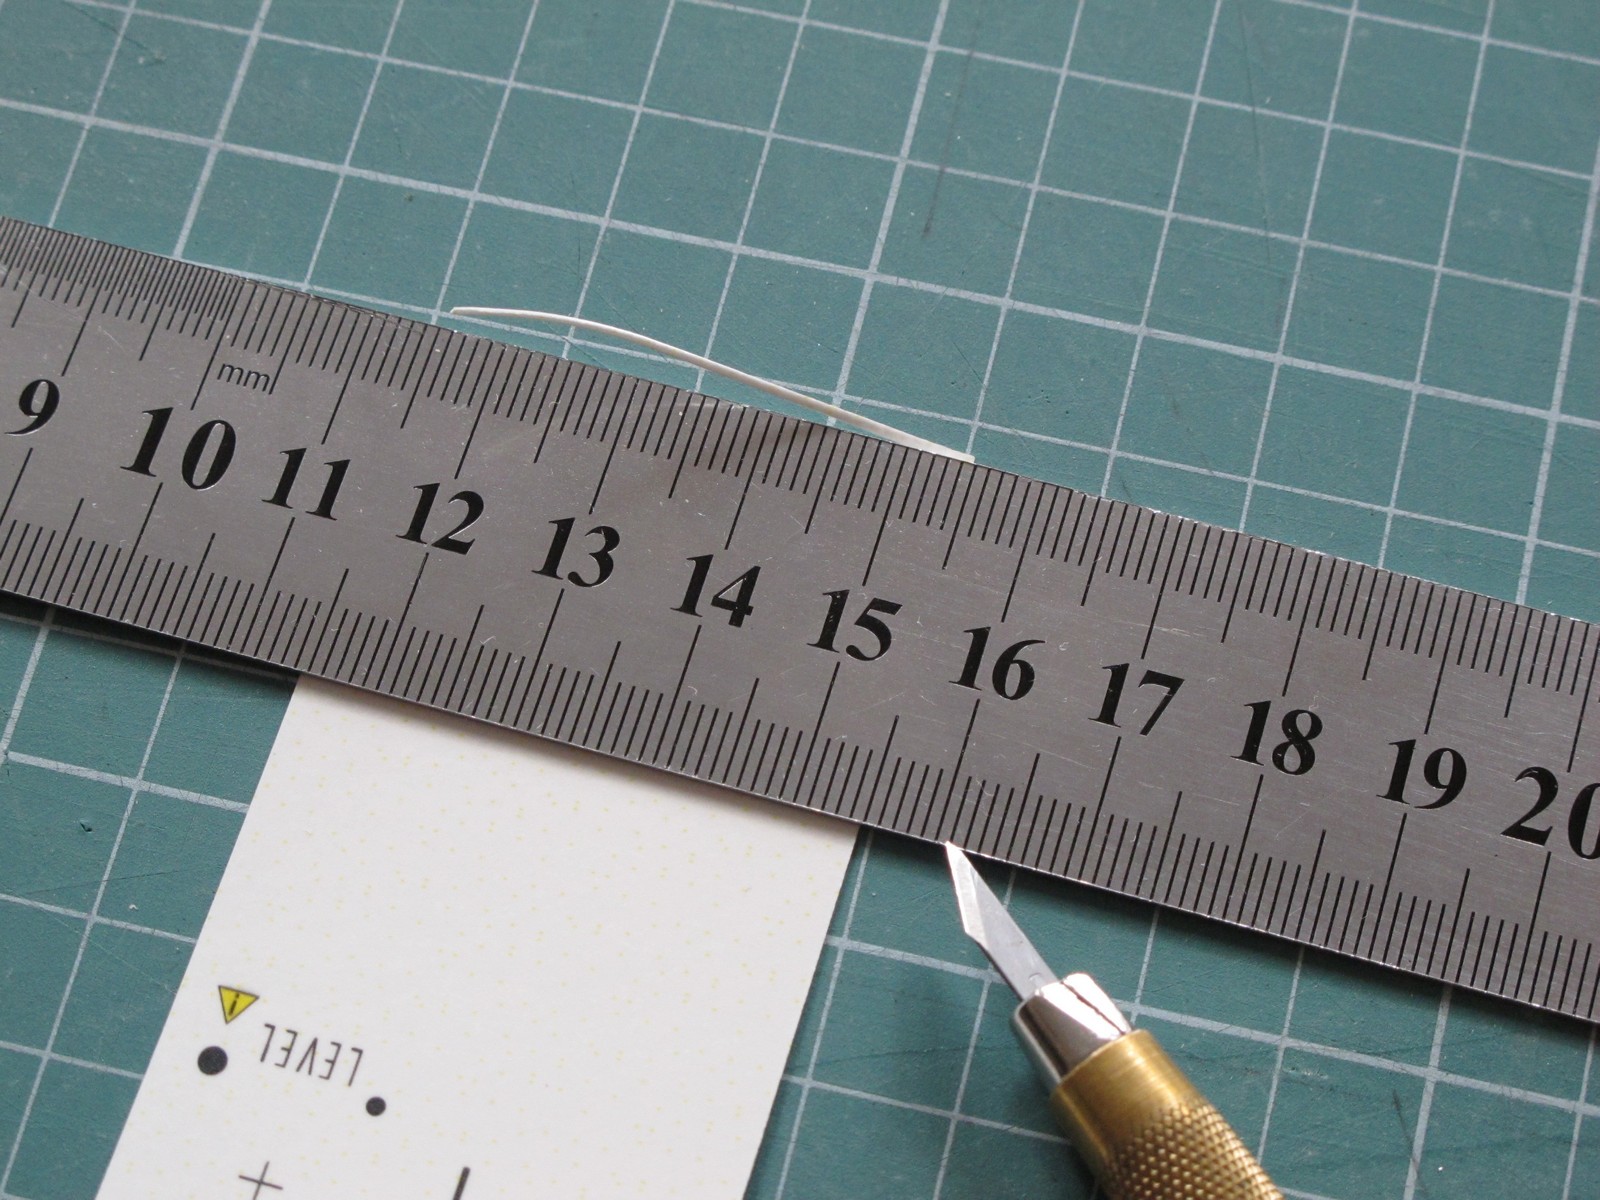
Try to keep all cuts as clean as possible, use a sharp knife and a trusted steel ruler (or a special cutting ruler with strengthen edges).
Transferring decal onto the aluminum
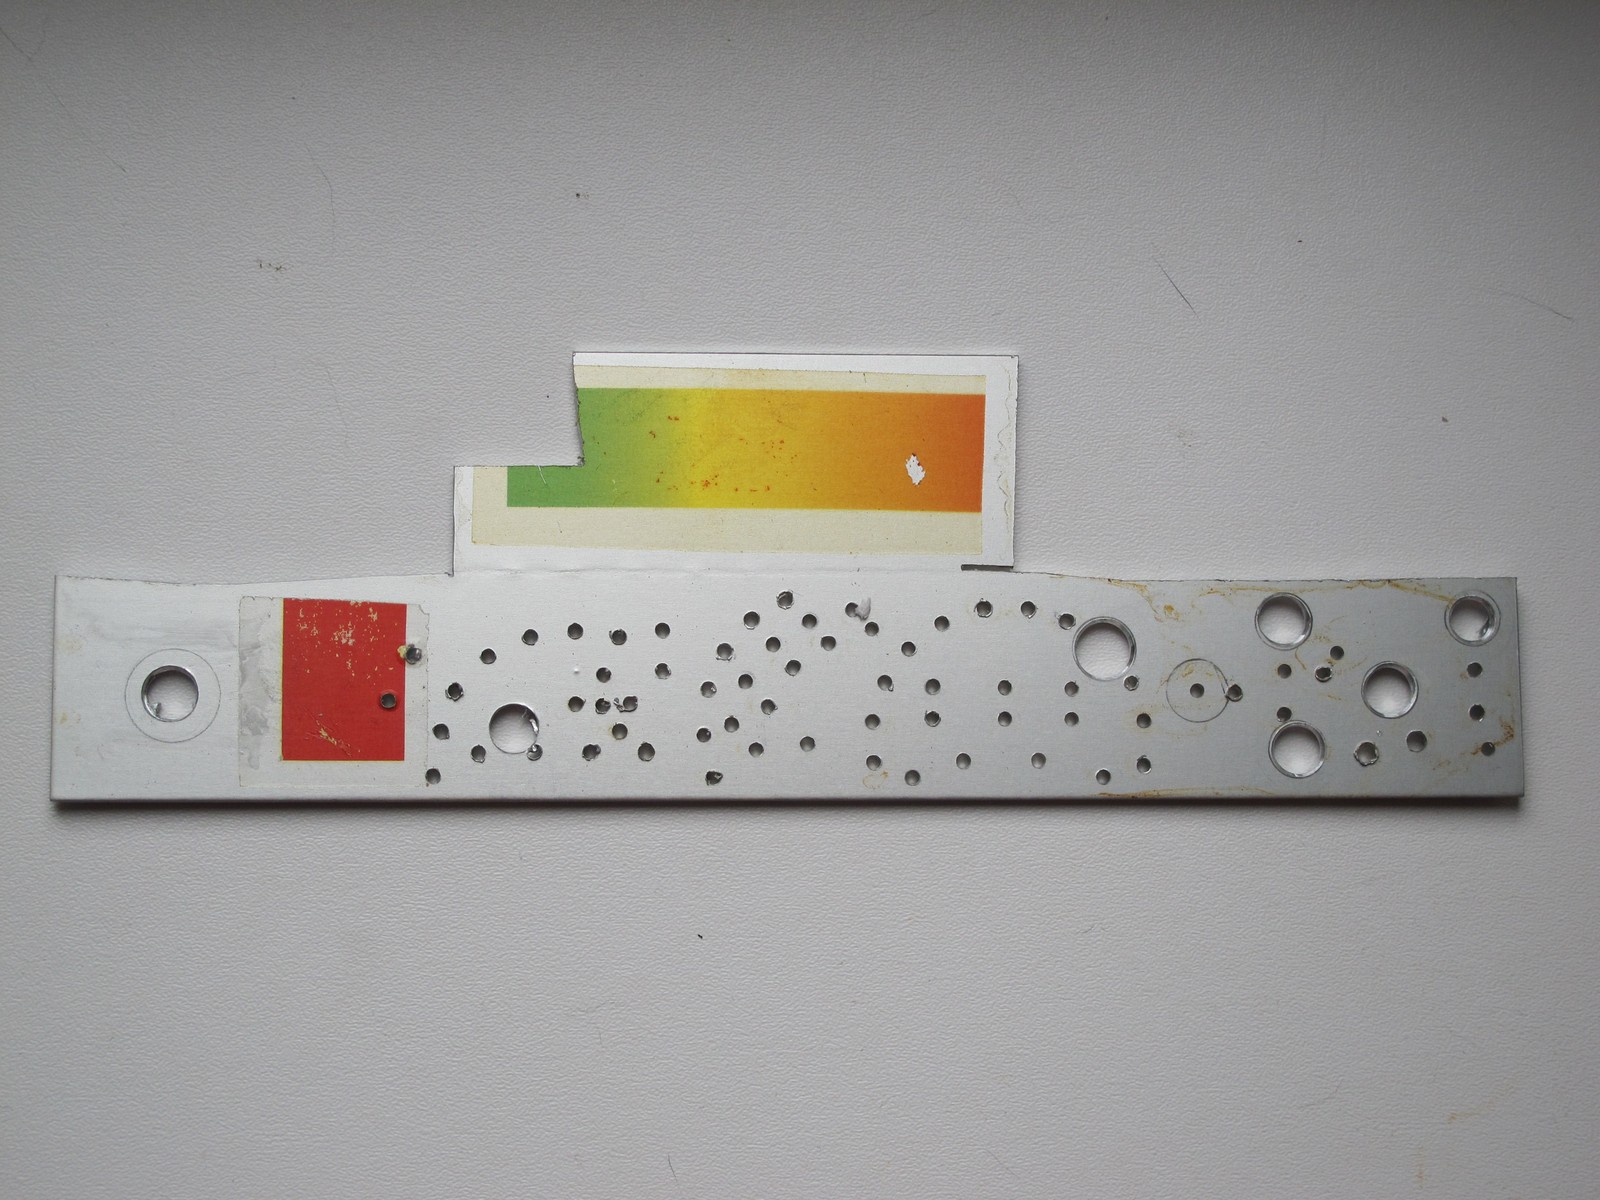
Check the holes diameters again. Maybe you have forgotten about countersink for screws? Any mechanical work from now on will be very difficult to do.
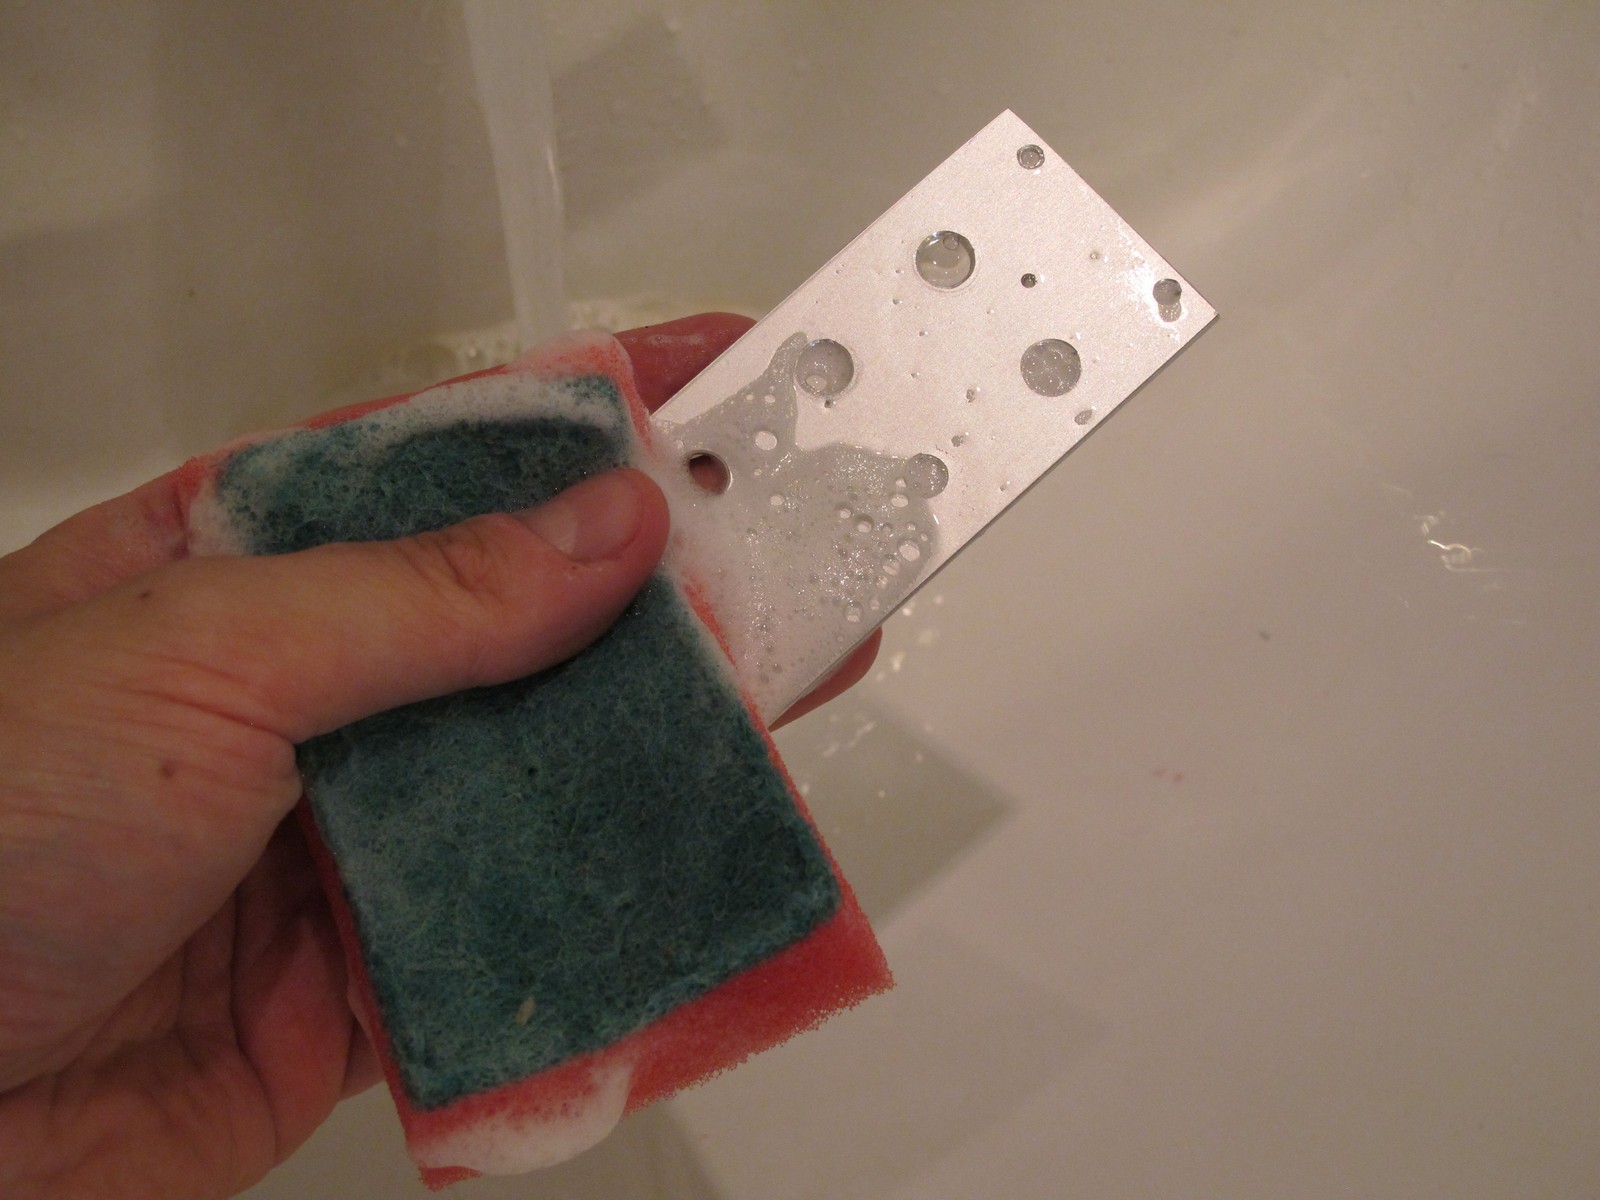
The decal is ready to transfer, but there still may be some sticky fingerprints from previous steps. Clean the panel with cheap dish soap and sharp sponge, do not use chemicals. If you feel any sharp or uneven edge, make it smooth with reamer or file, otherwise it can make problems durning decal transfer.
After that, you are ready for transfering! Prepare your workstation, get a clean dish with filtered tap water (not distilled water!), some paper towels and make small balls from handkerchief (to squeeze water from under the foil). Clean your hands.
Note: Once I was panneling my design in around 40°C ambient temperature and was amazed how elastic the foil became (it is a bad thing!). After a transfer, a foil was extended around 3 mm for 129 mm panel, even if I cut it 2 mm smaller! So, if it is very hot, just put your panel with decal into refrigerator and let it cool to avoid this. Temperature around ~20°C is not a problem.
Get your blank panel and wet it with water. The paper tower will help to remove the water from holes.
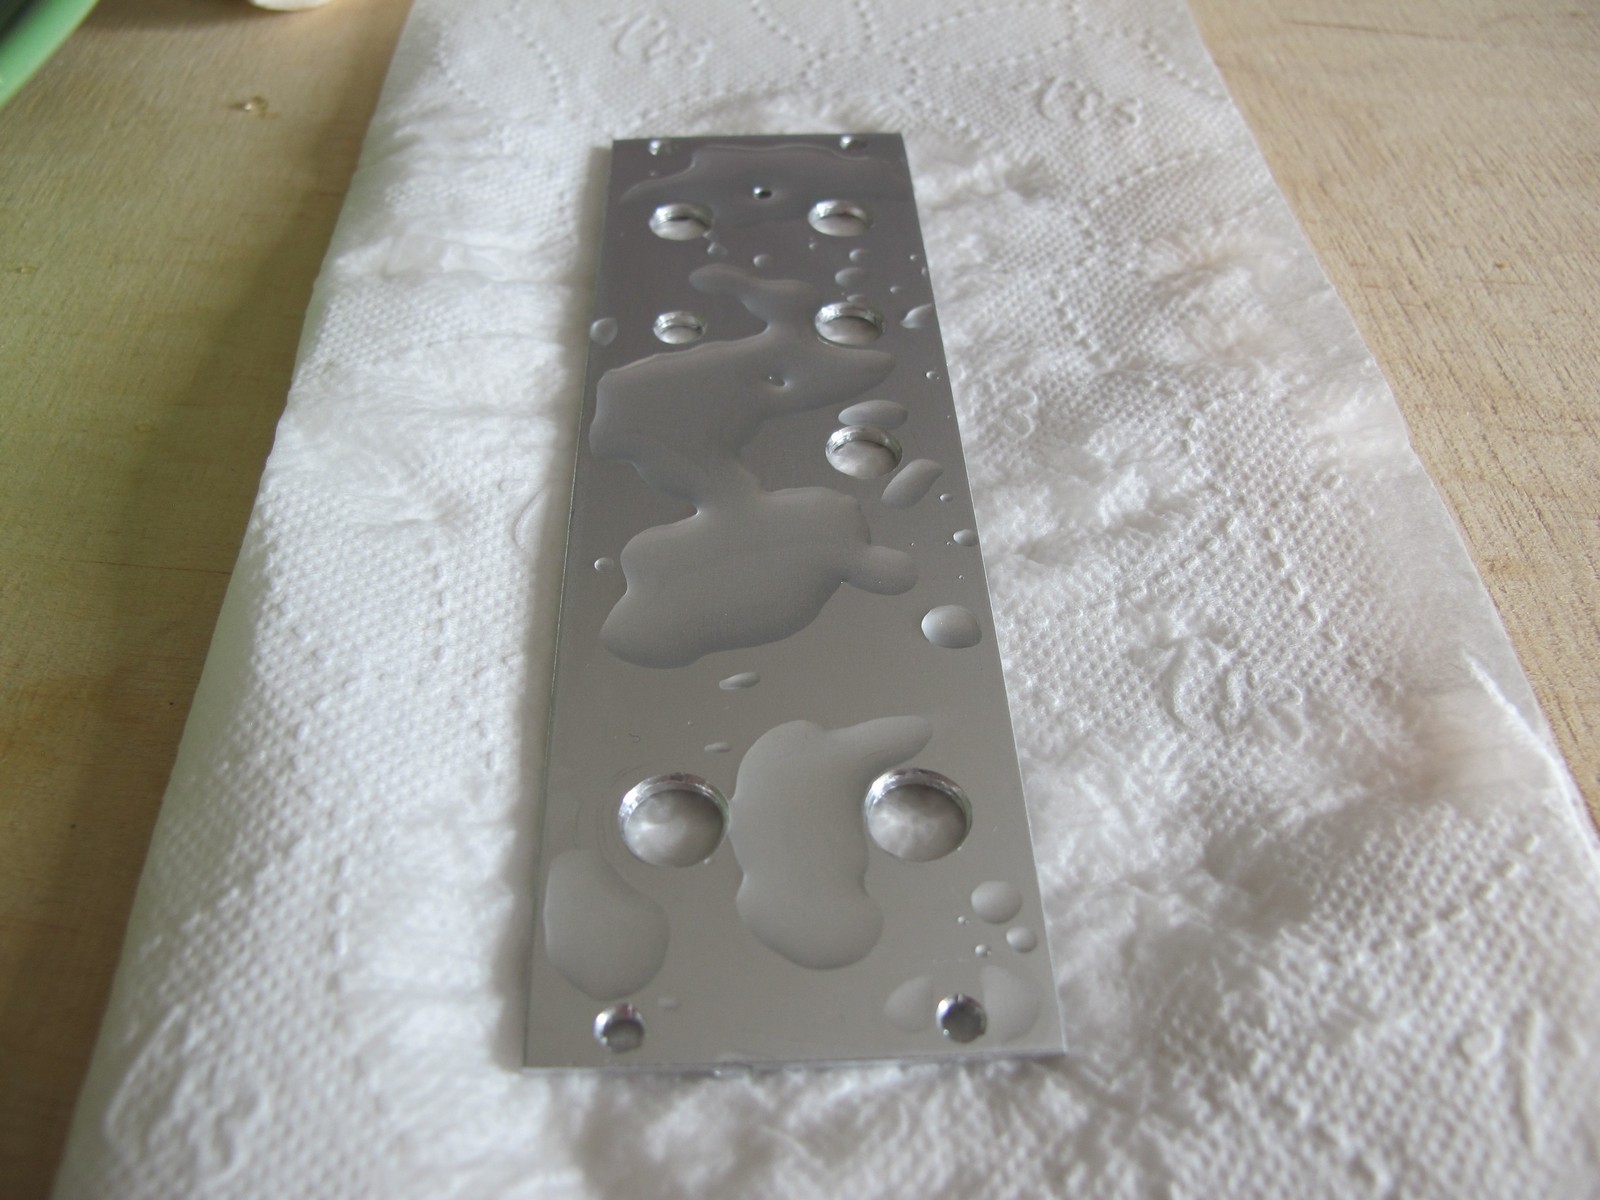
Put the decal in the water, it should stay there until you will be able to slip the foil from the paper. It will take below 1 minute for small decal like this. Be patient, avoid using excessive power to take off the foil – it should be movable with just one finger. If you make something wrong, don’t worry – that’s why you’ve printed multiple copies 🙂
Gently slip the foil from the paper straight to the aluminum. Use your fingers to position your print correctly, work slowly. You have a lot of time now, it is not a race.
Using paper balls from handkerchief (they have smooth surface), stroke the foil in all directions, the water will flow from under the foil and soak into balls on the edges and to the paper towel in the drilled holes. Take a special care to the corners. You may also lift your panel and get the water out of the holes, it will dry quicker.

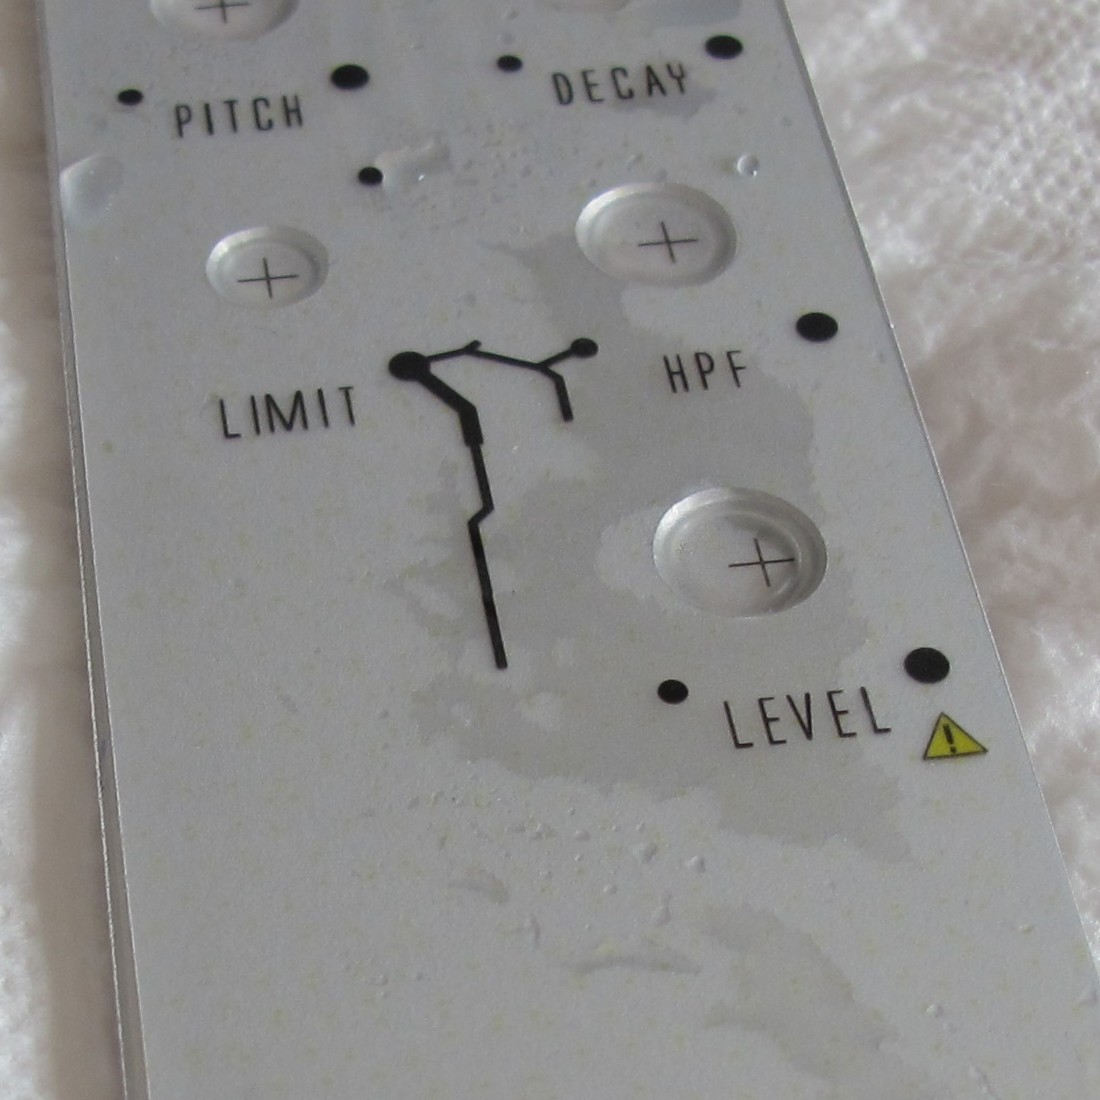
Look on the panel in the strong light from the sharp angle to see all imperfections and correct them. Get rid of all the stains and discolorations.
The properly transfered decal should look perfect – the surface even and clean, without fur or dust under the decal.
There is still water under the foil, let you panel dry for a few hours in a place no one can reach accidentally (f.e. curious girlfriend). Sometimes, after the drying new stains will occur under the decal. This mean, the decal didn’t adhered to the aluminum in some places. Don’t worry about it now, it will be fixed in the oven for 90%.

Clean your workspace. I didn’t. Cat took care instead of me.
Preserving the decal
If the panel is dry, lets put it to the owen. Don’t be afraid, there will be should be no smoke or stink. Make shure the oven is clean inside and not dusted (otherwise the pollutants can stick to the melted foil). Put your panel with decal on a plate and insert into a cold, standard, kitchen oven. Set it to fan assisted with temperature around 120°C. Take a flashlight and look at your panel to have a reference point – the surface of decal will change with temperature rise.
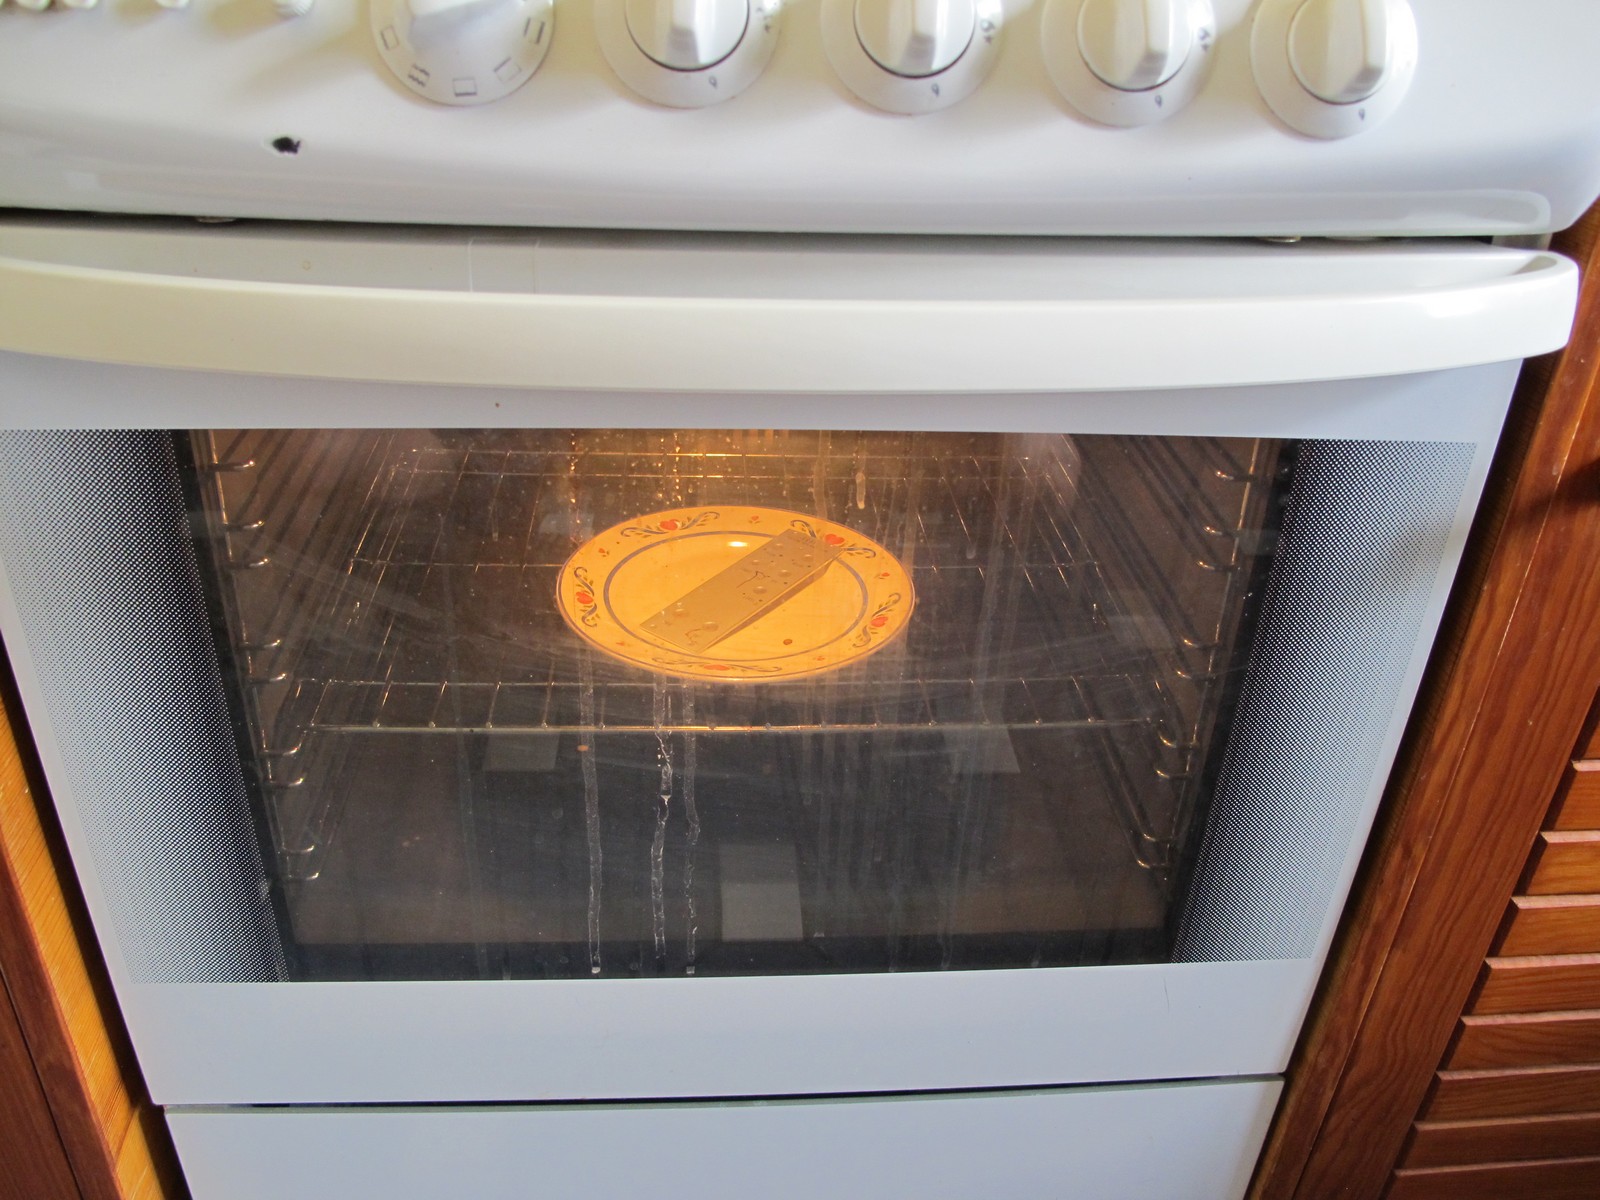
When you reach 120°C, set it to 140°C, then 150°C, 160°C etc. (I do it to not miss the melting point). The oven is an thermal object and can be approximated as first order inertia with transport delay, so the temperature will still rise after the oven controller turn off the heater. So, now the critical moment.
We are somewhere at 160°C. If you take a flashlight and look at the panel, it should became a litte shiny, and all imperfections should be fading. Set the oven to 170°C and let it stabilize for a minute. Look at the temperature display and set it to 180°C.
The decal will start to melt in 178°C (choosen experimentally for Forever Waterslide Decal – of course for you it can be slightly different, as it depend also on ovens controller measurement speed). If you miss this point, the decal will start bubbling and you will fail miserably. It is a matter of experience when to get your panel out. Maybe your first one won’t be perfect, but fifth for shure 🙂 Keep in mind, there is also Forever Waterslide Decal HT (High Temperature) version of the decal, for which the melting temp may differ.
As soon as you read 178°C, count to three and get the plate from the oven. It is hot, use some protection and mind not to touch the decal – it is sticky and will be happy to keep your fingerprint. Be thoughtful or you may burn yourself. The whole process, from turning the oven on should take around 10 – 15 minutes.
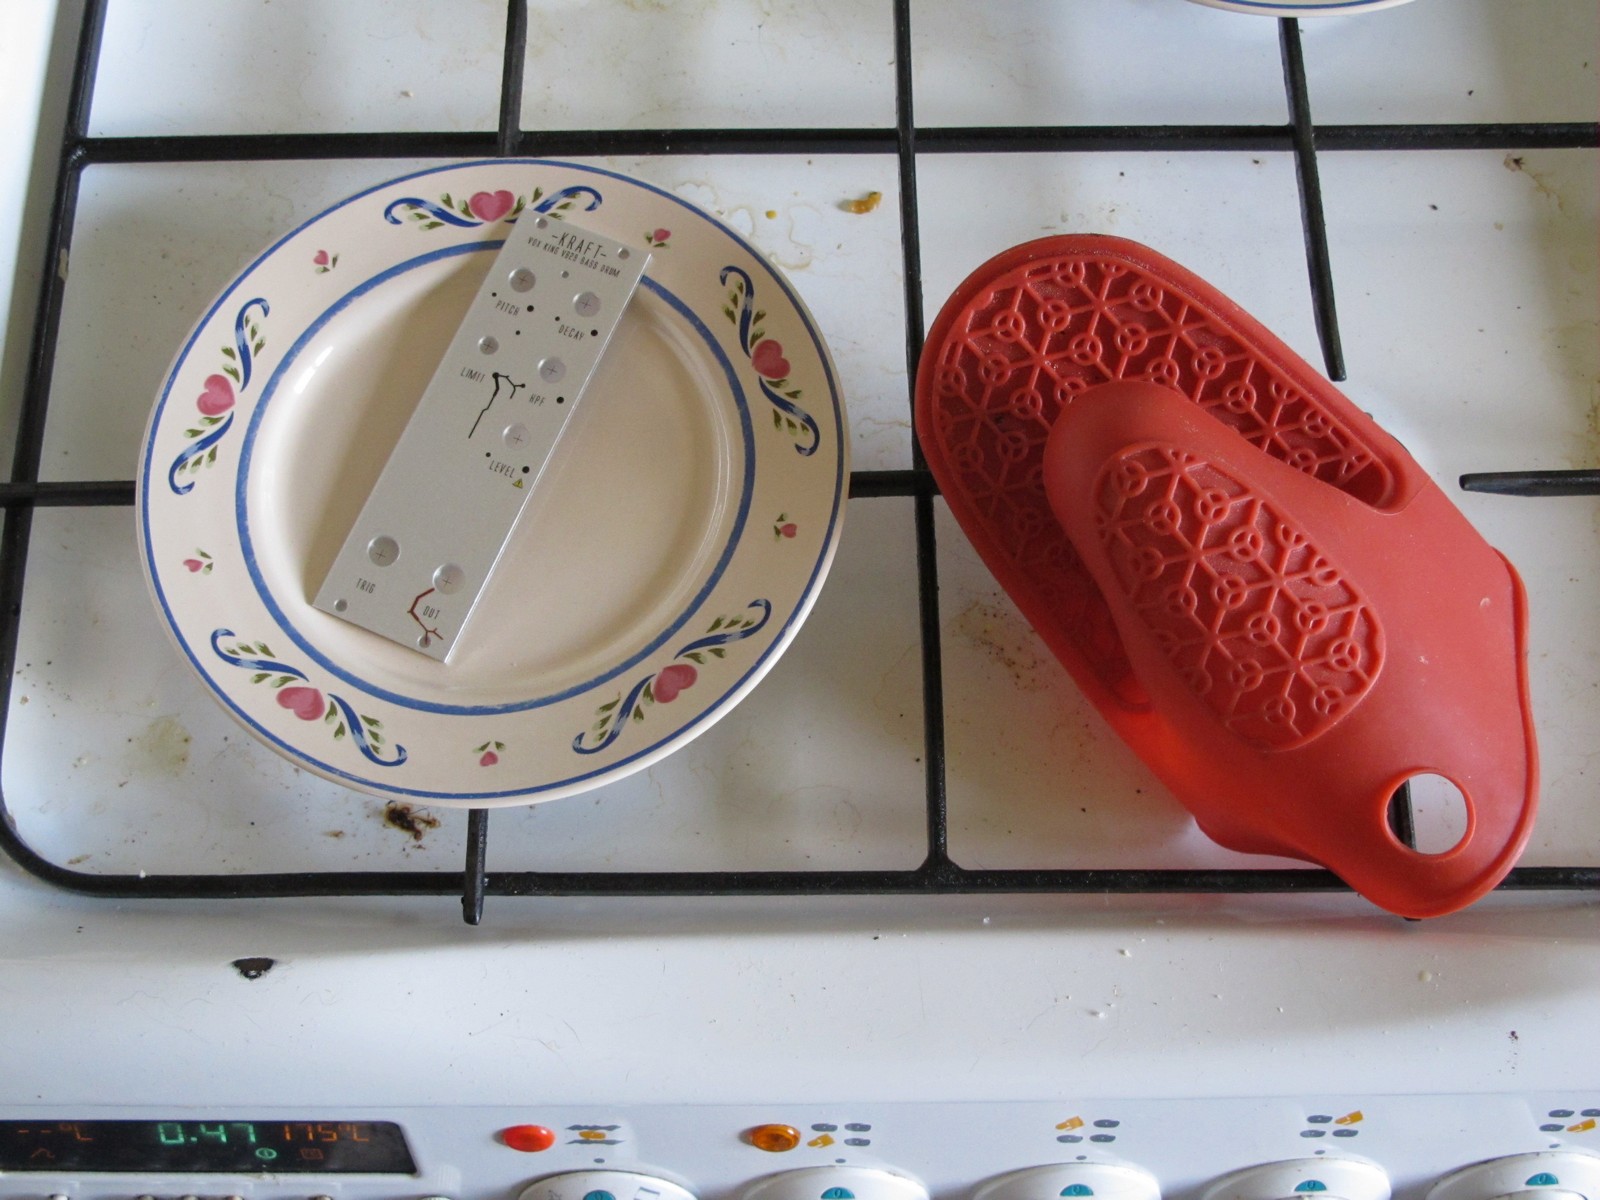
Let the panel cool in peace for around 30 minutes. Don’t check its temperature with your finger, don’t even look at it. Just leave and do something stress-free. You probably made a great job!
Not common problems…
…but every of them happened to me 🙁 Percentage in the brackets informs about the problem popularity for around 50 decaling attempts I made. Most of them happened to me at my early DIY days.
After drying, but before the oven:
- looks like the decal is barely sticked to the panel, it is already rolled up in some places and if you blow at it, just raises up – there was most likely a problem with cleaning agent, wetting the decal will not help, it is better to start again (2%),
- some stains and imperfections under the decal – foil didn’t sticked to aluminum perfectly, it should be ok after melting in the oven (40%).
While still in the oven:
- the decal has rolled up in the corner – it will melt soon; take the plate out immediately, get the toothpick, unroll it and try to push it back to the aluminum (if it is hot enough, it will stick), put into the oven again and continue – hard, but possible (5%),
- the decal flew away – happened to me once while I used some “hand friendly” soap with oil for aluminum cleaning; as you may guess, start again (2%),
- the decal is burned, bubbled and looks very nasty – get it out, tear it off and start again (2%),
After the cooling:
- the decal looks like it melted at the edges of the panel and looks uneven and rugged – probably it was just too big and didn’t sticked on the edges; take the very sharp scalpel and try to trim it – also hard, but possible (5%),
- looks very good, but I can do better (95%) – perfectionist hell, do as you wish.
Finishing touches
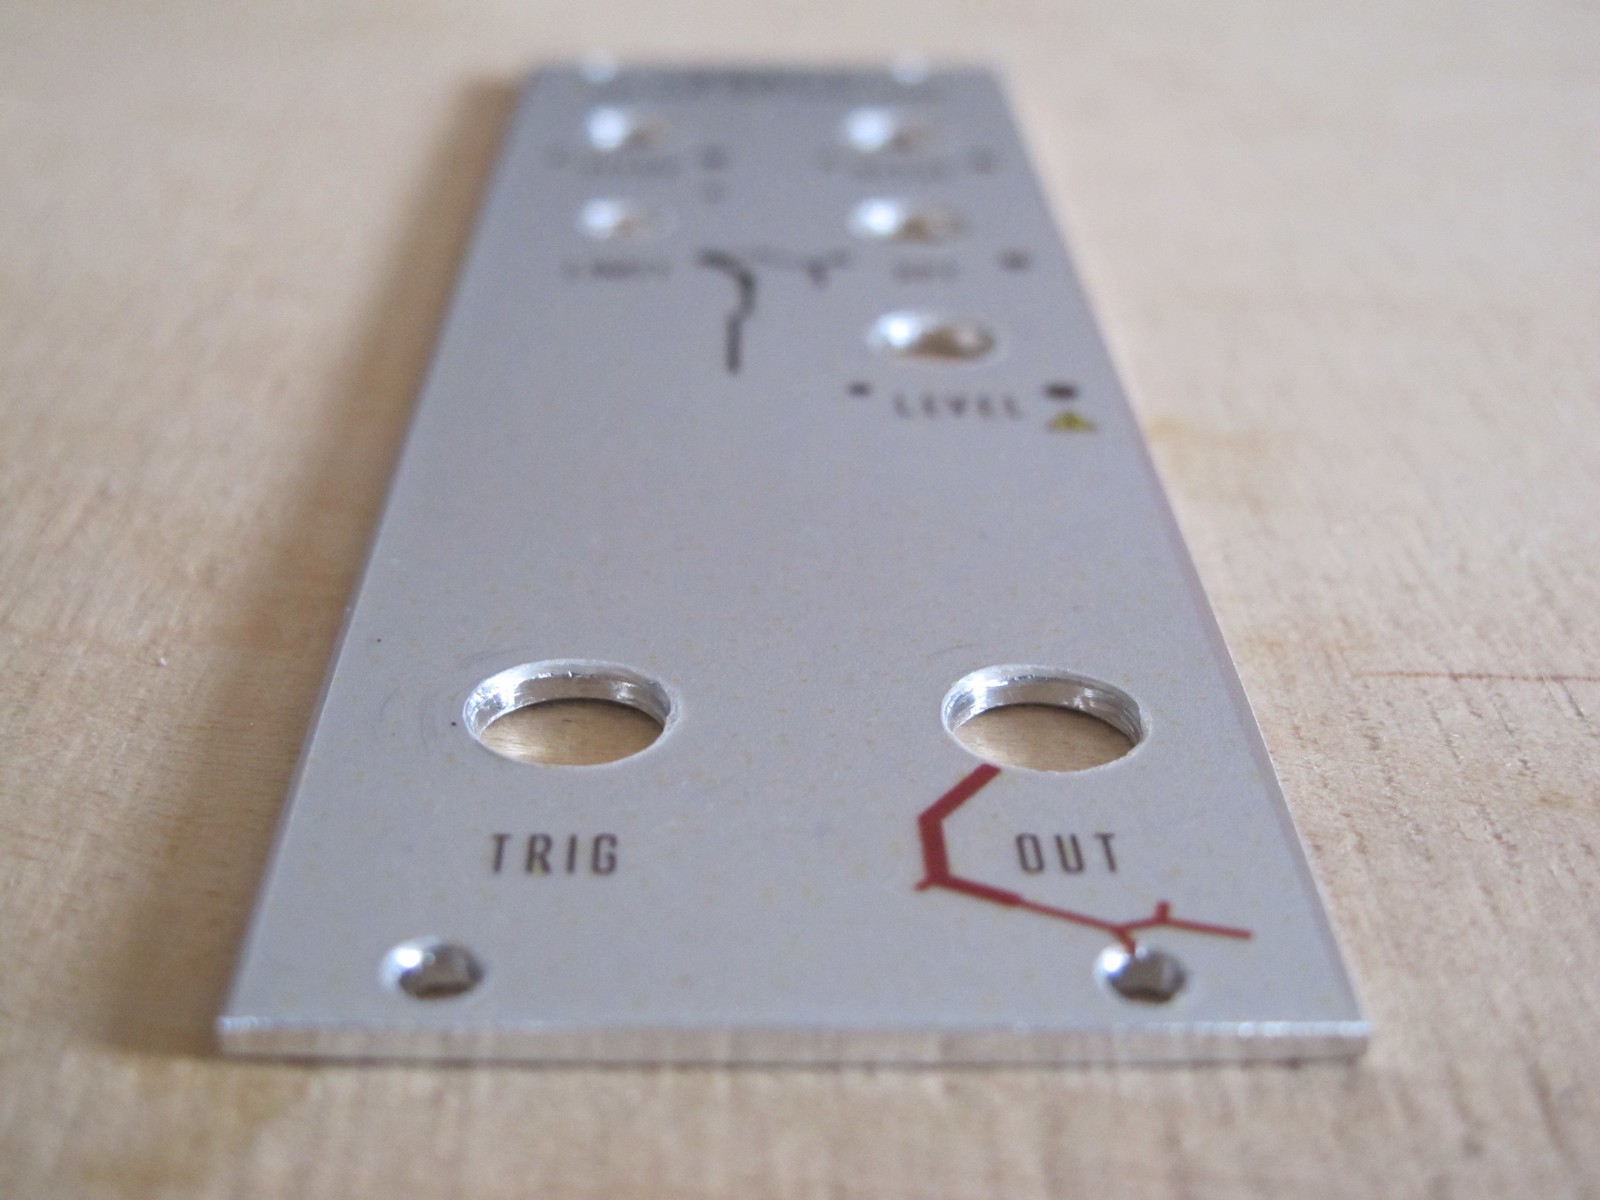
Take the knife and cut the holes. It doesn’t need to be perfect, washers and nuts will mask the edges. Think, if there is a need to cut the LED holes. I often let LEDs to be covered with decal, it is transparent anyway.
And that’s the end. All steps will take a whole day, but most of it is drying. Usually I make cutting, transferring and painting in the morning (the paint stinks), then open the windows and go to work. After I came back, the panel is already dry, so I can bake it. Then the best part, the PCB holder design 🙂
Hope it helped. A way to your eurorack DIY module is quite long, especially if you care about aesthetics. I tried to make this watersliding tutorial as detailed as possible, so maybe you will avoid mistakes I’ve done in my early Synth DIY stages.
Cheers
Jack
Thanks! Great read!
Hi,
Very good! Your posts are very inspiring. I’m curious about the font you use to draw your pannel. What soft do you use, Illustrator?
Regards
Hello, the font is called “Alien League”, and 90% of the time I use Inkscape. Only the panel for “Prodiż” was made in Illustrator. Cheers!
Hi,
Very great and useful tutorial.
Many thanks for this, i will test your method soon
Thank you very much for posting this. I’d tried other methods of getting artwork onto eurorack panels (toner transfer, etc.) but your technique has produced easily the best results. With your instructions, it worked first time too which was nice 🙂
This is great! I spend a lot of time on it and I’m really happy it was helpful 🙂
Very nice technique ! I never tried this one.
I don’t understand something about the varnish. If it is on the paper that goes away afterwards with the water soaking, it means that the varnish is gone with the paper ? (sorry I never used foil decal)
Or it ‘s the other way , meaning that the foil is melting with the varnish in the oven?
I would love to have some beers with you talking of all that 🙂