
- GF: What does this module do?
- Me: It shows a LEGO figure.
- GF: And?
- Me: Thats all.
- GF: … (gives me that you-have-wasted-a-week-of-your-life look and walks away).
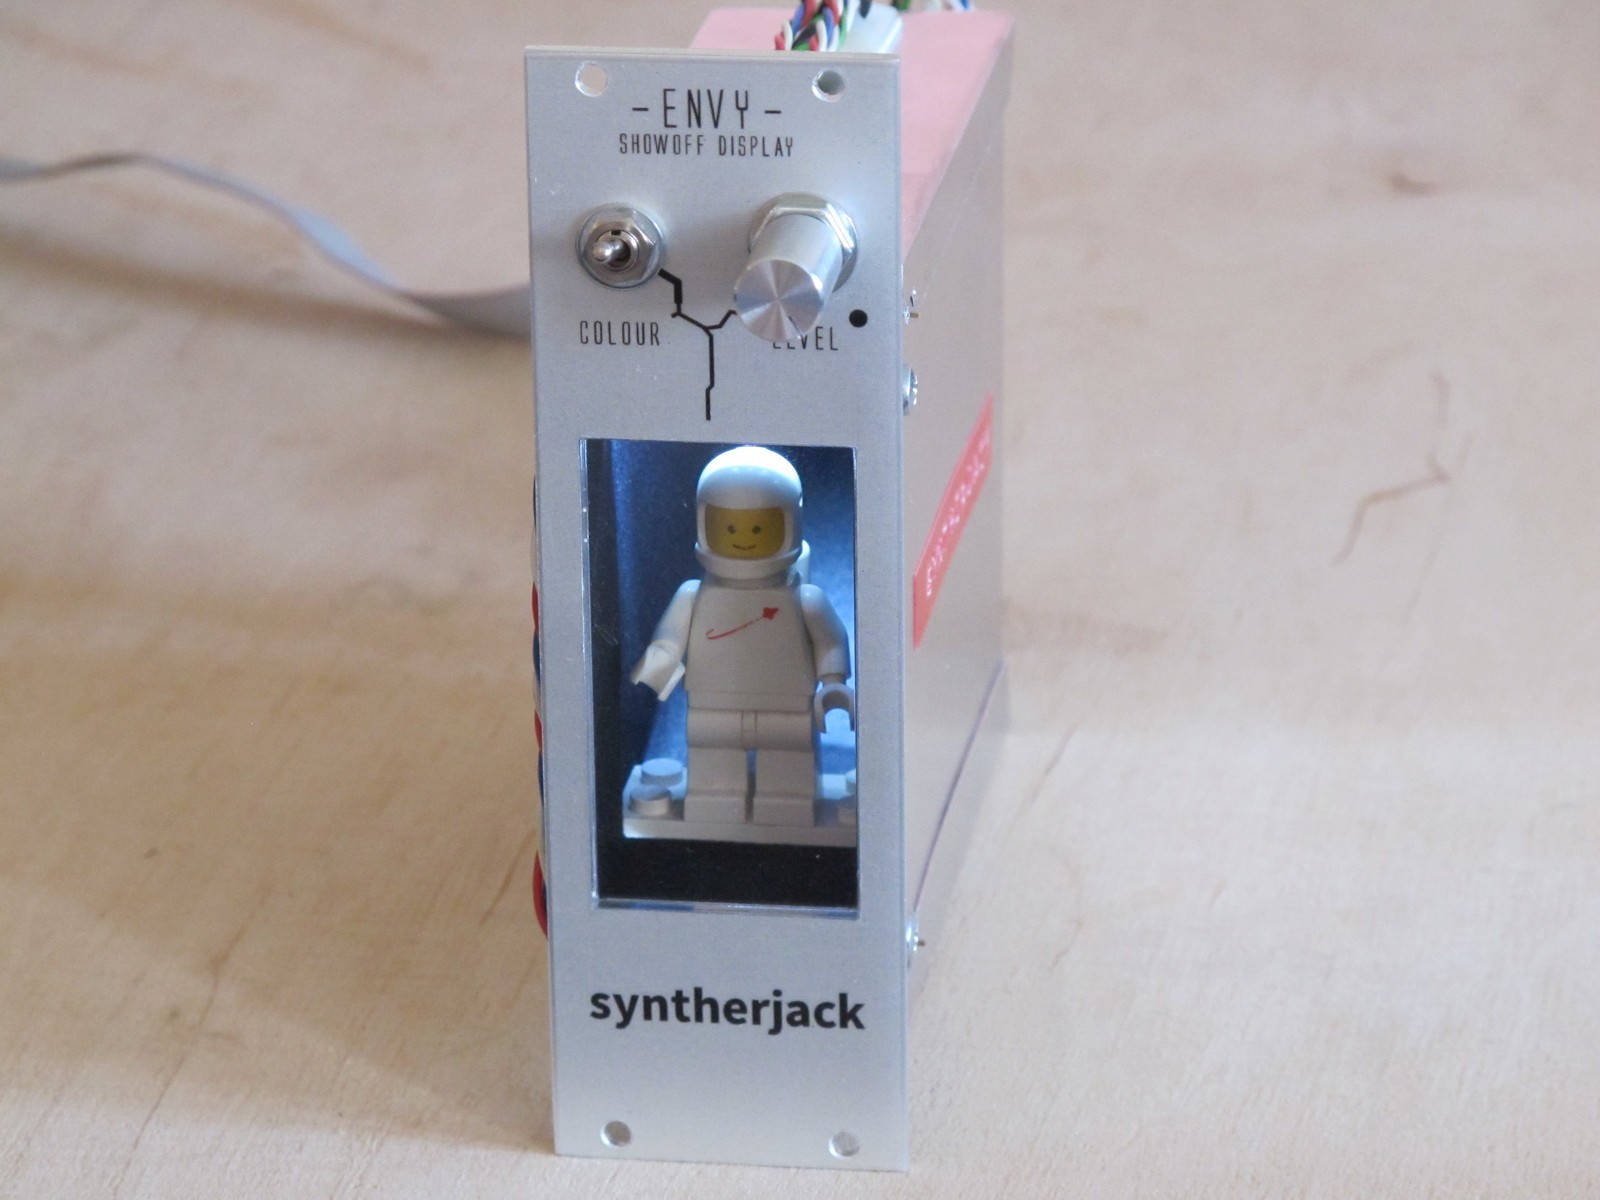
I was inspired by Gieskes “non-musical” modules, like “bottle opener” and “do-not-touch”. My module is a small display window with a iluminated LEGO figure. But not the ordinary one. It comes from 6844 set called “Seismologic Vehicle”, year 1983. It was one of my first advanced toys (except hammers, drills and stuff). I though my eurorack is boring and needs something special. So there it is, LEGO Eurorack ENVY module.
Forgive me, because I don’t have a great documentation for this project, I show you just few milestones.
The idea…
… is to display a LEGO minifig and iluminate it. I’m not a hardcore LEGO fan, but this particular figure reminds me of my happy and carefree childhood in communist Poland (yes, we had LEGO back then). The light color will be red/white with brightness control (some simple 555 PWM LED controler will do the job). The ilumination LEDs should not be visible (hidden somehow). Just simple build in less then 3 days (yeah, shure).
Front panel
I decided to make some kind of box behind the panel, to prevent light leaks into my eurorack case – I didn’t want to have all jacks to be backlit. I decided to use 0,5 mm aluminum sheet – easy to bend, yet stiff enough.
As always, I made the front panel with a 2 mm thick oxidized aluminum sheet with water decal graphic. The “window” in panel was made with file and is covered with laser cut 30 x 55 x 3 mm acrylic glass (PMMA) rectangle. There is no need for glue, both parts fit perfectly. The thin boarder on the sides of the square window (5 mm only) was a bad idea – even with 2 mm aluminum bends too easily.
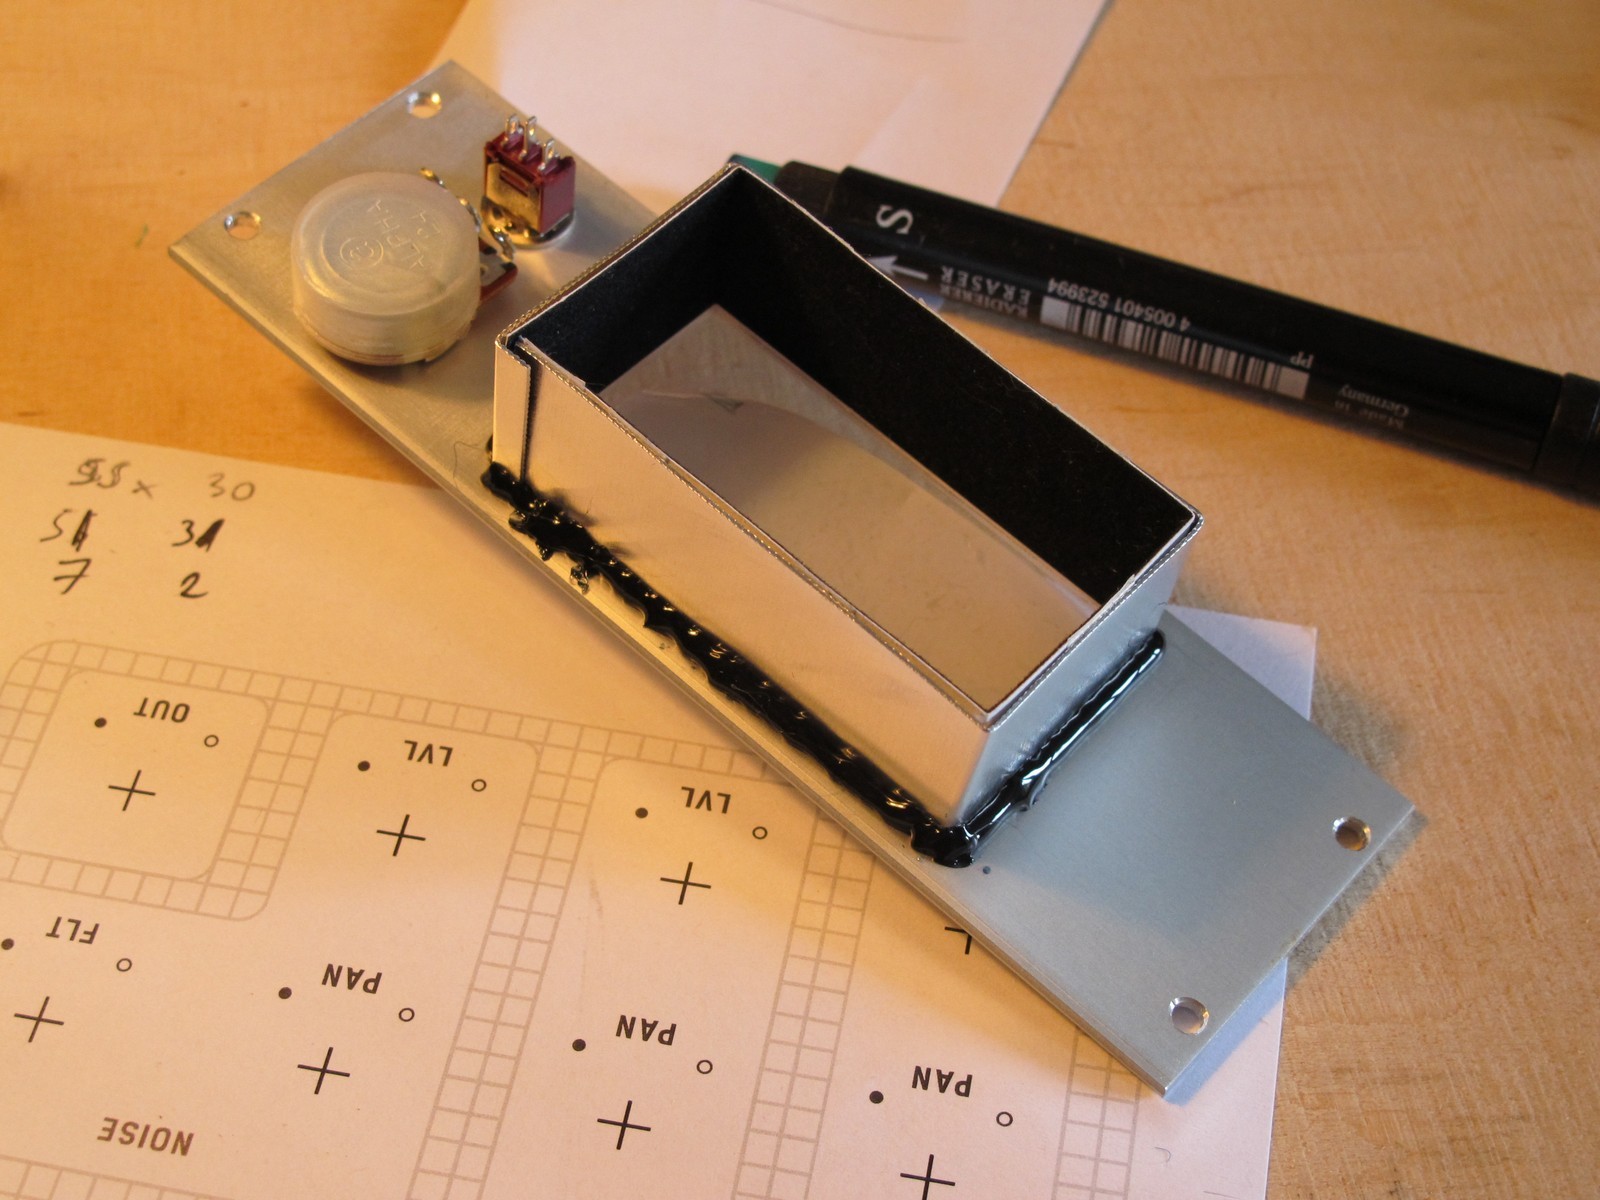
The first big step was to make a kind of frame behind the PMMA covered window – it serves as a holder for another parts and as a cover for LEDs. As you see, I used the thermal glue. Not because I love it and use everywhere, but because it sticks well to the plain metal and is easy to remove – I didn’t had a precise plan for this module and build it somehow chaotic. Inside of a “holder” (or “frame”) is covered with black velour-like paper. I though the white figure with black background will look splendidly.
I’ve glued two 35 mm spacers over and under the “holder” to act as a mounting for the rest of construction. They didn’t had to be sturdy – they just had to hold a piece of aluminum and paper.
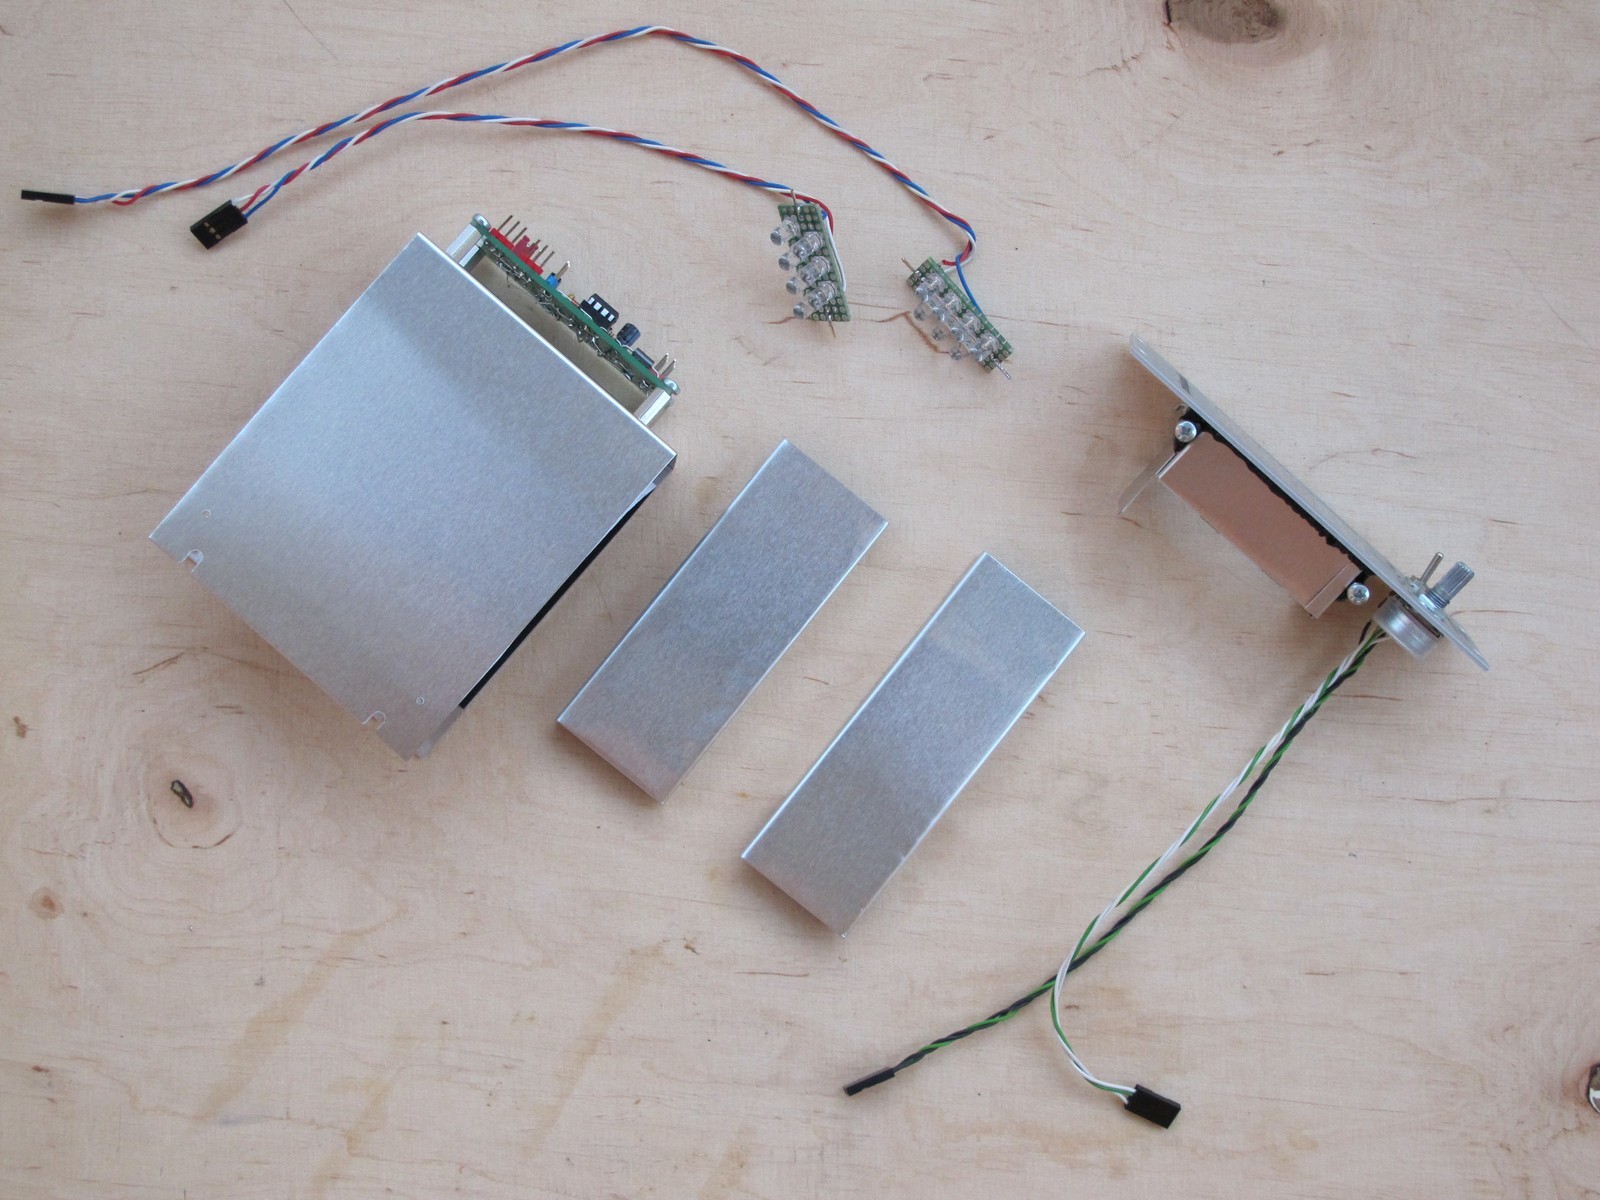
The “light box”
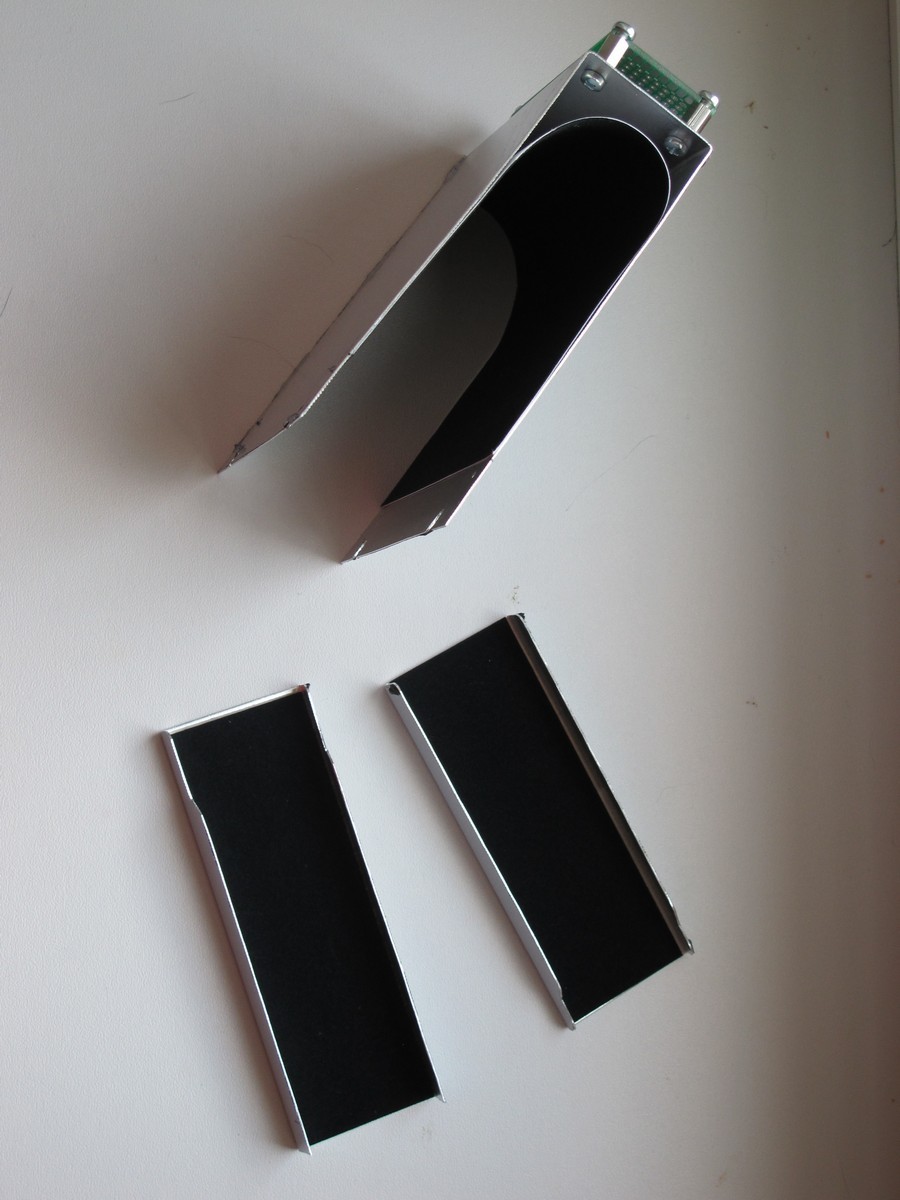
The “light box” consists of three parts:
- “U-frame” (on photo below fixed to front panel with four screws) – 90 mm (H) x 100 mm (D) x 35 mm (W),
- top box cover – 10 mm (H) x 90 mm (D) x 35 mm (W) – it is slightly shorter then the box, because of protruding potentiometer and switch,
- bottom box cover – 10 mm (H) x 100 mm (D) x 35 mm (W).
All parts just need to be pushed together, they hold without any glue.

All box componets were covered with black velour paper, attached with double-side adhesive tape. Inside the “U-frame” (like in real light box) it is shaped to avoid any sharp corners, while the back of the box serves as a holder for PCB with PWM LED controller (not soldered yet).
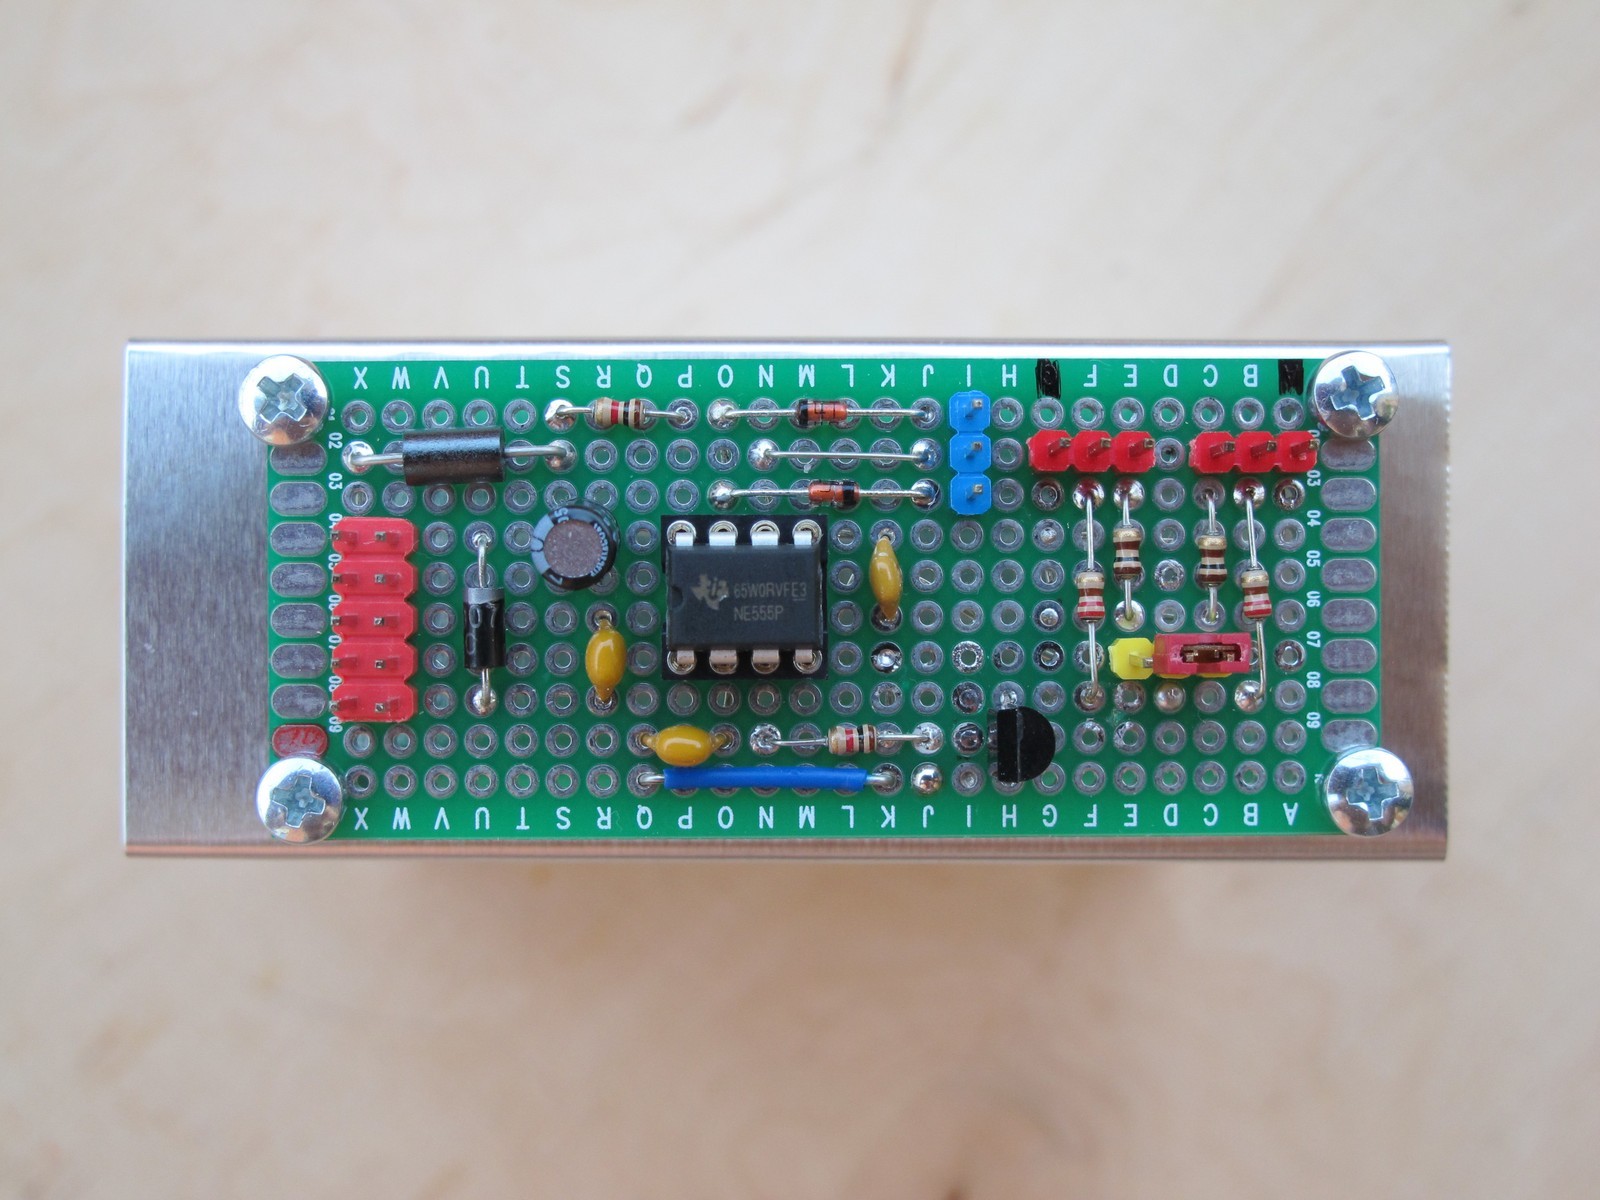
LEDs & contoller
The LED controller meets eurorack standards – is powered from +12 V (with max. current draw around 50 mA), has input protection, caps etc. Each LED reflector use 4 red and 3 white LEDs (I should have used RGB to save space, but as I mentioned, build was chaotic).
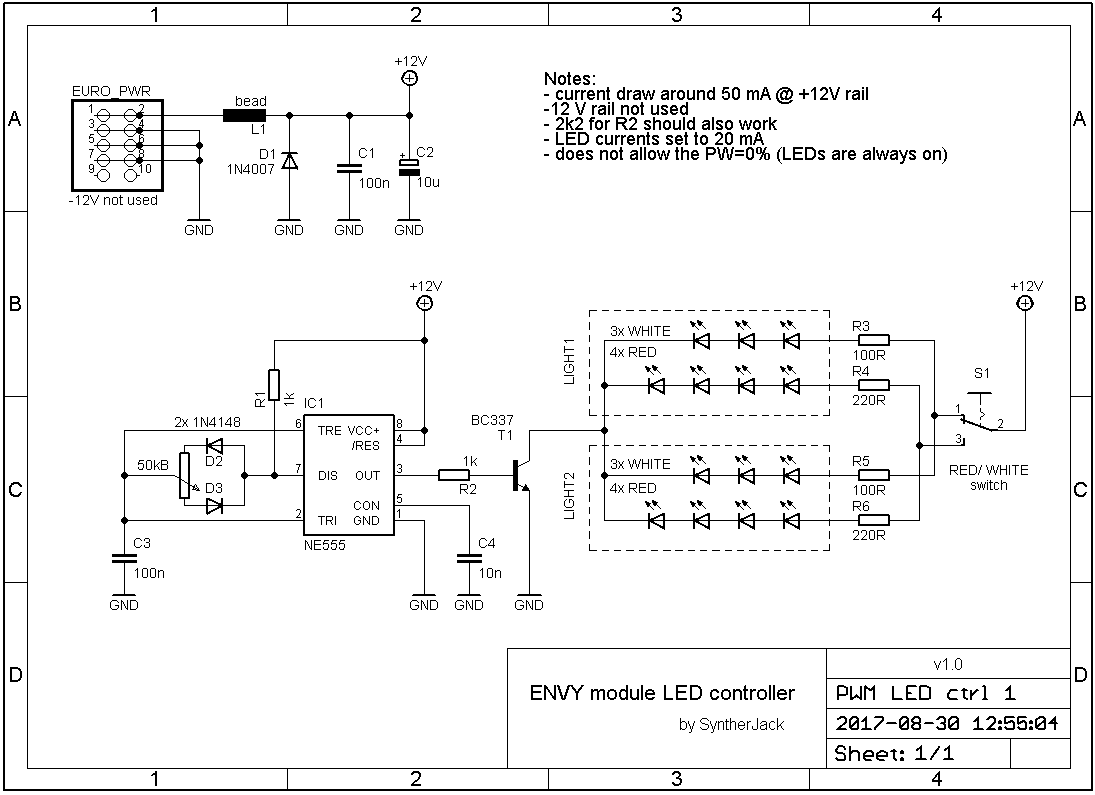
The circuit diagram is very simple – thats why I went for universal board. I used connectors for potentiometer, switch and both lights, as I wanted the black box to be disassembled without any additional desoldering.
Final assembly
The two lights come between U-shaped sheet – there are small holes in sheet and pins soldered to lamp PCB (it is hard to see on photos) – this way lamp mounting angle can be slightly changed. When the desired position is obtained, the last thing is to tighten four screws that hold the whole box in place.
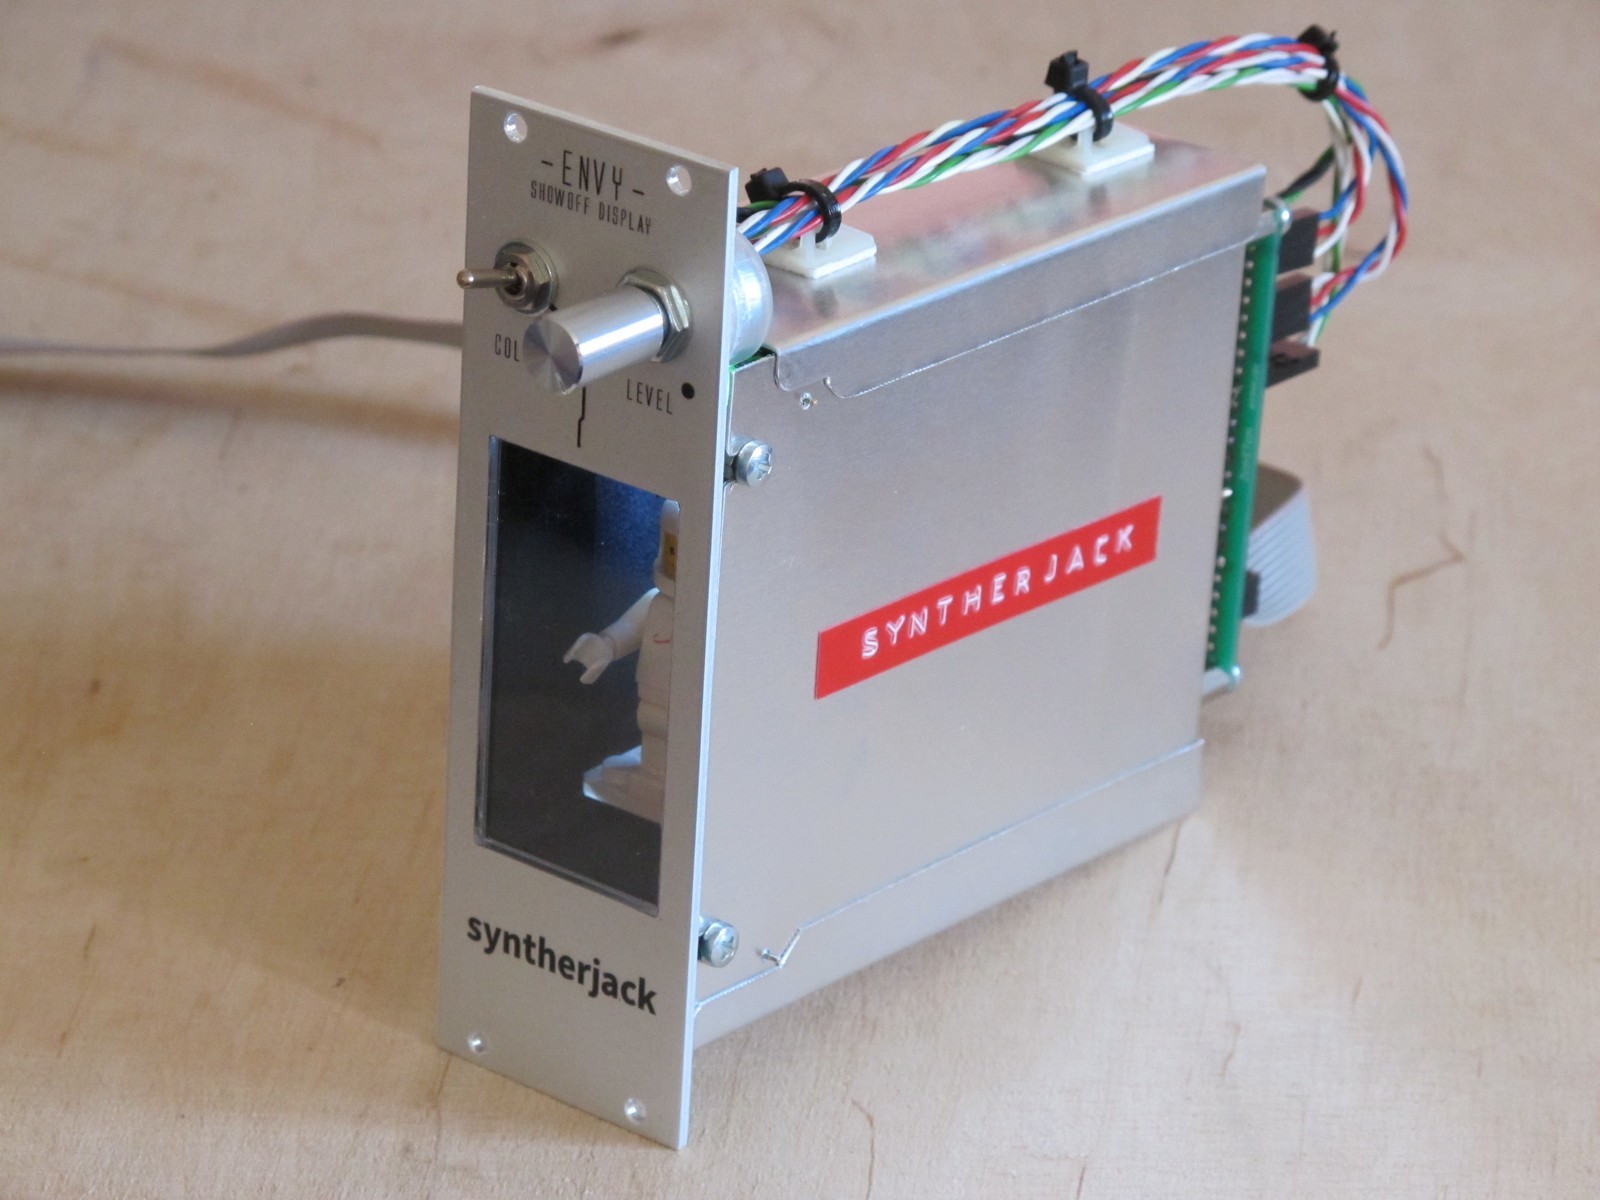
Finally, I fixed the wires to the top of the box with white self-adhesive cable tie holders (and cable ties). They are manufatured by f.e. Fix&Fasten, KSS Wiring, HellermannTyton and keep you design tidy. In case you want to remove the cables, just cut the tie.
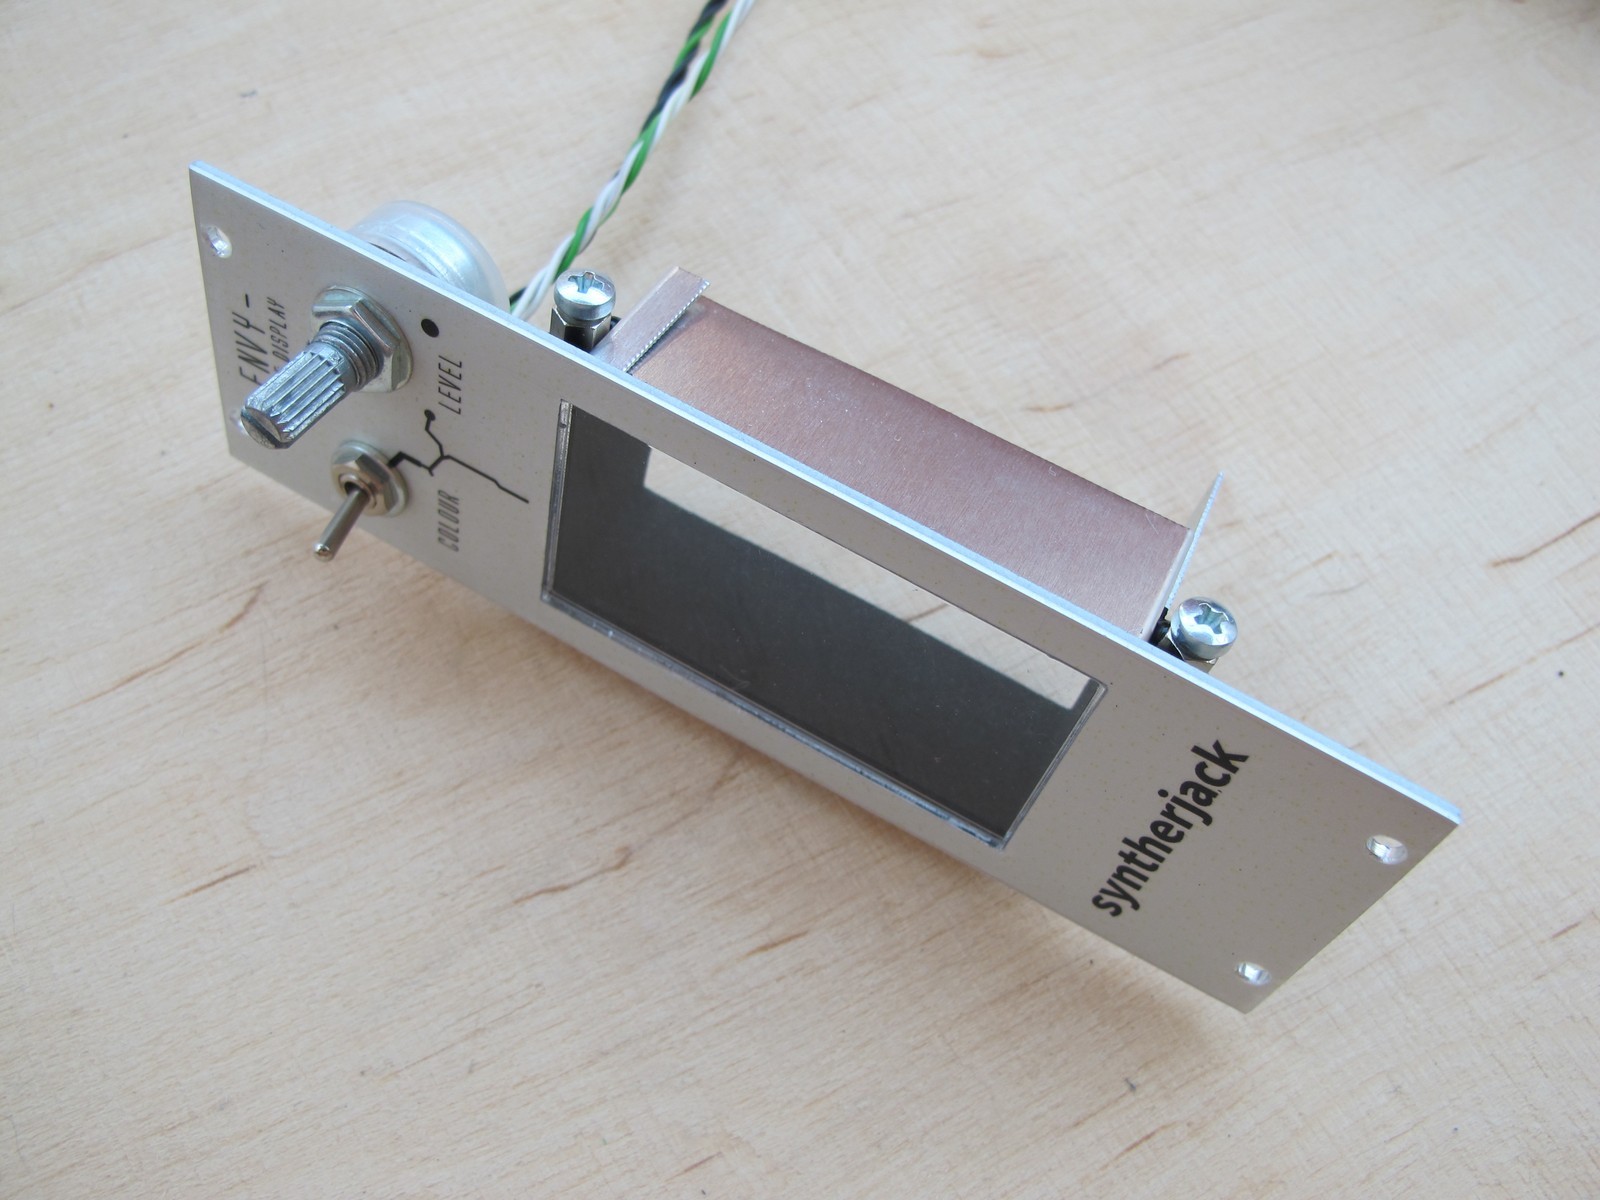
You may ask, why the figure is so close to the panels front. The first idea was to have it around 5 cm behind and had it iluminated directly – but then viewing angles were so narrow, you had to look exactly from the front to see the figure. So I move it to forth to about 2 cm and iluminated the backgroud – the final result is much more sophisticated, as the light is more scattered.
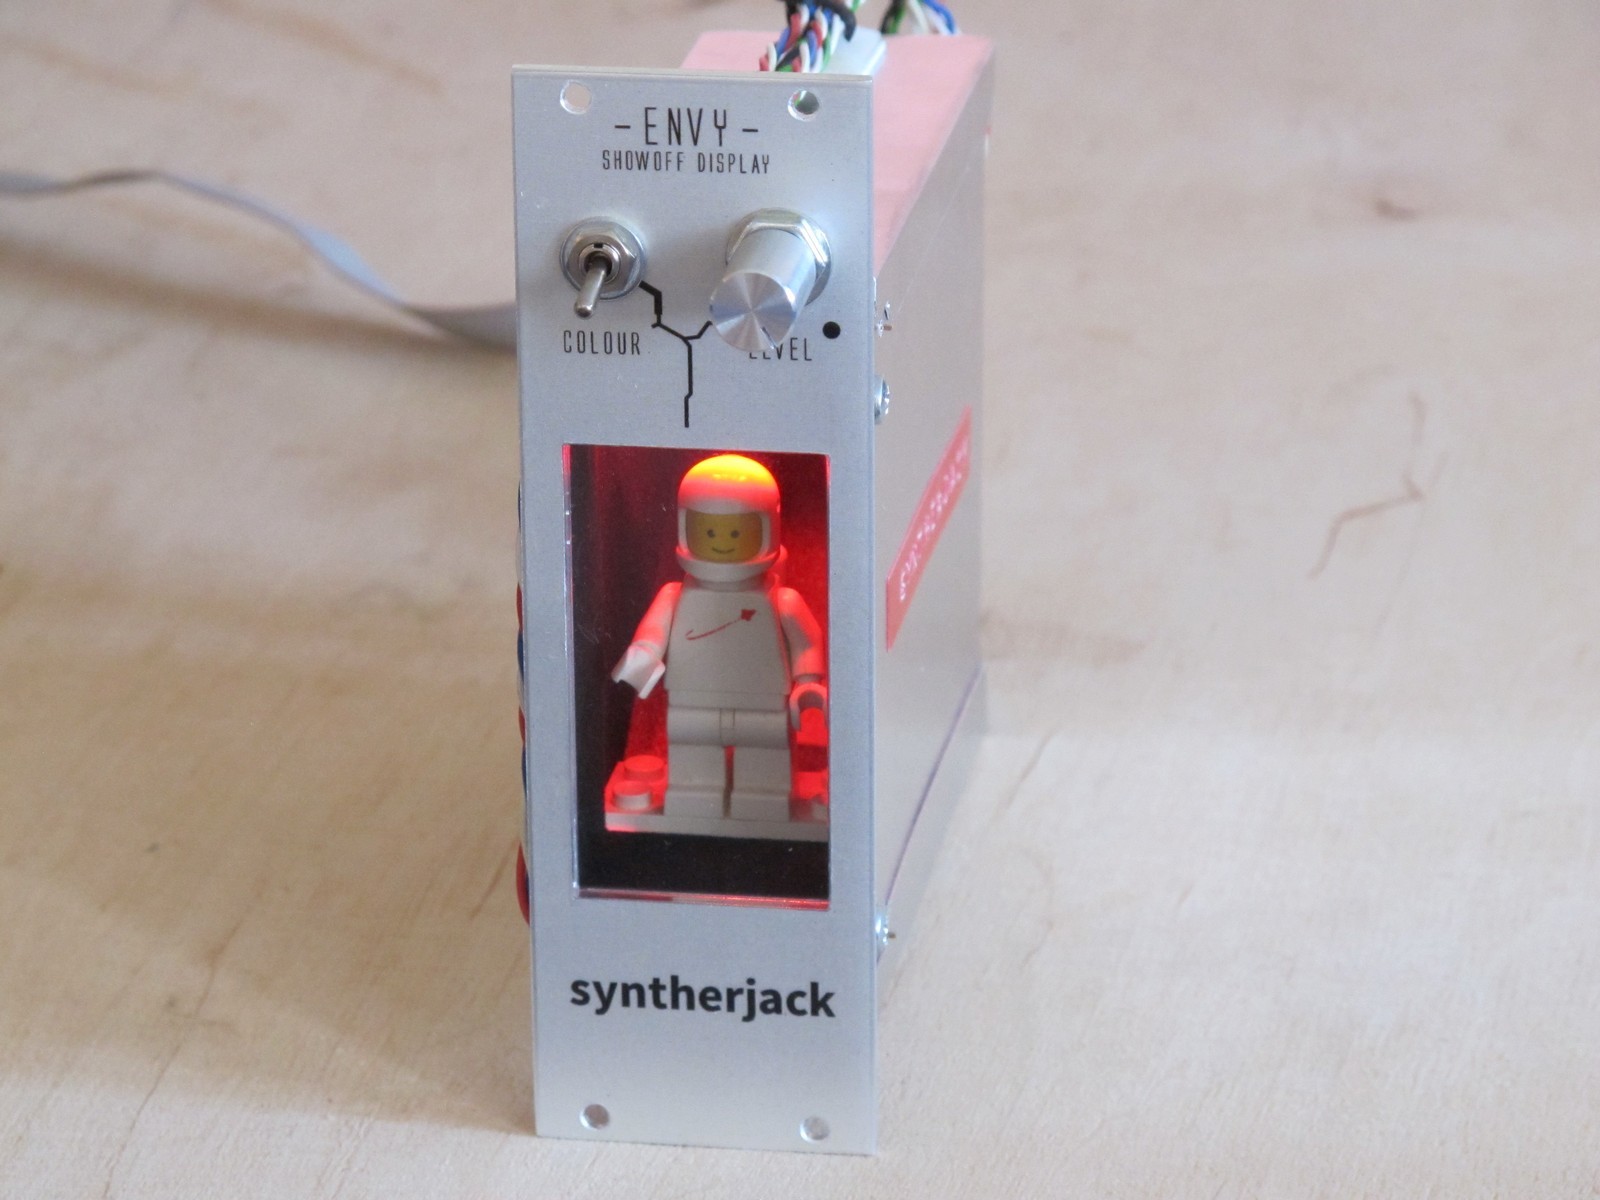
Figure illumination is clearly visible even in strong, direct light. The brightness control was a right concept – in the darkness to much backlight would be annoying. The module will be placed in the center of my system therefore the big SyntherJack inscription on the front.
Fazit
Module does what it does – almost nothing. I though to add a noise source, but decided to leave it just unuseful. Not all modules have to have sense. Desigining and building this one gave me a lot of fun (exactly 7 days full of happiness and unicorns), I also gain some new skills in metal sheet bending. And looks great, I’m quite proud of myself 🙂
Cheers
Jack
Amazing featured photo/gif was made by dies
How much to build me one of these? Soooo want this!
Needs rgb CVs
Me too man, do a small run.
Hi Jack,
pleeeease add CV-control over color and brightness! That way the illimuniation could easily be integrated and e.g. pulsate with the
beat! And that *would* be useful indeed 🙂
I though about CV in, but there was no place on front panel fo additional jack :/ And it was a fast “fun project”, a didn’t want to spend a lot of time on more advanced LED controlled. But the idea is good, maybe I will make V2 in the future 🙂
Very cool module!
I’d like to buy one please. Preferably with a clk input (simplar than cv)
and a minifigure of a Lego stormtrooper.
What would you charge for that?
Many thanks
Sefi Carmel
You could have made this powered from the -12V rail easily, since there are no connections to other modules. Saves a little drain on the most-used power rail.
All original connections to +12V are now connected to ground.
All original connections to ground are now connected to -12V.
Try it on a breadboard, you will see that it works fine!
Great tip! You’re right, it would be better solution then mine, and more PSU friendly. Cheers, Jack
I would really love to have on built in black for me!! If you ever think doing it, please notice me. I will find my own lego figure when you do! Willing to pay pretty much anything at leaste a little reasonable for it if you’re interested!